
How to use CloneZilla to encapsulate the system and restore?
Overview:
CloneZilla can fully transplant systems like Windows and Linux to another machine while preserving data, partitioning, mounting, startup items, and everything else.
Note that the machine used for restoration needs to have compatible hardware configuration with the one that was used for imaging, otherwise issues such as the inability to use graphics card drivers may arise.
1. Download CloneZilla
Download link: //clonezilla.org/downloads.php
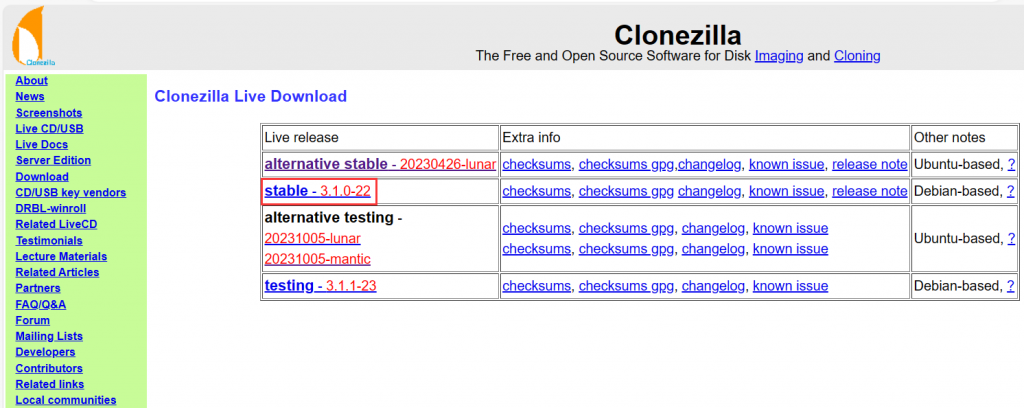
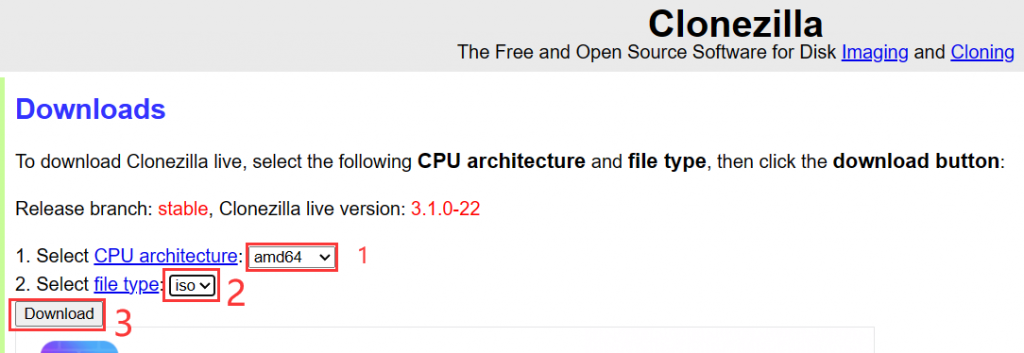
1. Select CPU architecture as amd64.
2. Select file type as iso.
Click on Download to download the image file.
2. Creating a CloneZilla bootable USB drive.
Download Rufus tool for USB creation, download link: http://rufus.ie/downloads/
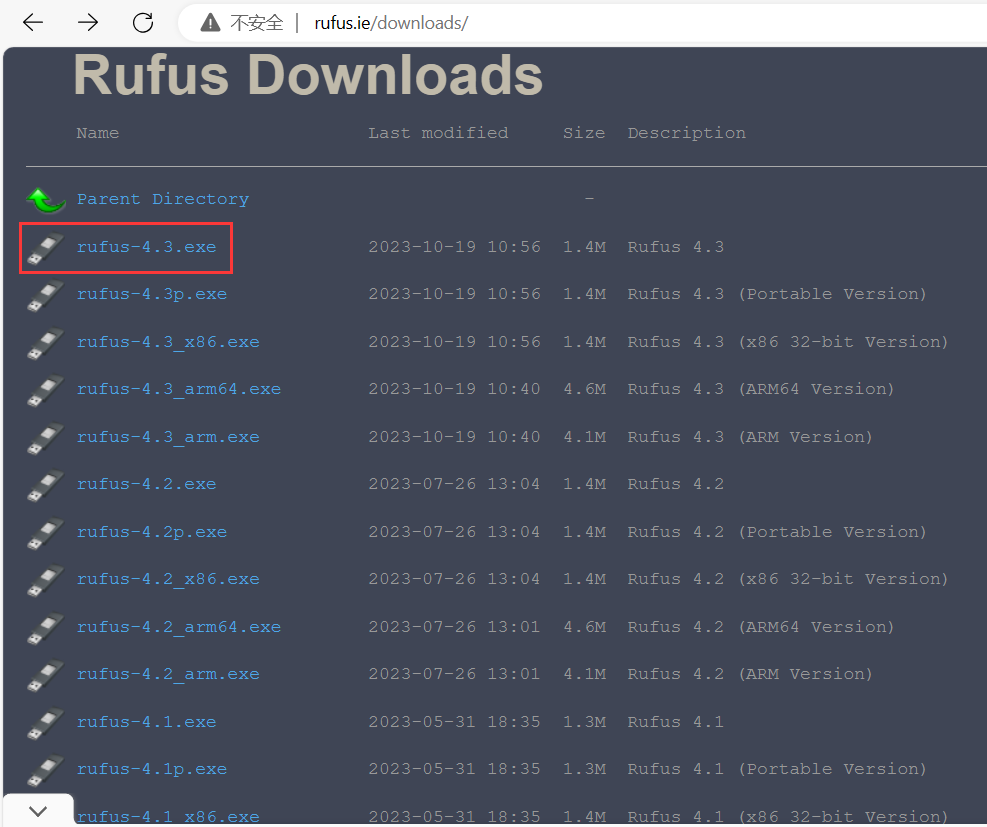
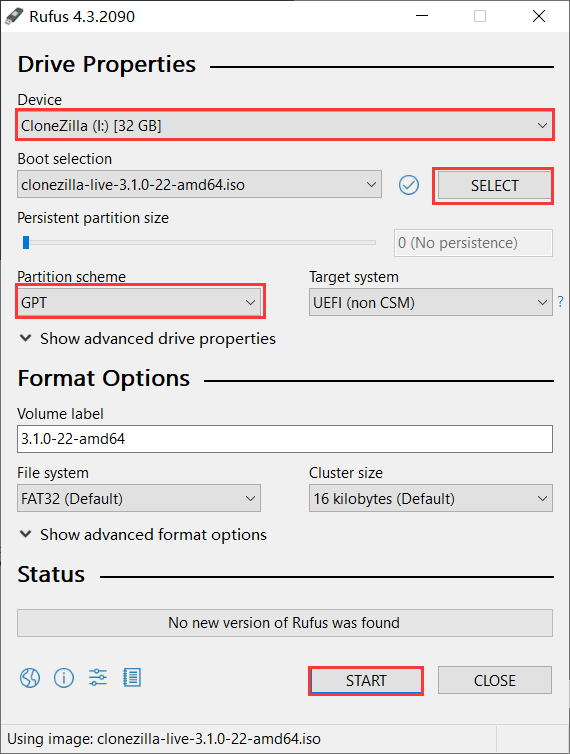
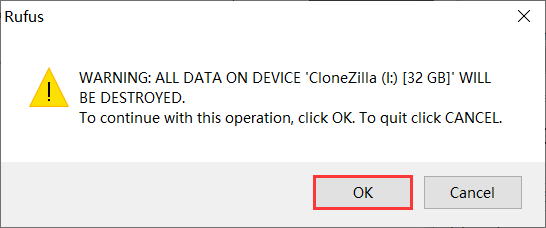
Note: This process will erase all data files in the U-disk. Please ensure that the data in the U-disk has been backed up before making it!
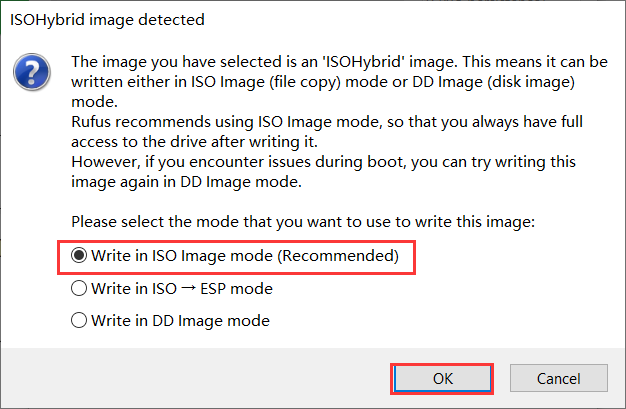
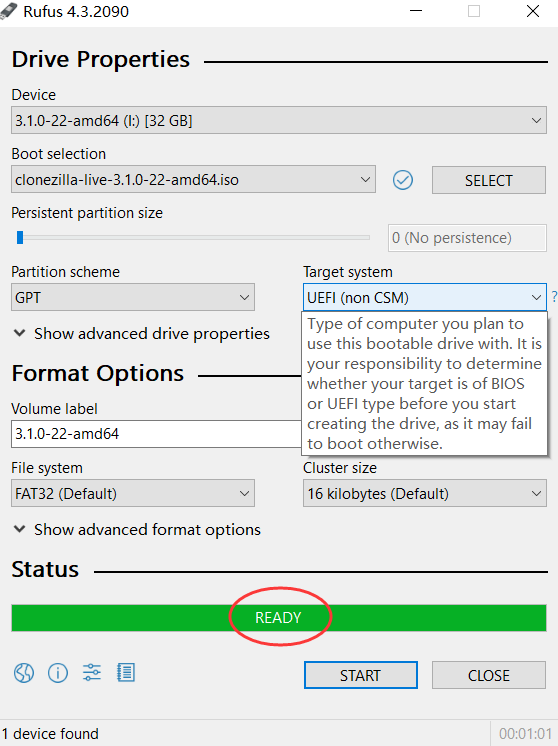
To make a CloneZilla bootable U-disk, download the Rufus production tool and follow the same process above. The download link for Rufus is: http://rufus.ie/downloads/
3. Packaging of Windows/Linux Systems
Preparation:
CloneZilla bootable USB drive
>16G USB drive (used to store packaging files, it is recommended to have a larger capacity than the CloneZilla bootable USB drive to facilitate distinguishing during the packaging process)
Ensure that the system to be packaged can start up normally and that the driver has been installed. Note: if packaging a Windows system, please ensure that the system to be packaged has not been connected to the Internet to avoid activation failure when using the key to activate the system later!
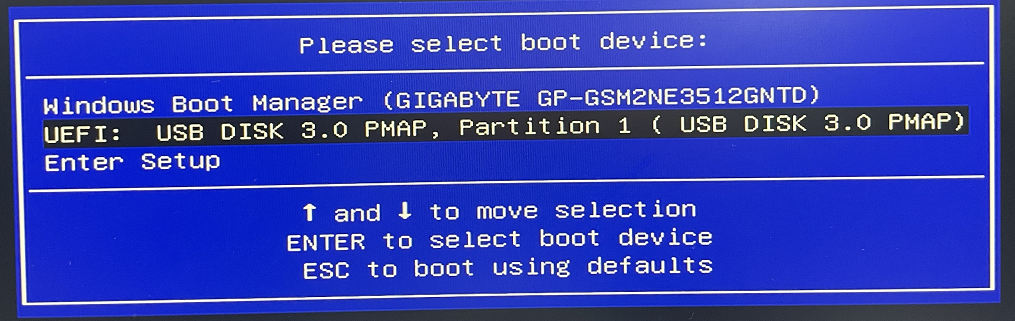
Insert the CloneZilla bootable USB drive into the USB port of the computer that needs to be packaged, press the computer power button, and quickly hit the F7/F11 key on the keyboard to enter the Boot menu. Select the USB drive with UEFI: prefix and press enter to confirm entering the ClonZilla packaging wizard.
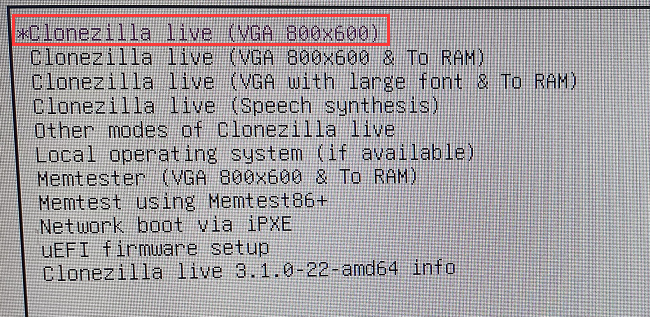
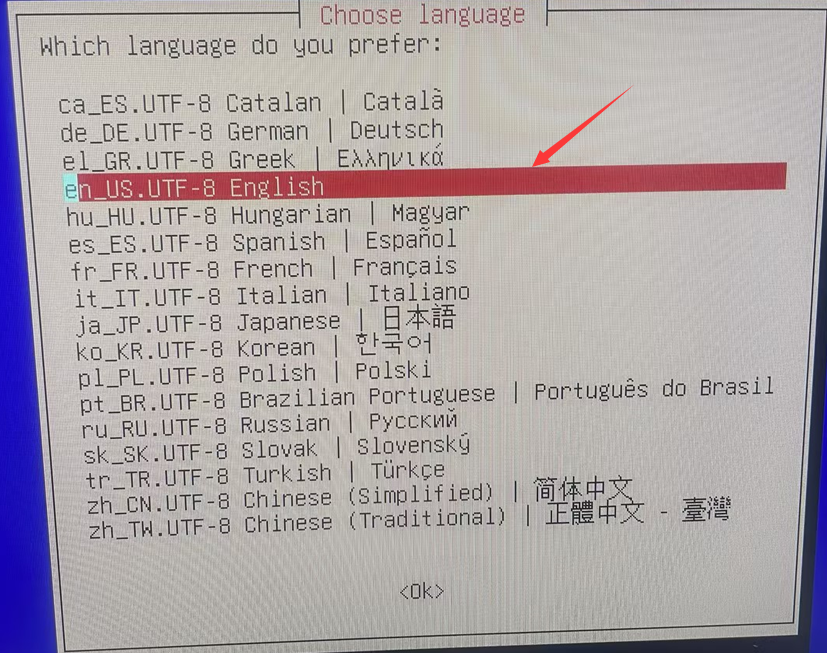
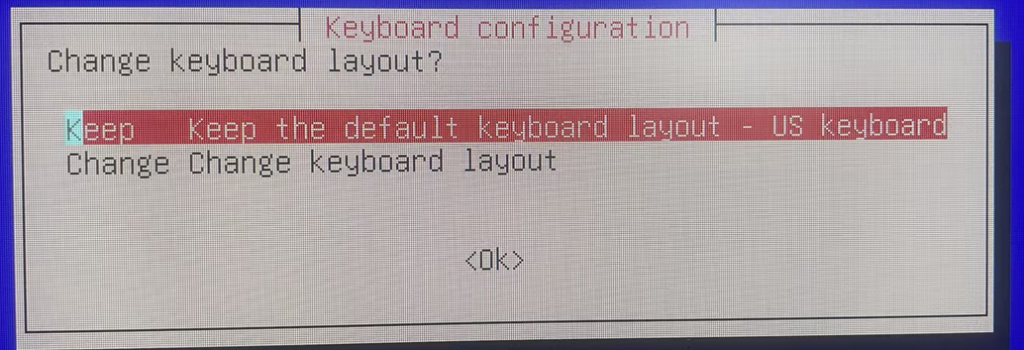
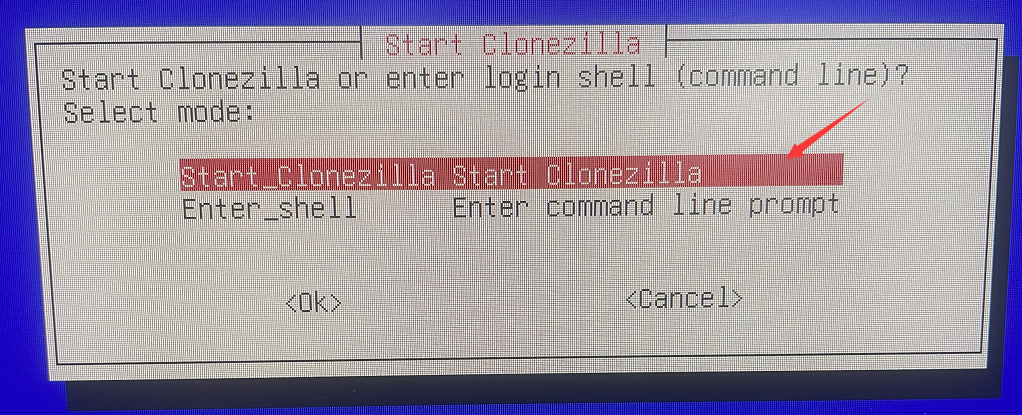
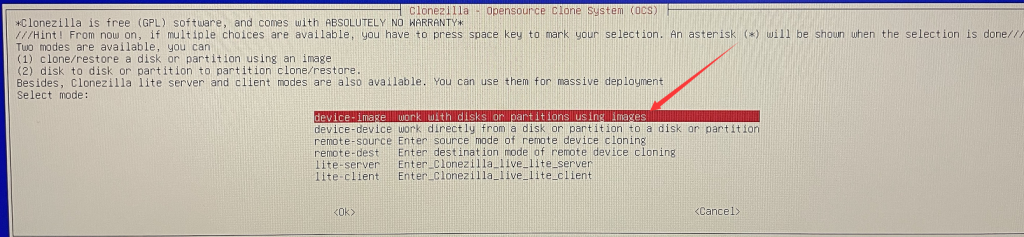


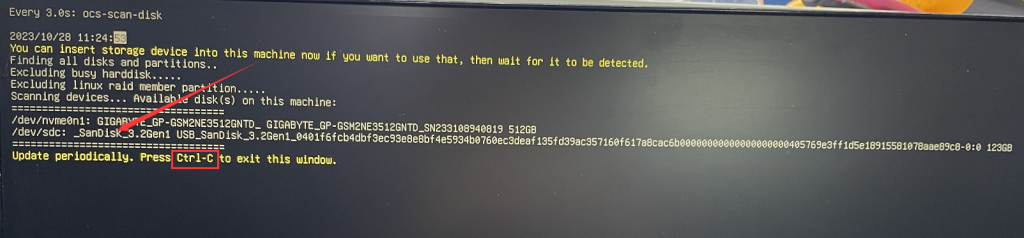


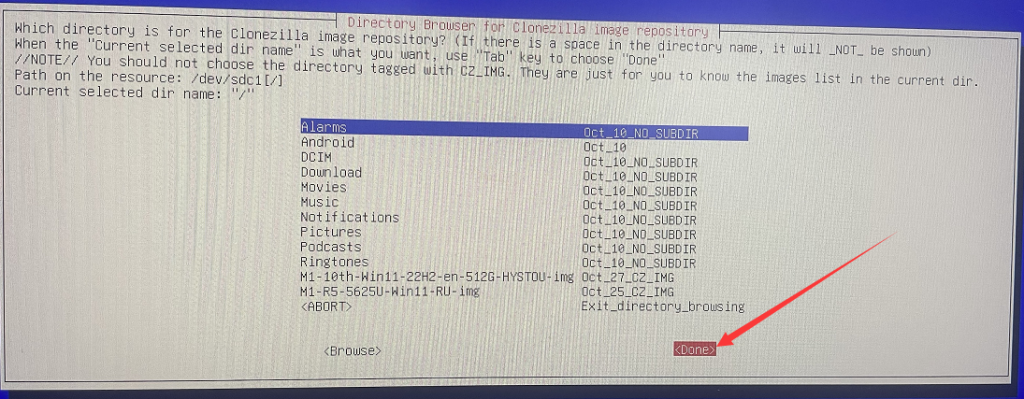
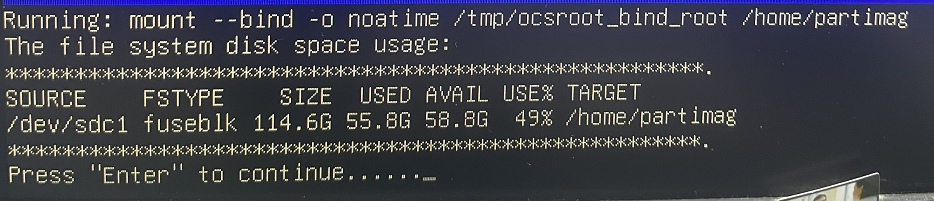
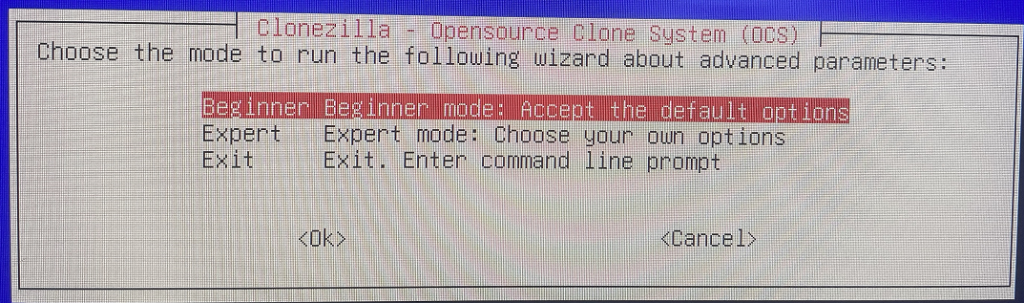
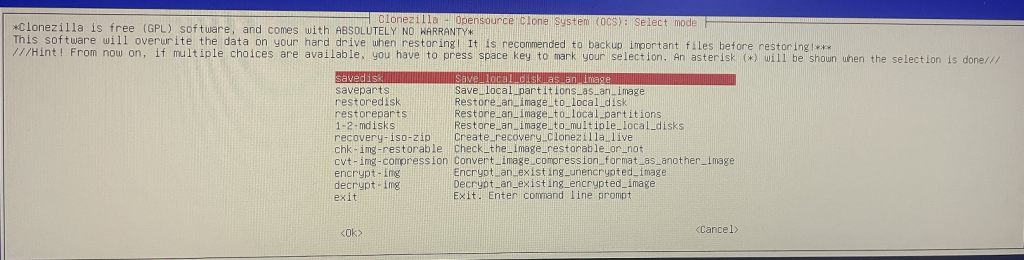






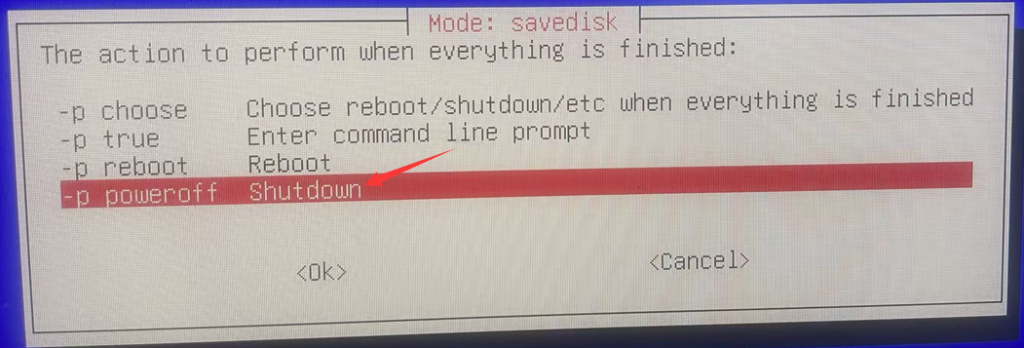
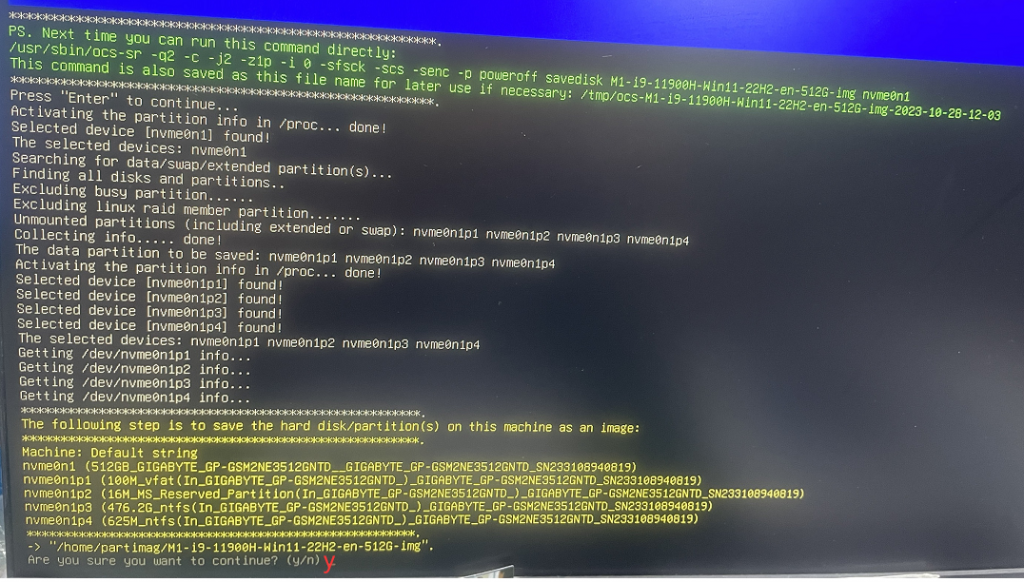
Insert the CloneZilla bootable USB drive into the USB port of the computer that needs to be restored. The steps for system restore are basically the same as step 3 and the same parts will not be explained again. This article will start directly from the different parts.
After entering the following page, select "restoredisk".
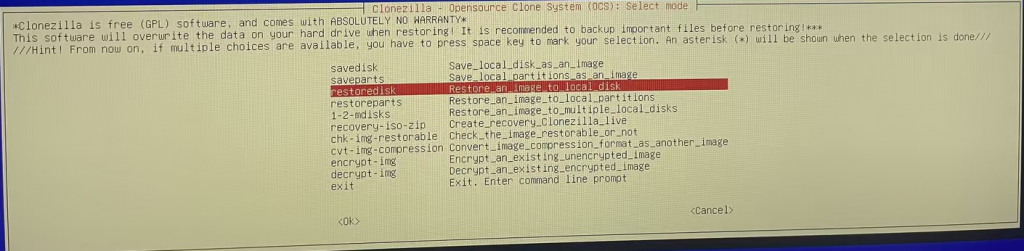
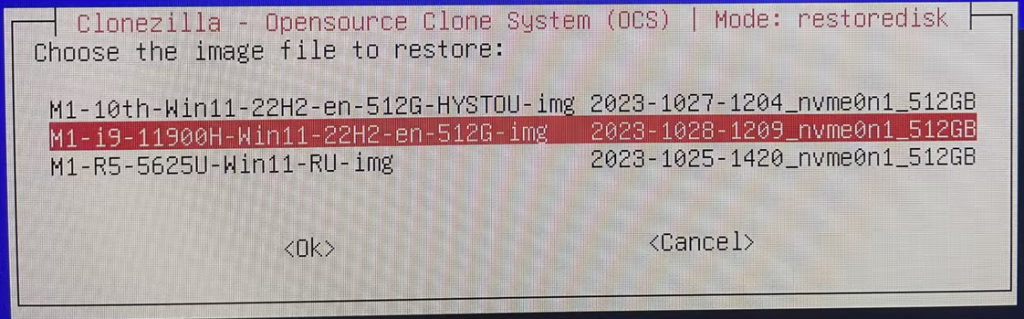
Choose hard drive.

Selection KO Use the partition table from the image;

Selection scr No,skip checking the image before restoring;

After restoration is complete, choose "-p poweroff".
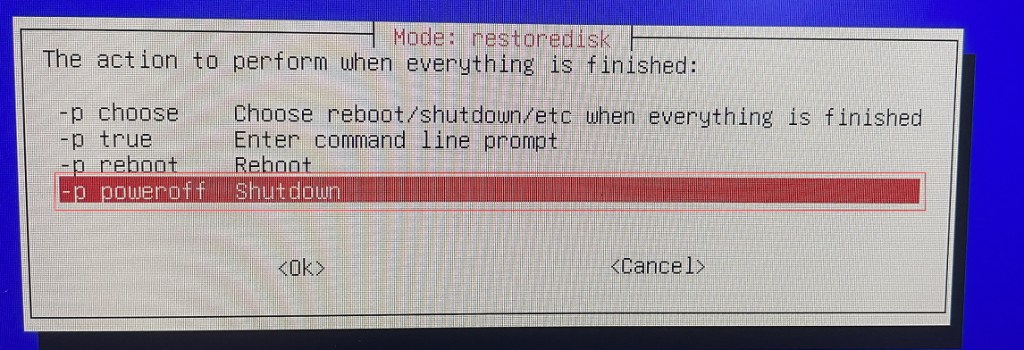
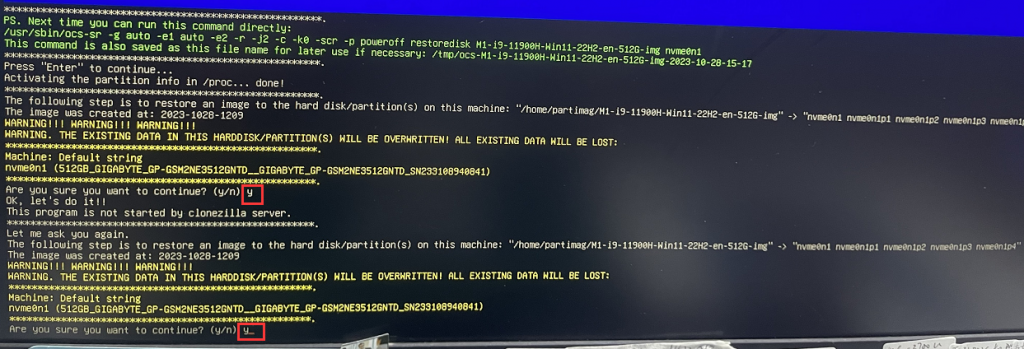
To confirm the restoration information, press Enter after confirming completion, and then confirm the relevant information twice by pressing y. The system will automatically shut down after the restoration is complete, indicating that the restoration is complete. After successful restoration, remove all external storage devices from the USB port, and press the power button to automatically enter the operating system desktop. At this point, the packaging and restoration introduction using CloneZilla is complete.

Solution to Frequent Reset of Motherboard BIOS
Pre-install Windows 11 22H2 and skip the network setup steps on the OOBE page.
