
Steps to enable Secure Boot in BIOS
author: VENOEN
2025-07-29
Enable the Secure Boot step in BIOS
Secure Boot Overview:
Secure Boot, or Secure Boot, is a security standard defined by UEFI (Unified Extensible Firmware Interface) firmware to prevent malware from loading and executing during system boot.
Main role
Prevent malware attacks: It can effectively prevent the injection of malicious software such as rootkits into the system during the system startup phase, because these unauthorized software usually does not have a valid digital signature and cannot pass the verification of safe startup.
Ensure system integrity: Verify the signatures of startup components to ensure that original and untampered components are loaded during system startup, preventing attackers from planting malicious code or performing other malicious acts by modifying startup files.
Support for legitimate software: The ability to restrict the installation and operation of unauthorized operating systems or drivers helps protect the intellectual property rights of software developers and ensures that users are using legitimate software.
shortcoming
Ensure system integrity: Verify the signatures of startup components to ensure that original and untampered components are loaded during system startup, preventing attackers from planting malicious code or performing other malicious acts by modifying startup files.
Support for legitimate software: The ability to restrict the installation and operation of unauthorized operating systems or drivers helps protect the intellectual property rights of software developers and ensures that users are using legitimate software.
shortcoming
Compatibility issues: Some older hardware devices, operating systems, or certain software may not support Secure Boot. For example, the BIOS version of some older computer motherboards is too early to enable Secure Boot. After this function is enabled, certain special drivers cannot be loaded and the device cannot work properly.
Complex key management: involves a series of complex operations such as key generation, storage, distribution, and management. For common users and system administrators, if the key is lost, damaged, or improperly managed, the system may fail to start normally, requiring professional knowledge and tools to recover, increasing the management cost and difficulty.
Restricted user freedom: To a certain extent, users can restrict the free configuration of system Boot items. Users may not be able to easily install some custom operating systems, booters, or drivers that are not digitally signed. Even if these software are Secure and reliable, they may be prevented from loading because they are not verified by Secure Boot.
Potential performance impact: Verifying the digital signature of each startup component takes time and system resources at system startup and may cause the system to boot slightly slower, although this performance impact is usually not noticeable for most modern hardware devices.
Complex key management: involves a series of complex operations such as key generation, storage, distribution, and management. For common users and system administrators, if the key is lost, damaged, or improperly managed, the system may fail to start normally, requiring professional knowledge and tools to recover, increasing the management cost and difficulty.
Restricted user freedom: To a certain extent, users can restrict the free configuration of system Boot items. Users may not be able to easily install some custom operating systems, booters, or drivers that are not digitally signed. Even if these software are Secure and reliable, they may be prevented from loading because they are not verified by Secure Boot.
Potential performance impact: Verifying the digital signature of each startup component takes time and system resources at system startup and may cause the system to boot slightly slower, although this performance impact is usually not noticeable for most modern hardware devices.
Opening Procedure: (Use H3-J4125-6U as an example)
1. Press the SW button and quickly press the Del key on the keyboard to enter the Bios Setup;
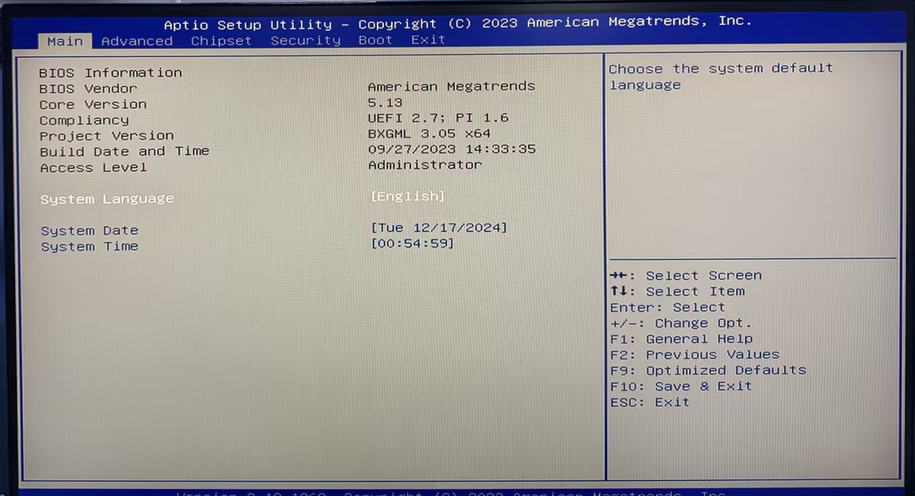
2. After entering the BIOS, choose Advanced>CSM Configuration> Set Video to [UEFI], and set Boot Option filter to [UEFI only].
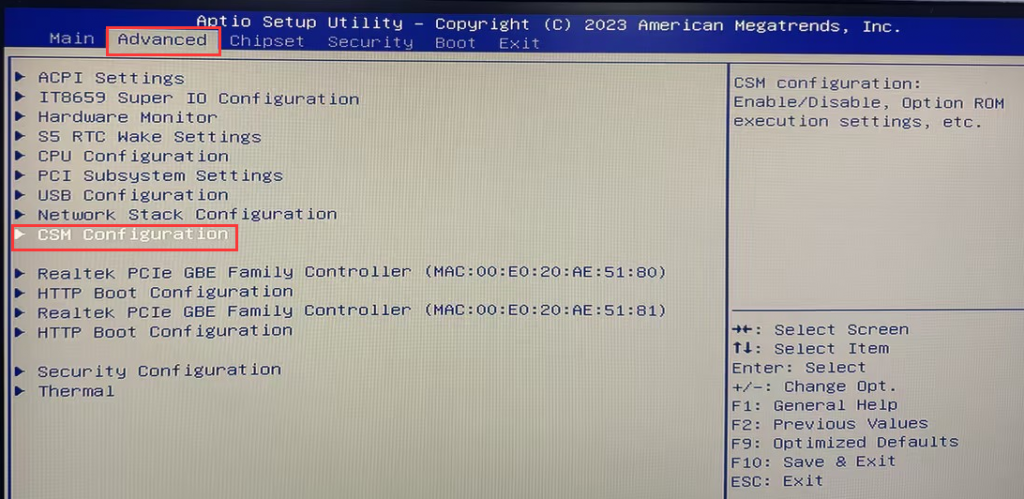
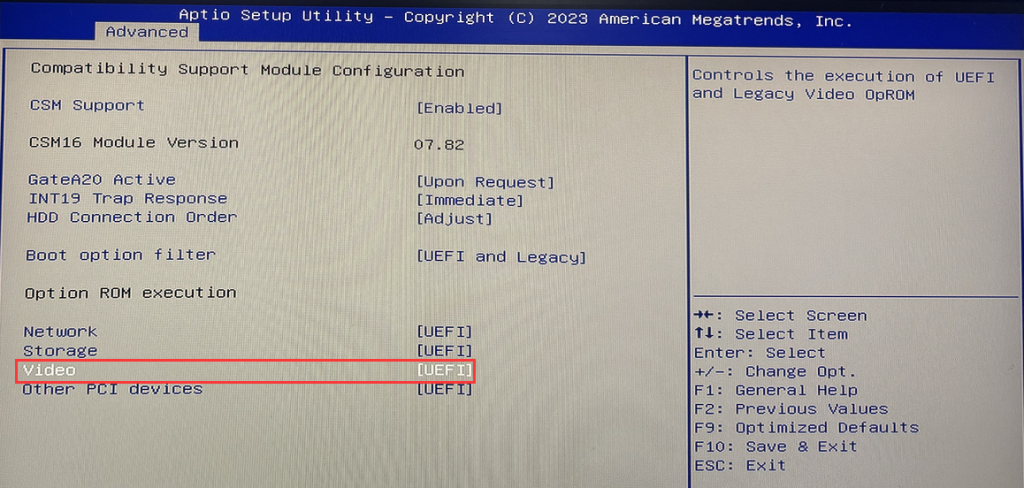
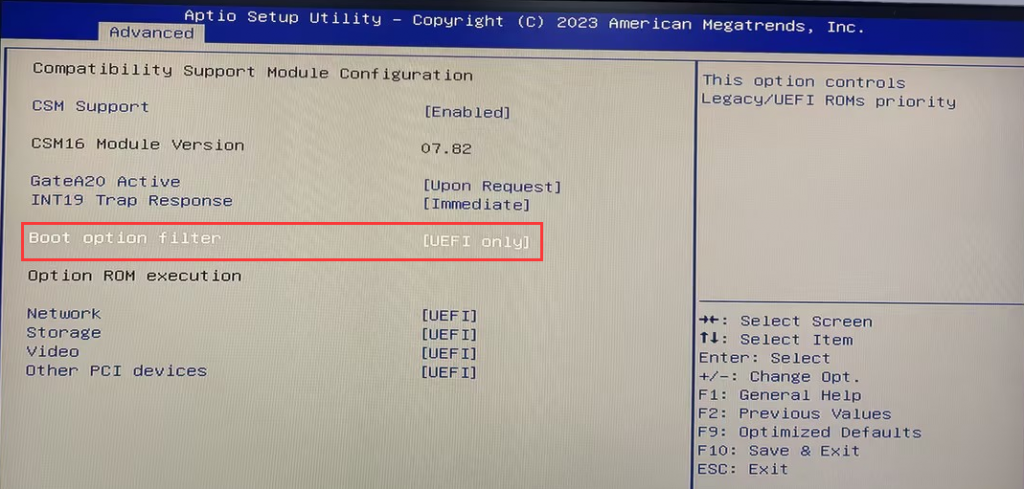
- 3. After the configuration is complete, press F10>Enter to select Yes to save the configuration and exit.
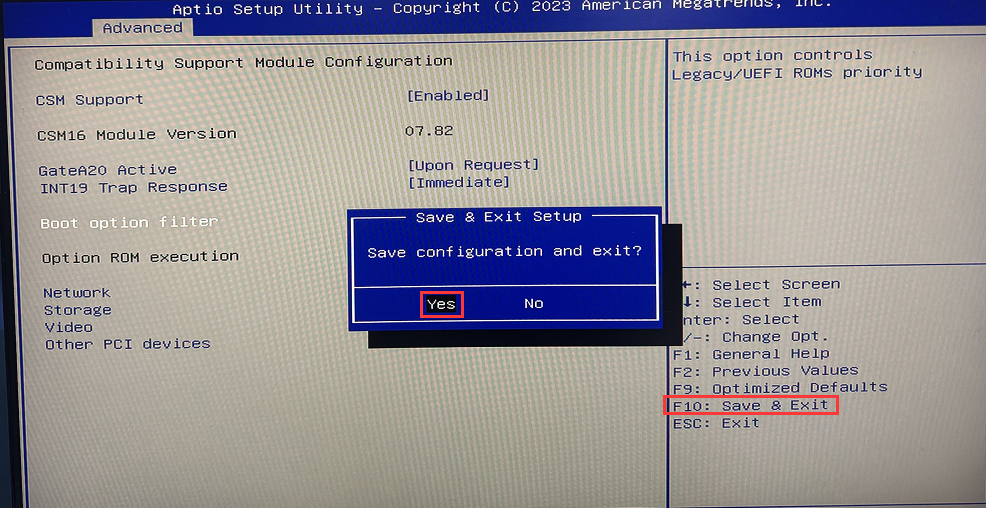
- 4. At this time, the PC restarts. Press Del to go to the BIOS Setup screen, choose Advanced>CSM Configuration> Set CSM Support to [Enabled], and press F10> Enter to select Yes to save the configuration and exit.
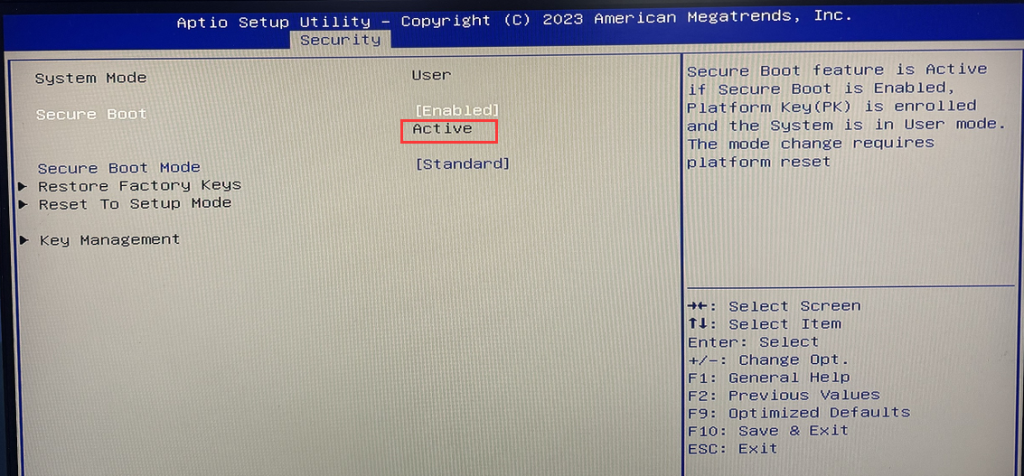
5. The PC restarts. Press Del to enter BIOS Setup, choose Security>Secure Boot> Set Secure Boot Mode to [Standerd], and select Yes in the dialog box that is displayed.
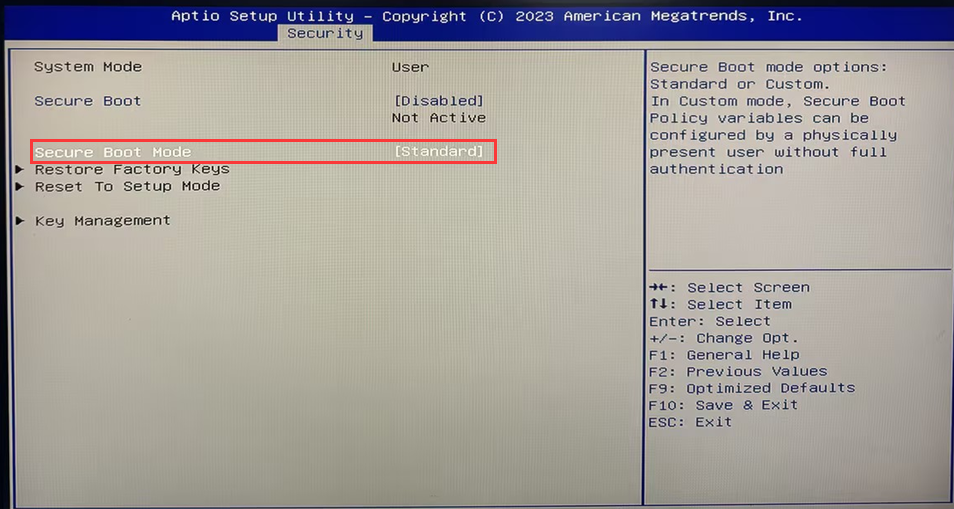
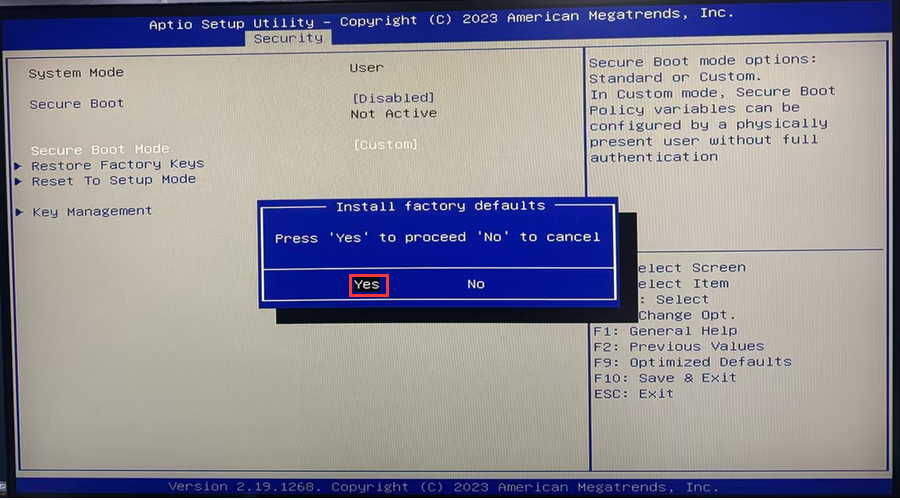
- 6. Set Secure Boot to [Enable], and press F10 to save the Settings and exit.
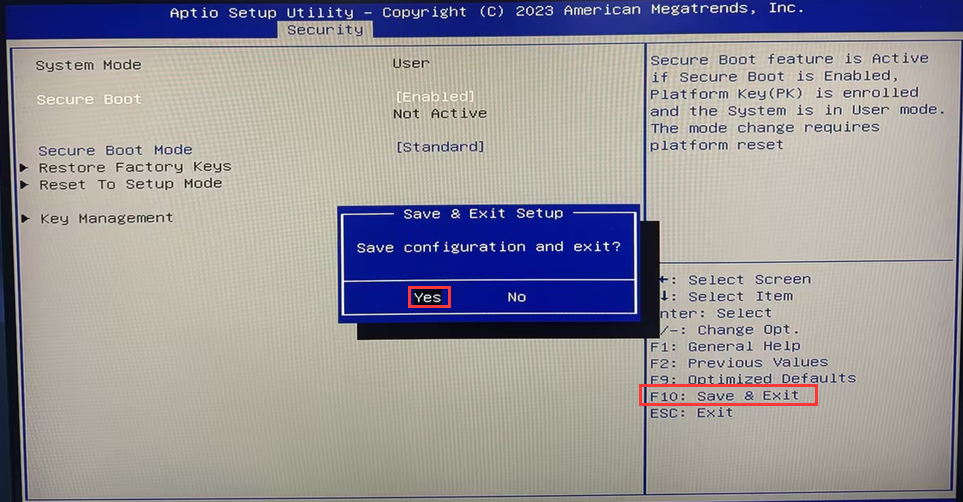
- 7. During the restart, press Del on the keyboard to enter the BIOS and check whether Secure Boot is successfully activated.
- Note:
To enable Secure Boot, the CSM needs to be disabled. For oss installed in Legacy mode, when Secure Boot is activated, the OS cannot be accessed.
If the system is installed in Legacy mode on the original hard disk, reinstall the system in UEFI mode.
If you have important data on the original hard disk, enter the BIOS and press F9 to restore the CMOS parameters to the default values. Then press F10 to save the data and exit. After backing up important data, configure BIOS to enable Secure Boot, and reinstall the system in UEFI mode.
Unlock the hidden features of "Charging while powered off" and "Wake up with keyboard/mouse" on your mini PC.
【M9】Steps to query the hard disk in BIOS
