
M2-How to set Auto Power On+Common Function Configuration
author: VENOEN
2025-09-19
- 1. Auto Power On
Applicable to M2 private model, BIOS version: BOX IGD.27 X64
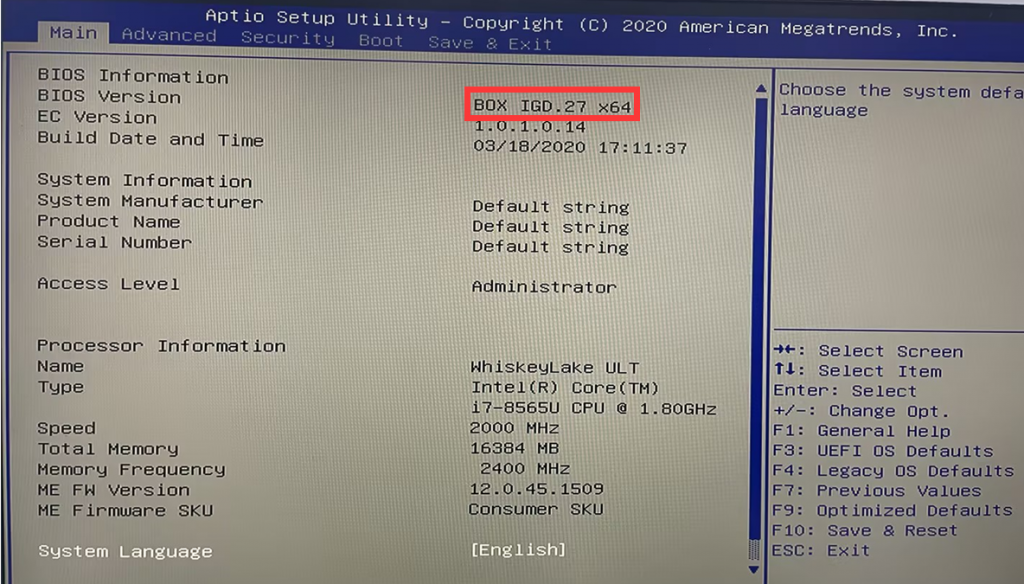
- 1-1. Press the PC power button and quickly tap the F2 key on the keyboard to enter BIOS Setup, then select Boot > Set Auto Power on to Enabled.
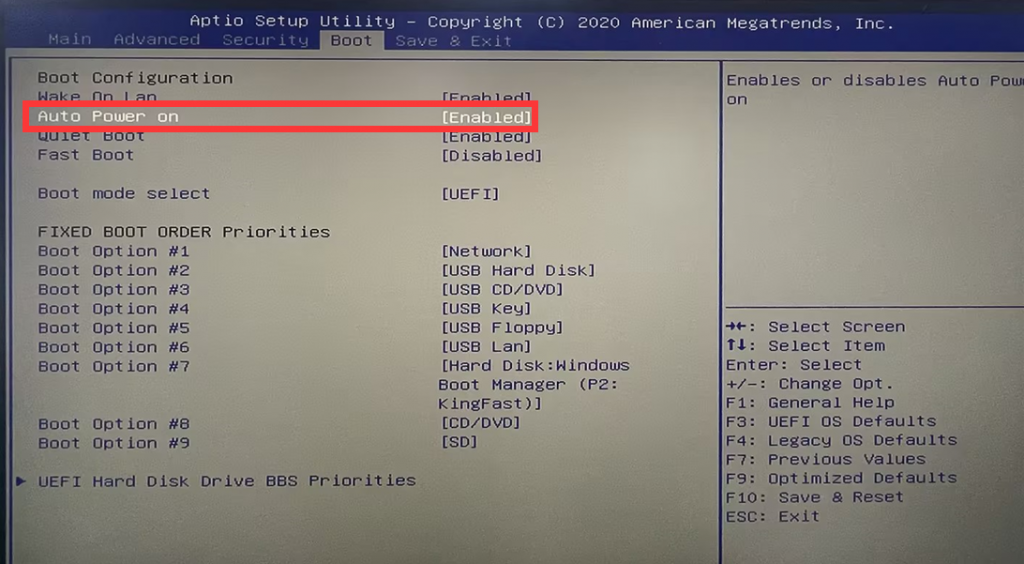
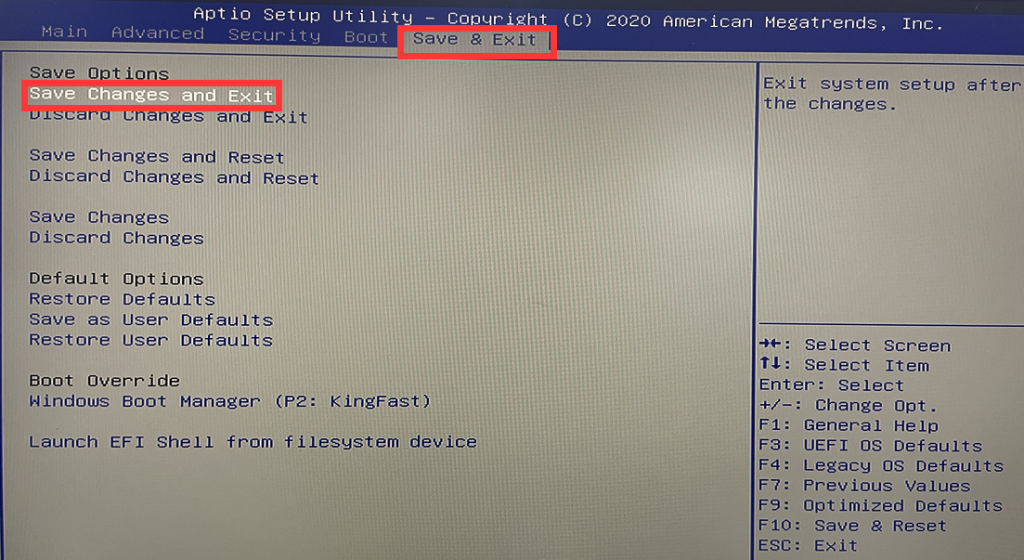
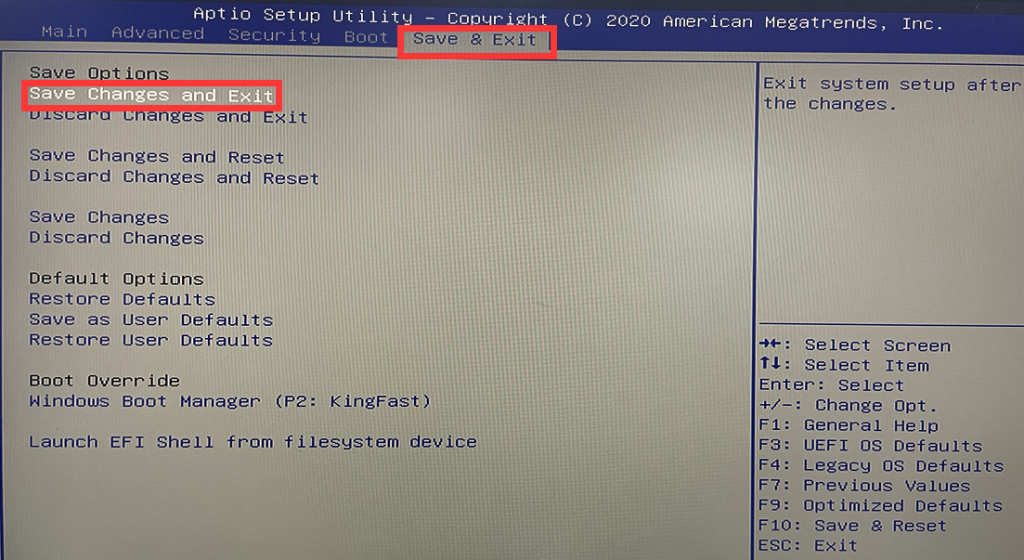
- 1-2. After the settings are completed, select Save & Exit>Save Changes and Exit.
- 2. Enable FTPM2.0
2-1. Press the PC power button and quickly tap the F2 key on the keyboard to enter BIOS Setup, select Trusted Computing>Set Security Device Support to Enable. After setting is complete, select Save & Exit>Save Changes and Exit.
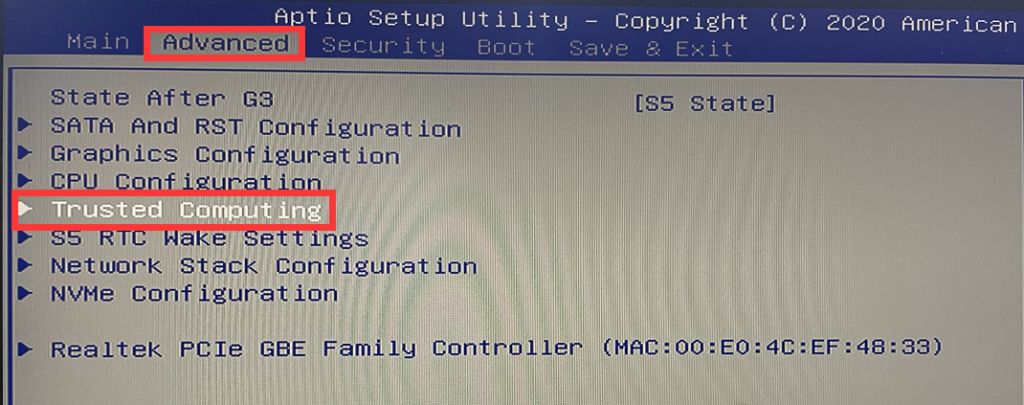
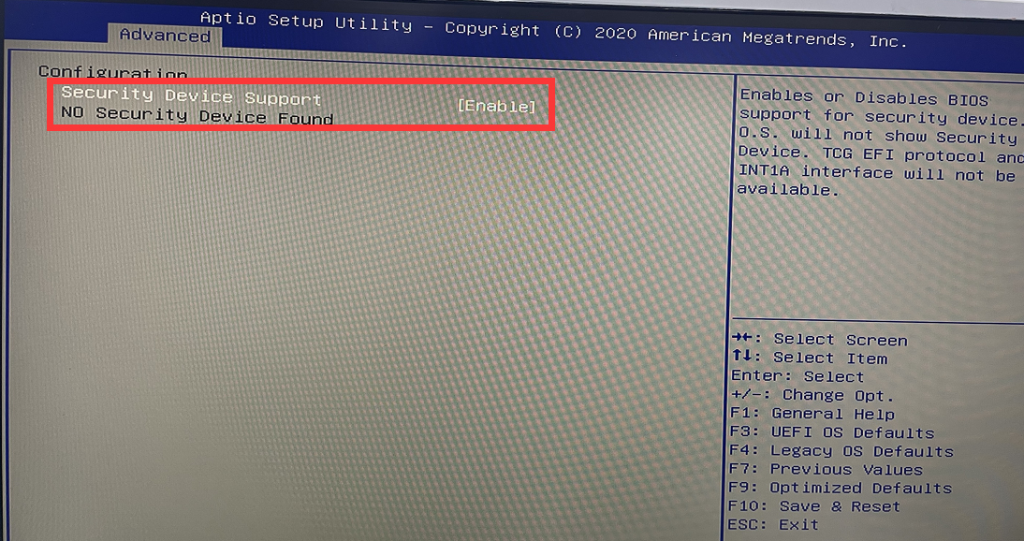
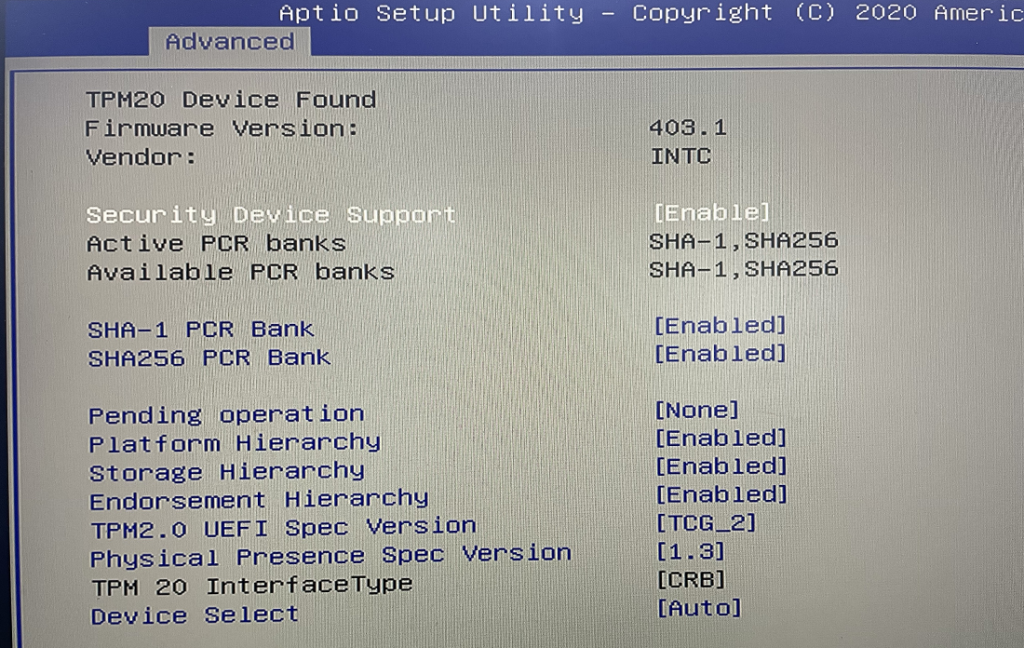
- 2-2. After restarting, enter the BIOS>Trusted Computing option again and confirm whether it is enabled successfully. The successful opening status is shown in the figure below.
- 3. Disable PXE boot (network boot)
Overview: UEFI PXE is turned on by default in this BIOS. When the computer does not have a hard disk installed, the operating system is damaged, or the Boot item settings are abnormal, it will boot through UEFI PXE, making it impossible to enter the operating system in the hard disk. The picture below is a screenshot of entering PXE startup
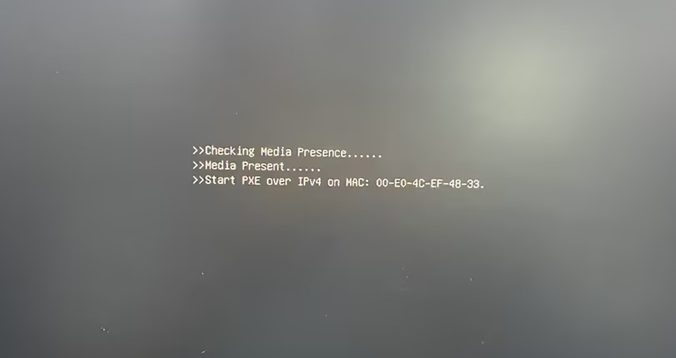
If you cannot enter the operating system after entering PXE startup, you can follow the following steps to troubleshoot one by one.
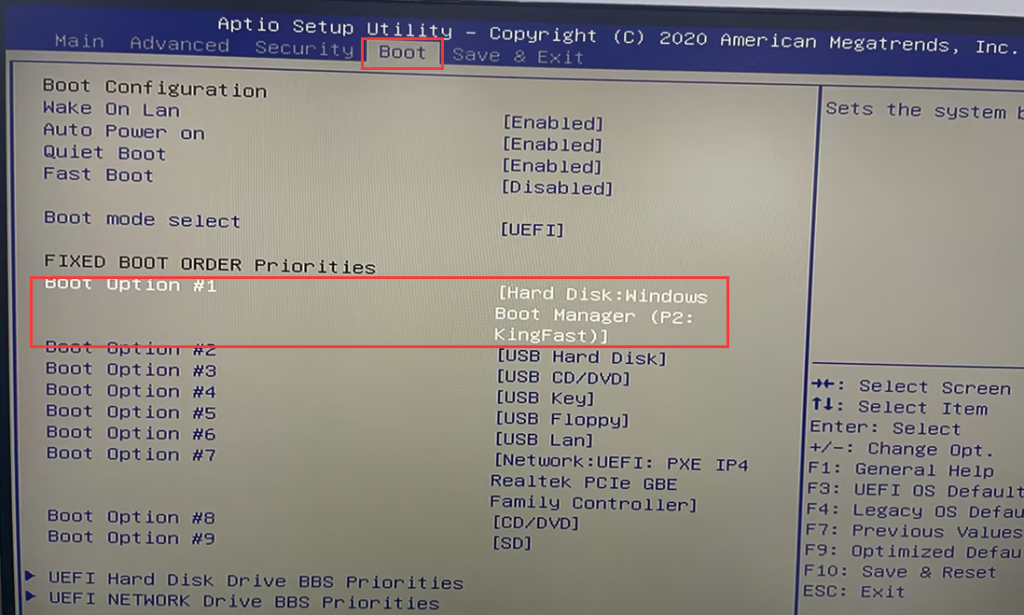
3-1. Press the Ctrl+Alt+Delete keys to restart the computer. After restarting, quickly tap the F2 key on the keyboard to enter BIOS Setup and select Boot > Set Boot option #1 to Hard Disk: Windows Boot Manager.
- 3-2. Select Advanced>Network Stack configuration>Set Network Stack to Disabled.
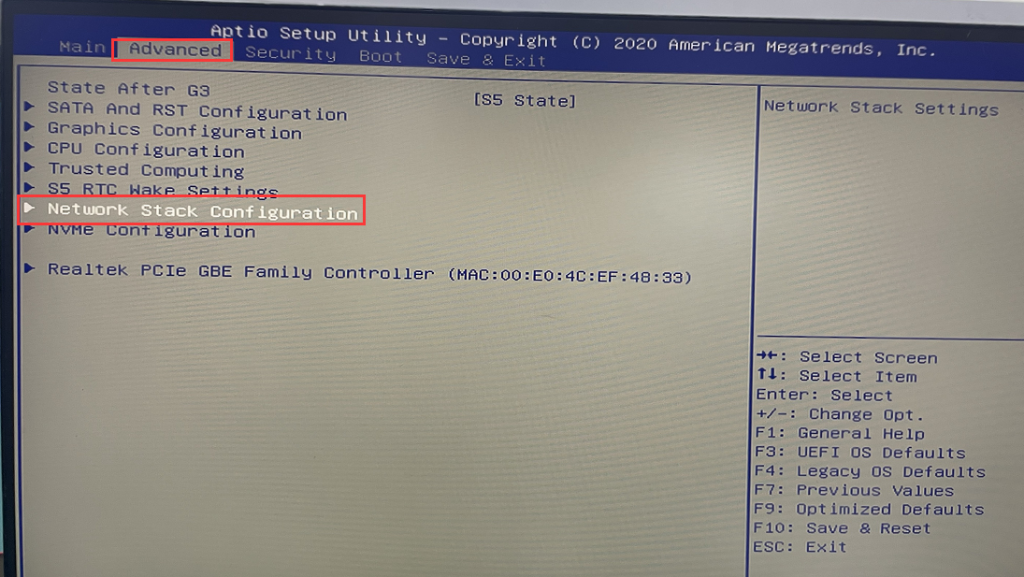
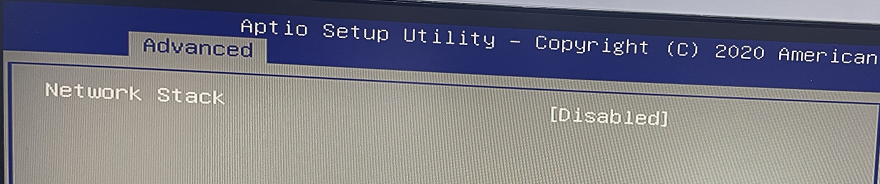
- 3-3. After the settings are completed, select Save & Exit>Save Changes and Exit, or press the F10 key to save and exit.
M6/M1-R7-5800H-How to set Auto Power On
M1-How to set Auto Power On
Related Article
