
[Windows 11]Create a system restore point and restore steps
Create a system restore point and restore steps
Overview:
In Windows 11, the system restore point is an important feature that helps you restore your system to some previous normal state in the event of a problem.
The system restore point contains the backup of system Settings, registry information, system files, and so on. When you create a restore point, Windows records the state of these key elements.
Its main features and functions include:
Features:
Automatic creation: Windows 11 May automatically create restore points before some important system operations, such as installing updates and installing new software.
Manual creation: Users can also manually create a restore point according to their needs.
Functions:
Troubleshoot system faults: If the system is unstable, crashes, or has a blue screen of death after a certain software or driver is installed, you can use the restore point to restore the system to the normal state.
Undo incorrect setting changes: For example, if you accidentally change some key system Settings, resulting in abnormal system functions, you can roll back these Settings through the restore point.
For example, if you install an incompatible video card driver that causes a screen display problem, you can use the system restore point to restore the state before the driver was installed to resolve the display problem.
To create or use a system restore point, you can open the Settings window by typing "Create restore point" in the search bar.
It is important to note that the system restoration point is not completely solved for all problems, and it will not recover your personal files and data, such as documents, pictures, videos, etc. Before using the system restore point, it is recommended that you back up important personal data.
PS: System restoration takes a long time. During the restoration process, ensure that the power is connected and do not forcibly shut down to avoid abnormal problems.
Enable the system restore point
In most cases, the system restore point is enabled by default. You can also check whether the system restore point is enabled in the following ways.
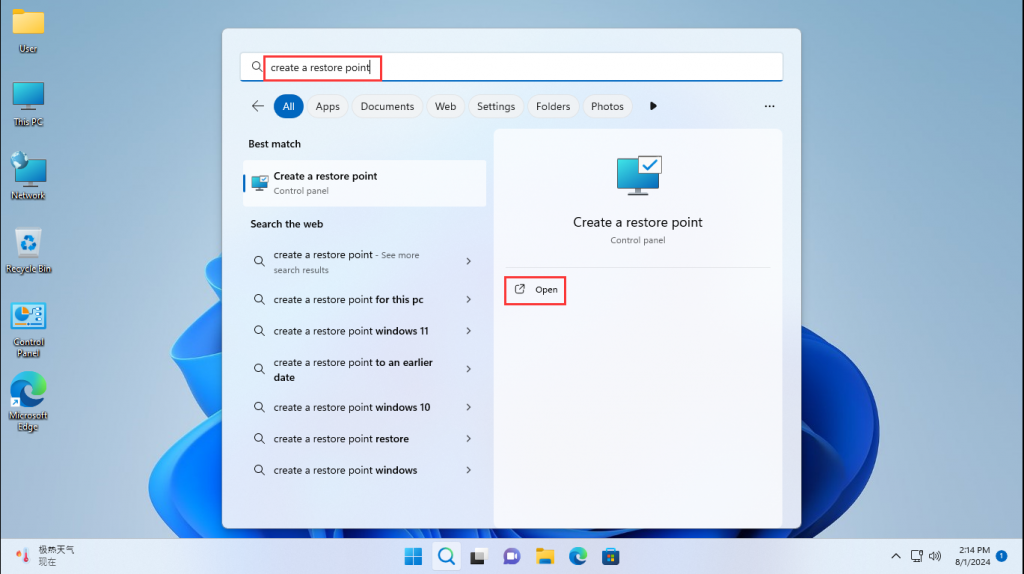
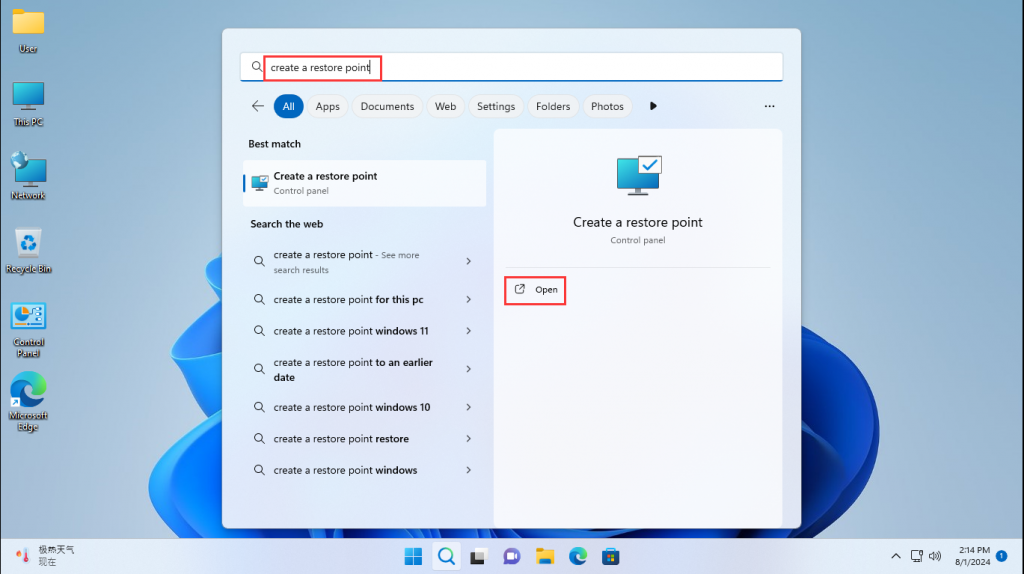
Step 1: In the Windows search bar, type [Create a restore point] and click [Open].
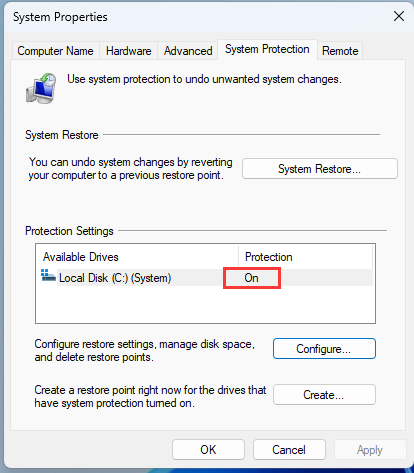
- Step 2: If the protection of the system disk drive is on, the system restore point is enabled.
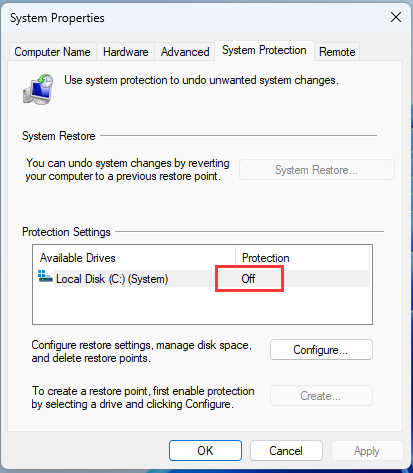
- Step 3: If the protection of the system disk drive is off, click [System Disk Drive] and then click [Configure].
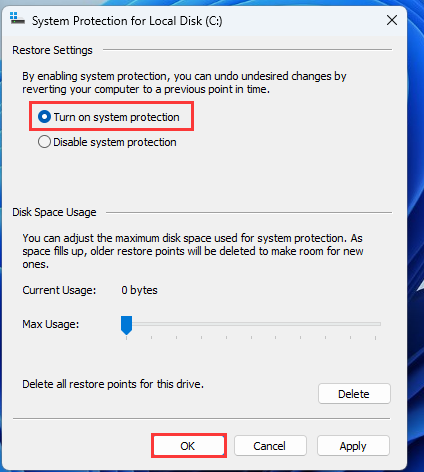
- Step 4: Select Turn on system protection, set the maximum usage (it is recommended to set the system disk space usage to 5% to 10%), and click ok. The system Restore point will be enabled.
The maximum usage will retain the disk space capacity you set as the system restore point to use, when the set space capacity is running out, the system will delete the older restore point in time to store the new restore point.
- Manually create a restore point
Step 1: In the Windows search bar, type [Create a restore point] and click [Open].
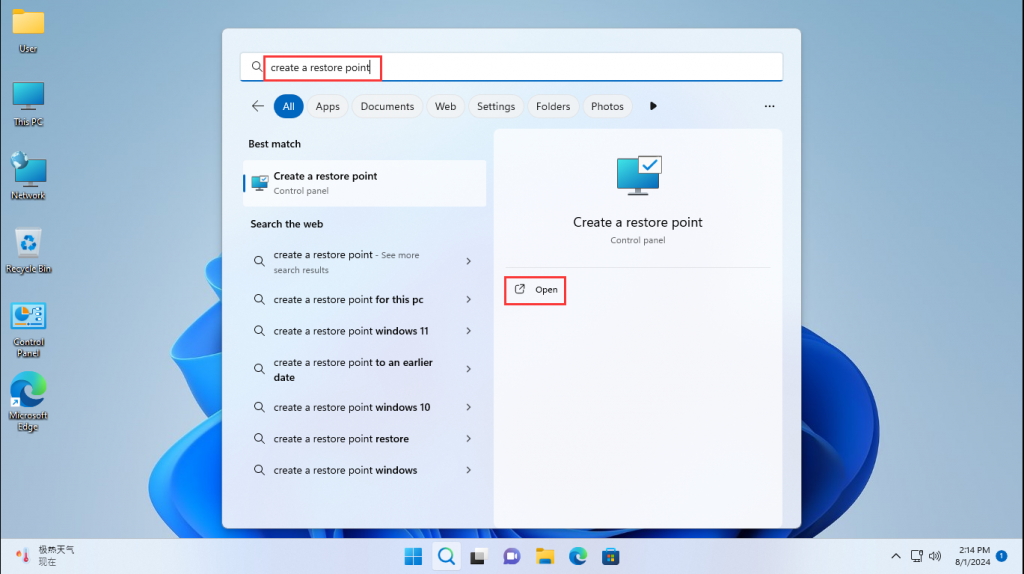
- Step 2: Select the disk drive with system protection enabled and click [Create].
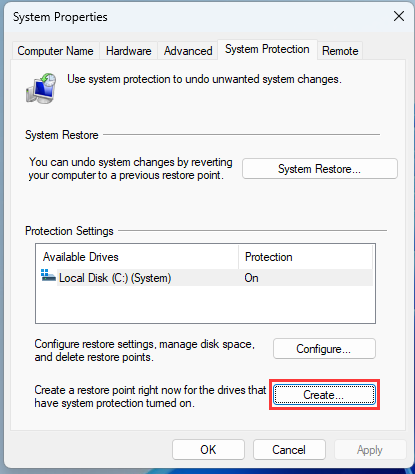
- Step 3: Enter the description of the restore point to facilitate your later identification, then click [Create];
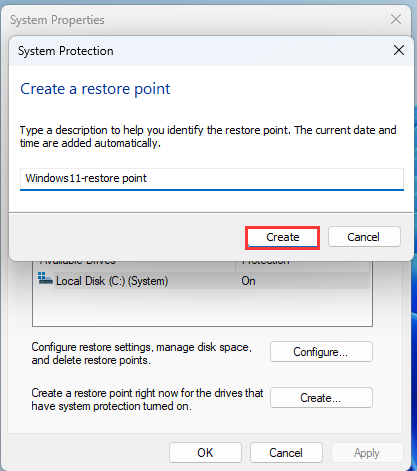
- Step 4: When the following window appears, it means that the restore point has been successfully established, please click [Close].
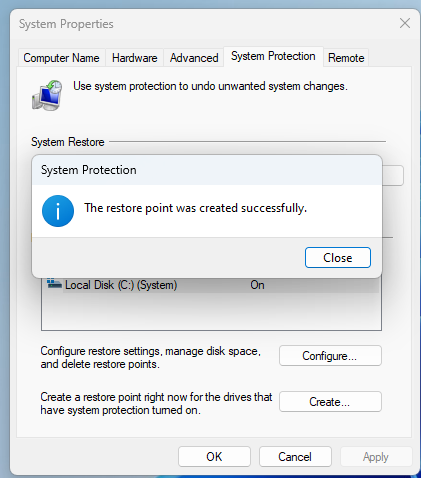
- Restore the system from the system restore point
Step 1: In the Windows search bar, type [Create a restore point] and click [Open].
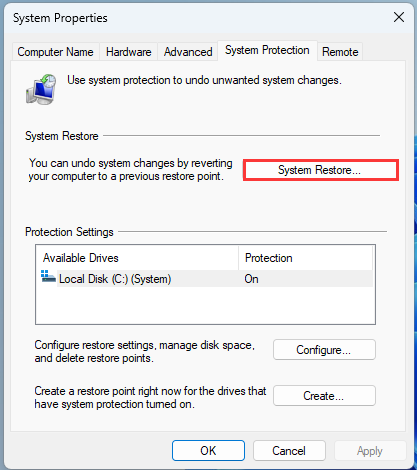
- Step 2: Click [System Restore].
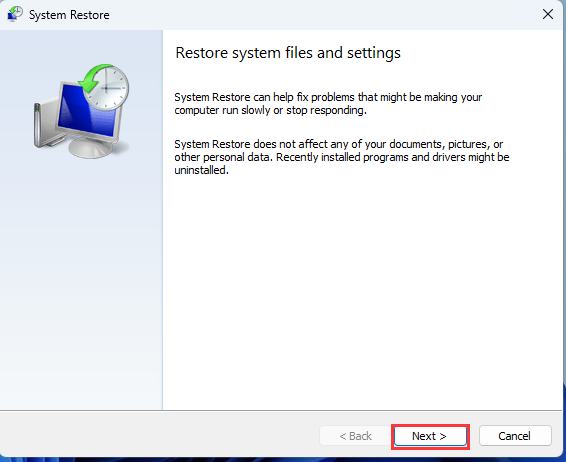
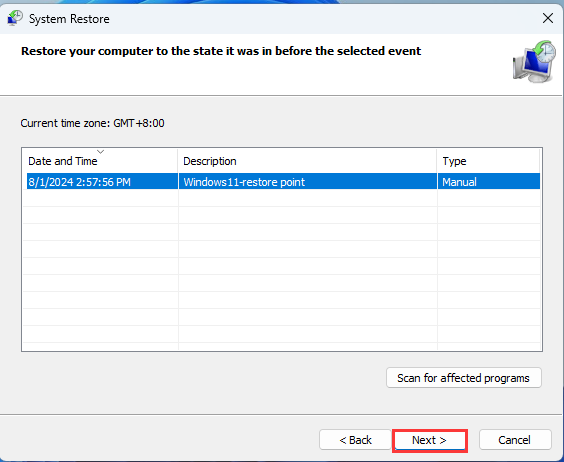
- Step 3: Click [Next];
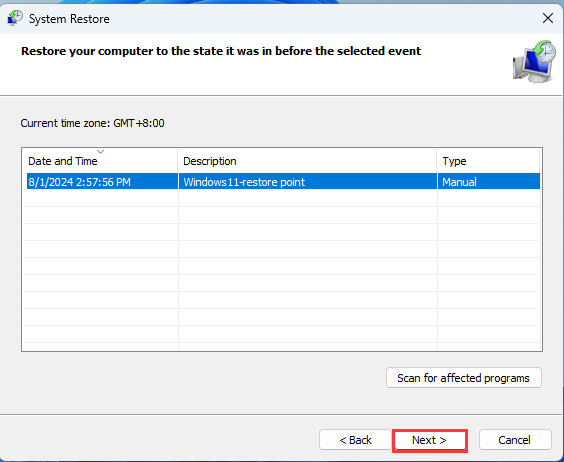
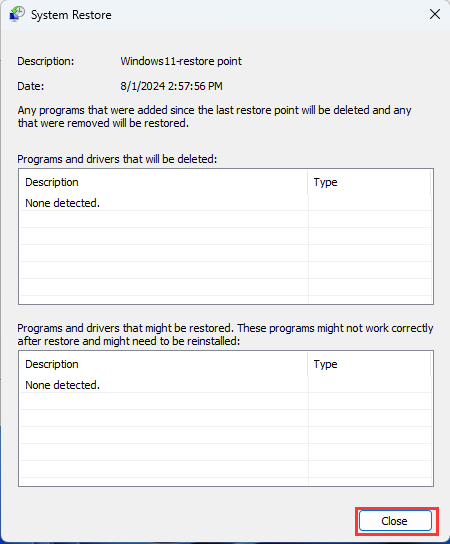
- Step 4: Select the restore point you want to use and click [Scan for affected programs].
If the system restore point you want to use does not appear, you can check the display for more restore points to see all of them.
- Step 5: You will see a list of items that will be deleted when you revert to this restore point. If you need to delete them, click [Close] and proceed to the next step.
If it does not meet your needs, please go back to the previous step and select another return point;
- Step 6: Click [Next].
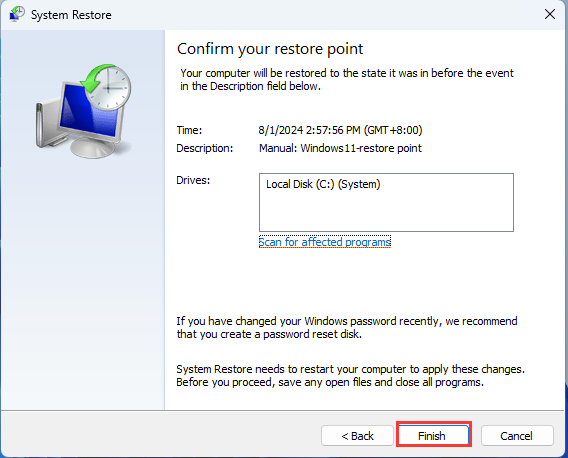
- Step 7: To verify that the restore point information is correct, click [Finsh].
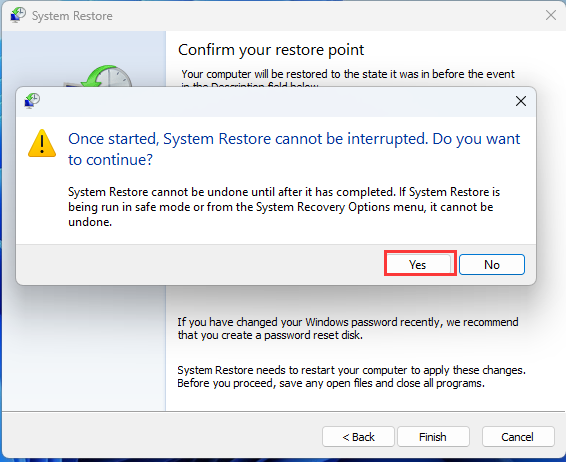
- Step 8: After clicking [Yes], the system will start performing the restore and restart.
Note: System restoration may take some time, during the restoration process, please ensure that the computer is connected to the power supply and do not forcibly shut down to avoid abnormal problems.

Step 9: After the computer restarts, the system restoration is complete, please click [close].
[Windows 11/10]Log in to the system and create a Microsoft account
[Windows 10/11] How to solve the problem of system restore failure
