
【P05B-I7-5500U】How to build RAID
author: VENOEN
2025-08-01
Mini PCS are widely popular because of their compact size and low power consumption, but can be somewhat limited when it comes to storage expansion and data protection. By building a RAID (Redundant Array of Independent Disks), you can improve storage performance, increase storage capacity, or enhance data redundancy, even on minicomputers.
Supported RAID types
There are different levels of RAID, each with its own advantages and disadvantages. Common RAID levels include:
RAID 0 (Striping) : Data is distributed across multiple hard drives, with faster read and write speeds, but no redundancy, and hard drive failures can lead to data loss.
RAID 1 (Mirroring) : Data is completely copied to another hard drive, providing redundancy but only 50% storage efficiency.
RAID formation conditions
RAID0 and RAID1 require two SSDS of the same MSATA capacity.
PS: This model does not support recommended RAID for SATA3.0 ports (2.5-inch SSD or HDD). Data on hard disks may be deleted during RAID formation. Therefore, you need to back up all important data.
The host and BIOS support RAID.
RAID building Procedure
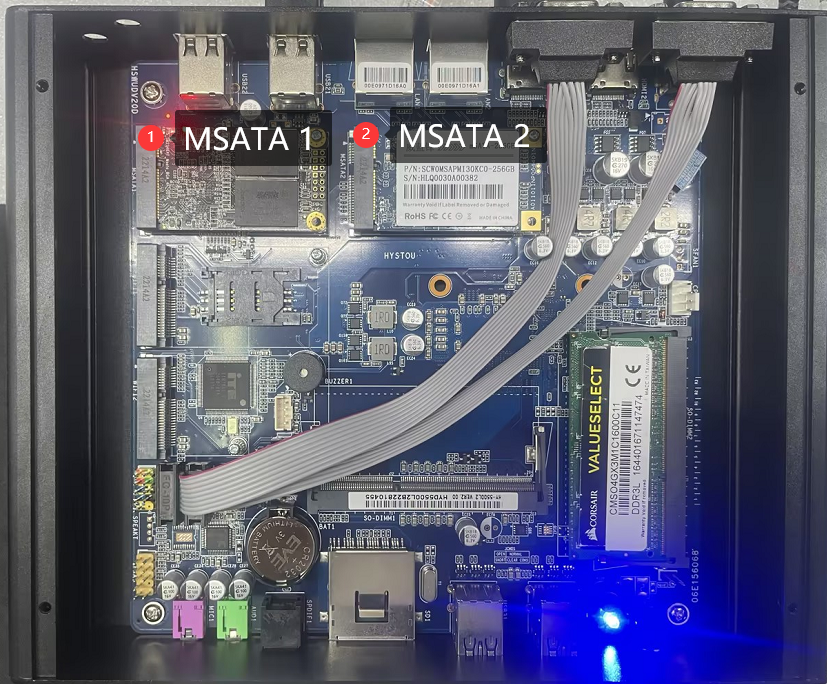
Step 1: Remove the mainboard from the power-off state and install two MSATA SSDS (blank SSDS are recommended) into the MSATA slot on the mainboard.
There are different levels of RAID, each with its own advantages and disadvantages. Common RAID levels include:
RAID 0 (Striping) : Data is distributed across multiple hard drives, with faster read and write speeds, but no redundancy, and hard drive failures can lead to data loss.
RAID 1 (Mirroring) : Data is completely copied to another hard drive, providing redundancy but only 50% storage efficiency.
RAID formation conditions
RAID0 and RAID1 require two SSDS of the same MSATA capacity.
PS: This model does not support recommended RAID for SATA3.0 ports (2.5-inch SSD or HDD). Data on hard disks may be deleted during RAID formation. Therefore, you need to back up all important data.
The host and BIOS support RAID.
RAID building Procedure
Step 1: Remove the mainboard from the power-off state and install two MSATA SSDS (blank SSDS are recommended) into the MSATA slot on the mainboard.
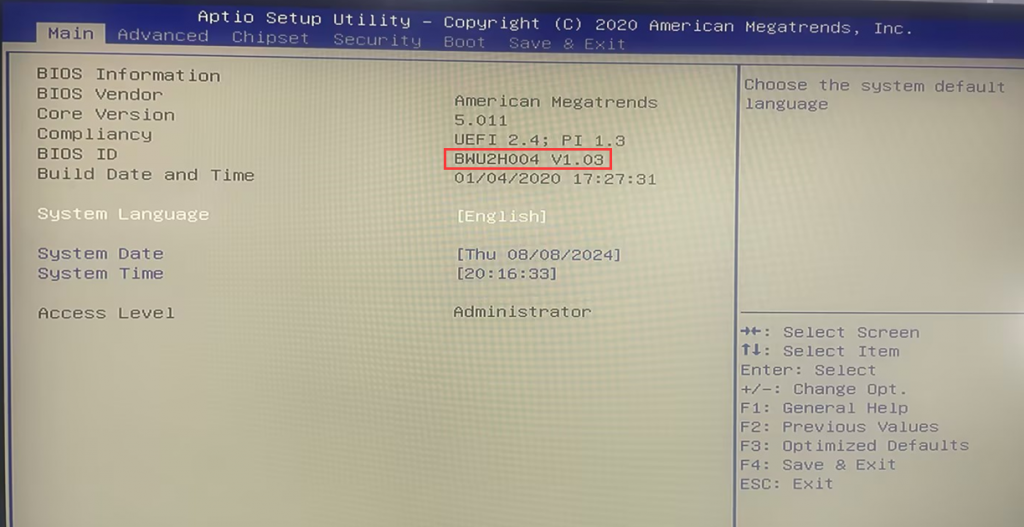
- Step 2: Connect all peripheral products (such as keyboard, mouse, monitor, etc.), press the SW button to power on, and quickly press the Del key on the keyboard to enter the BIOS Setup;
PS: This post uses P05B-I7-5500U as a demonstration, BIOS ID: BWU2H004 V1.03;
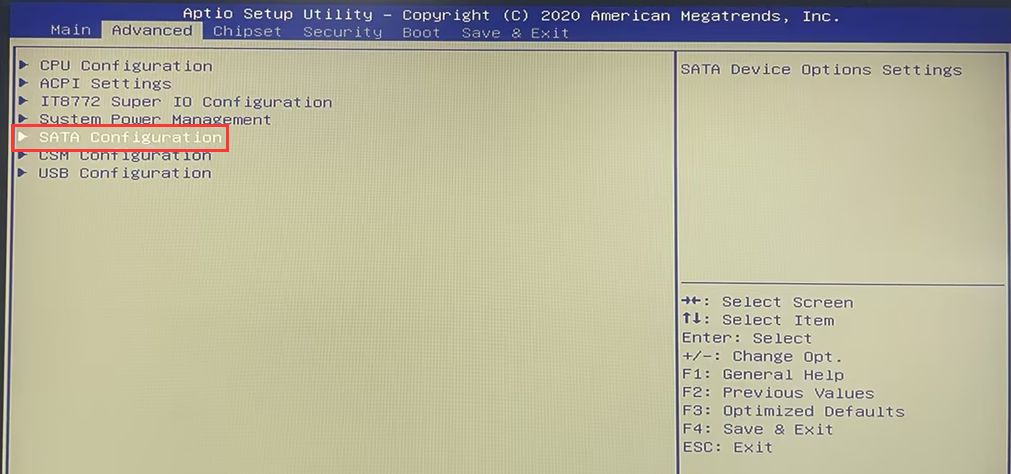
- Step 3: Select Advanced>SATA Configuration.
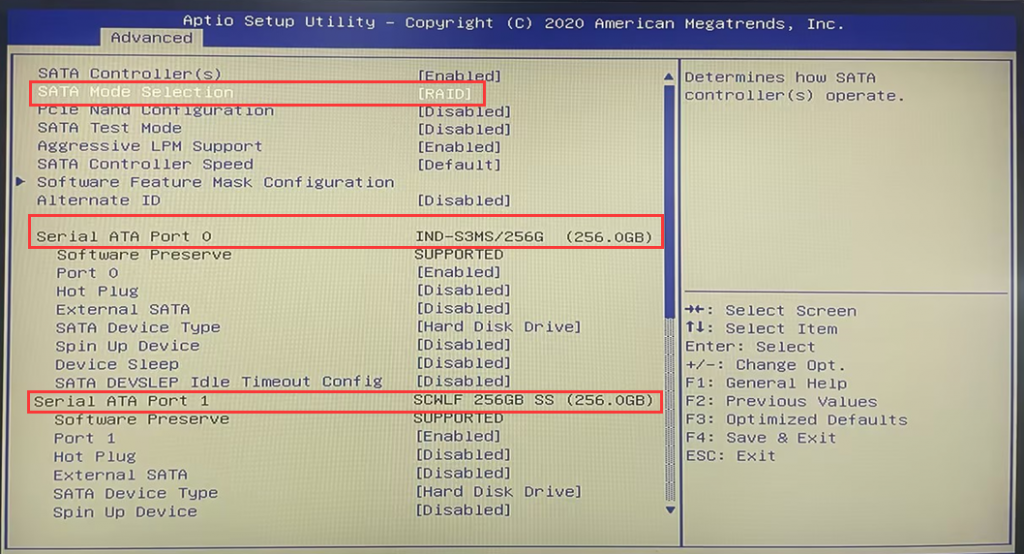
- Set the SATA Mode Selection mode to [RAID], and check whether the MSATA SSD name and capacity are identified in Serial ATA Port 0 and Serial ATA Port1.
- Step 4: Press F4 on the keyboard to save and exit;
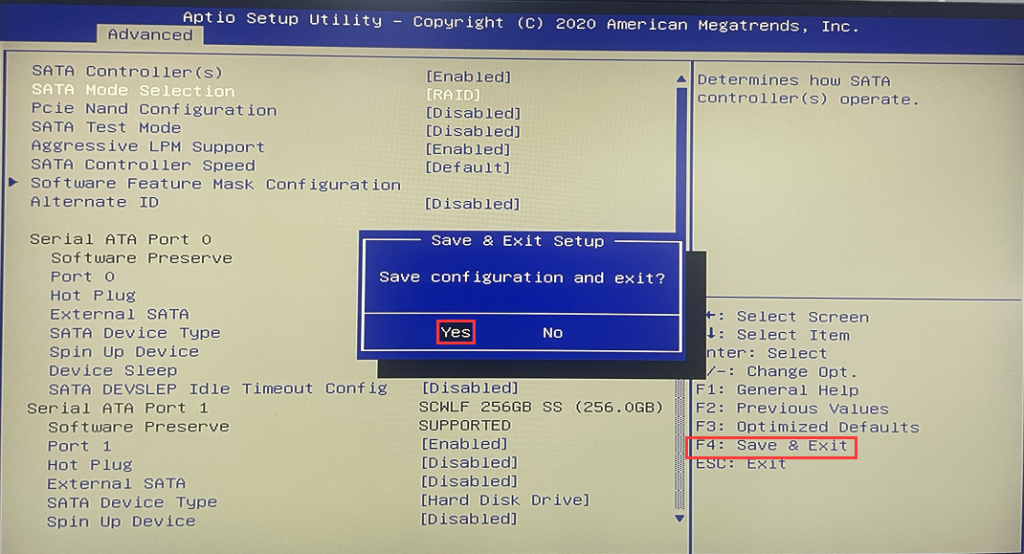
- Step 5: When the computer restarts, press Ctrl+I to enter the RAID management screen.
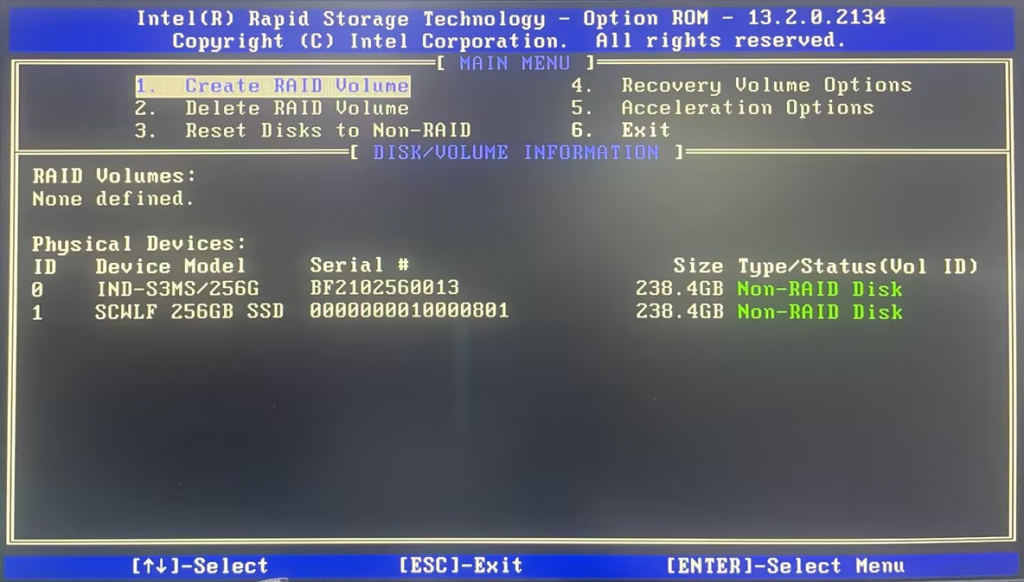
- Step 6: Create a RAID array as prompted. Press 1 to enter the Create RAID Volume.
Key description
[↑↓]-Select
[ESC]-Exit
[Enter]-Select Menu
[Tab]-Next
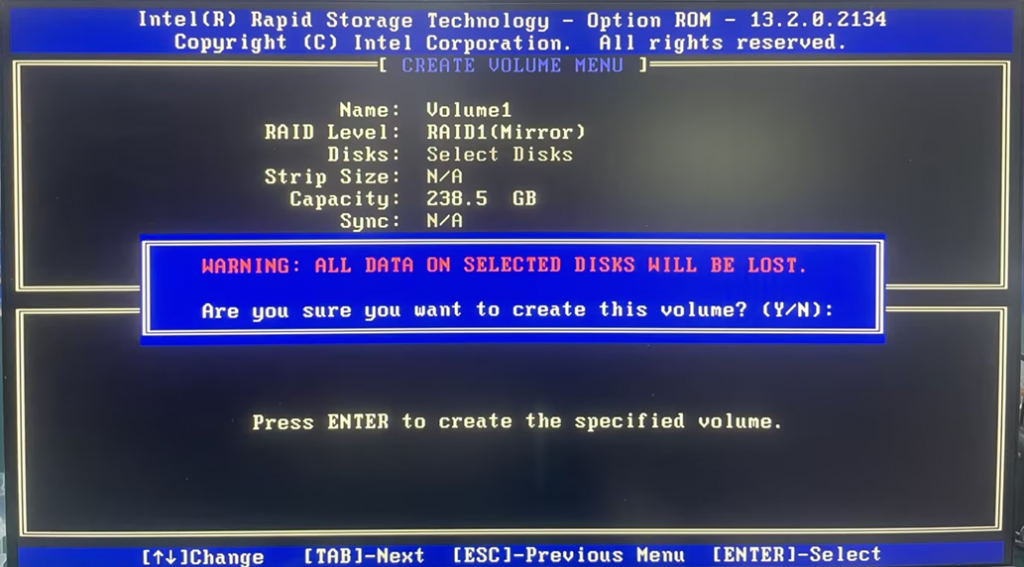
Set RAID Level to RAID0 (Stripe) or RAID1 (Mirror). After the configuration is complete, press Tab to move the value to Create Volume and press Enter.
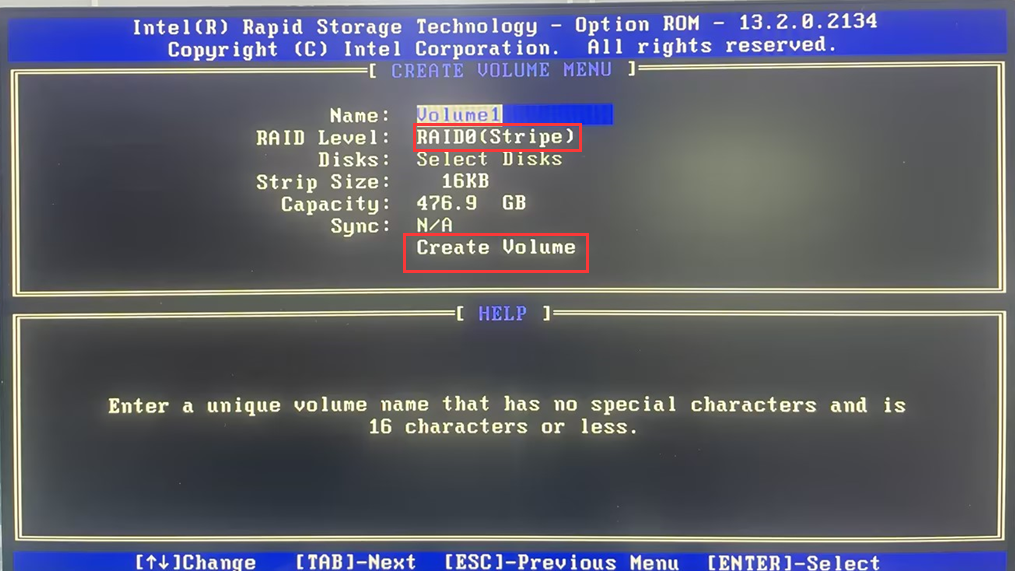
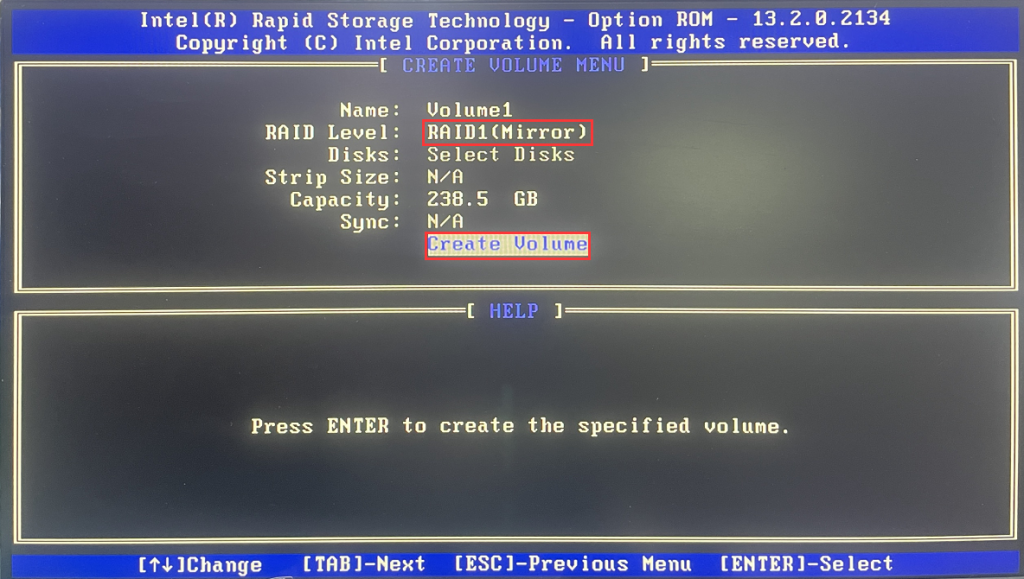
- A message is displayed indicating that all data on the selected disk will be lost. Press Y to confirm that there is no important data.
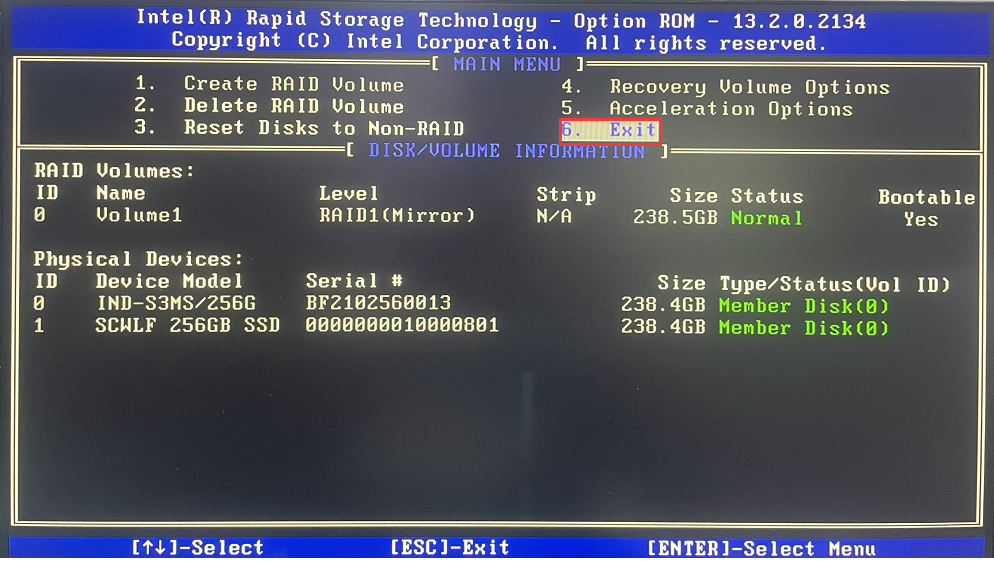
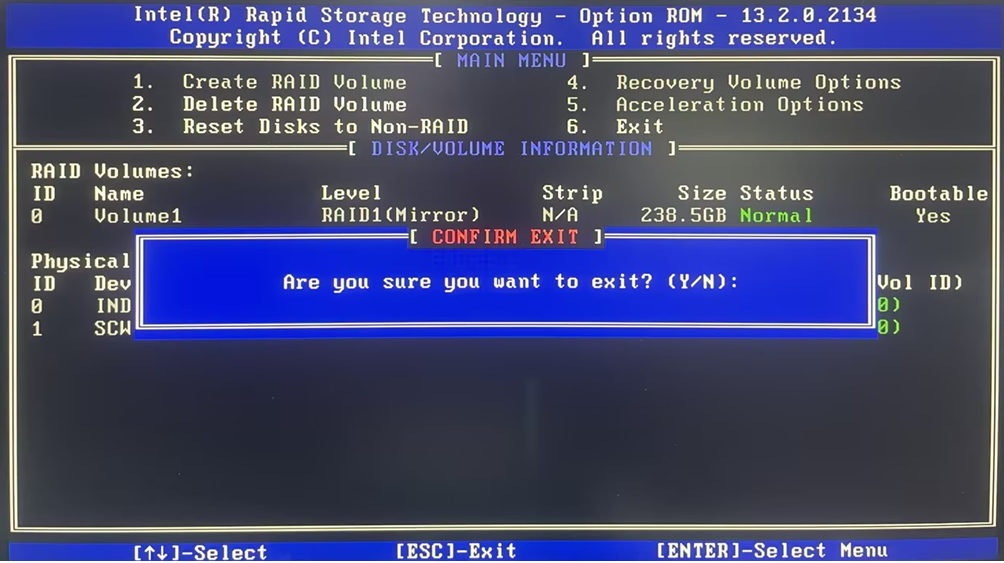
- Step 7: If no other configuration is required, press 6 to Exit. Press Y to exit.
- Extended note:
After the RAID is created, the SSD does not contain any data or operating system. After the restart, the computer automatically enters the BIOS Setup. You need to use the system installation media to reinstall the operating system. To create Windows10 installation media and install the system, refer to the link steps: //minipcsupport.com/blog/2023/05/05/windows-11-10-how-to-create-and-use-installation-media-to-reinstall-windows-11 -10-via-usb-drive/
If you want to delete a RAID array, you still need to go to the RAID management page and press 2 to delete the RAID array. The operations are basically the same. Note: Creating or deleting a RAID array will delete all data on the hard drives.
[Windows11]Restore this computer (delete all files and applications) and OOEB configuration steps[Windows11]
[Windows11] Rest this PC
