
Guide to Creating a Local User on Windows 11 Pro
Guide for Creating Local Users on Windows 11 PRO System
I. Applicable Scenarios
Applicable for creating local accounts under Windows 11 Pro.
II. Operating Steps
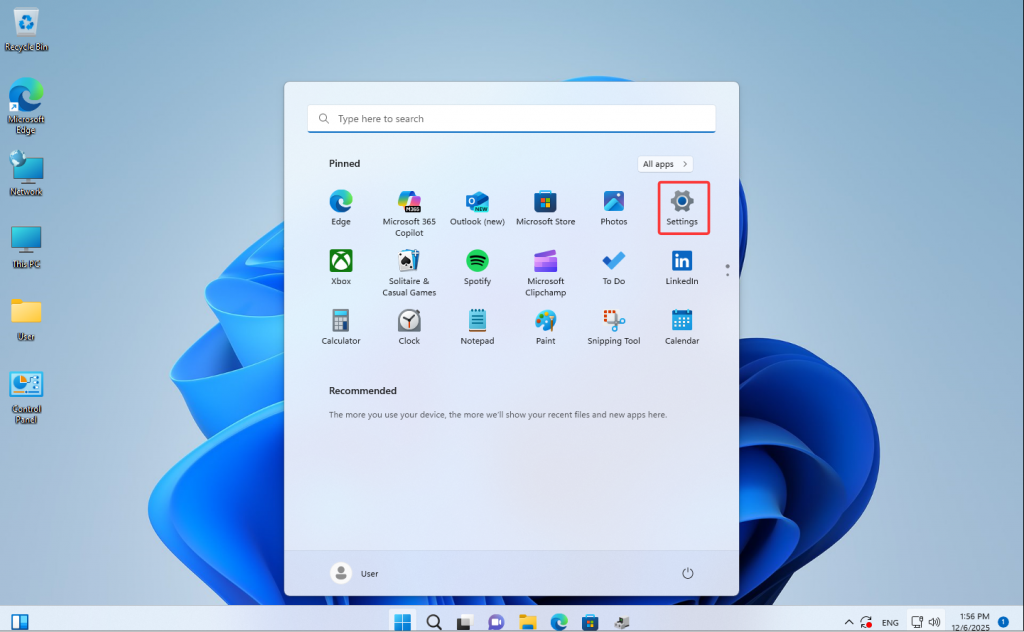
Open the system settings
Click on the "Start" menu, select the gear-shaped "Settings" icon (or press the keyboard shortcut Win + i to directly open it).
- Enter the account management page.
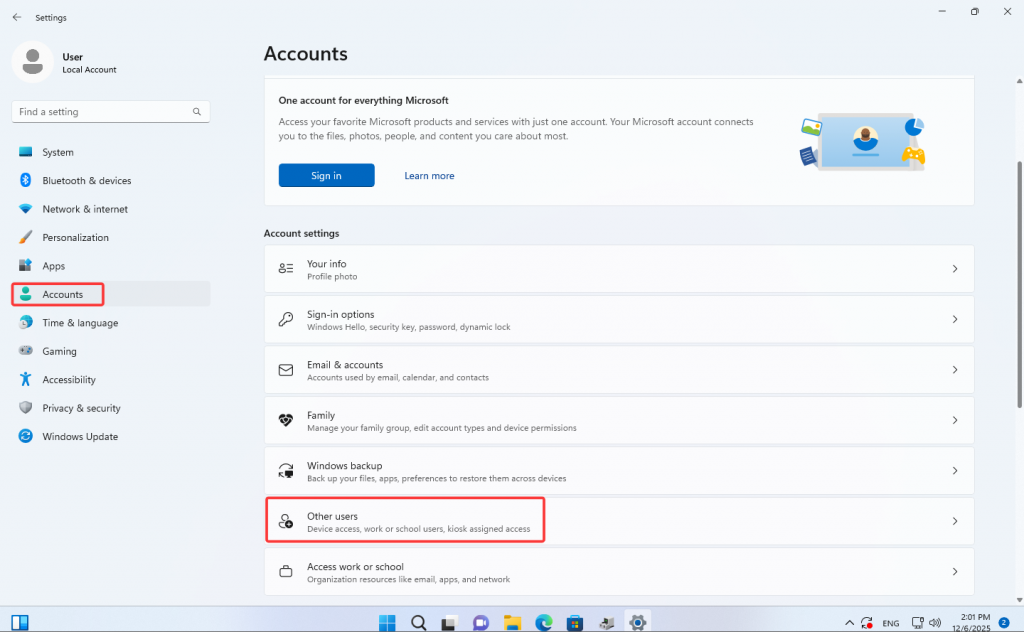
In the left menu bar of settings, find and click the "Accounts" option;
After entering the account page, in the right section, click "Other users".
- III. Initiating the New Account Creation Process
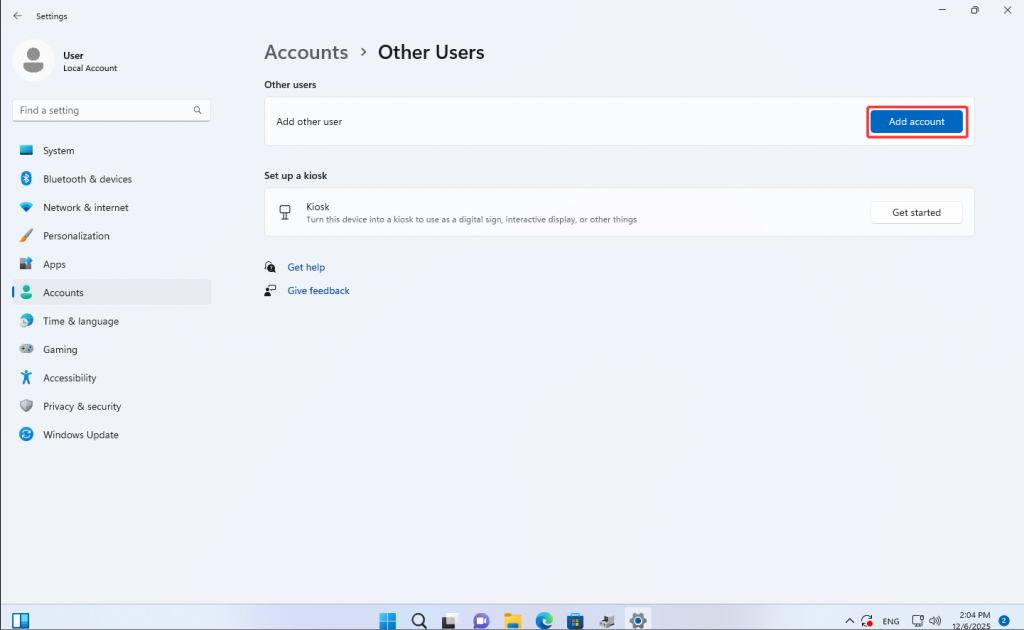
On the "Other users" page, click the "Add account" button;
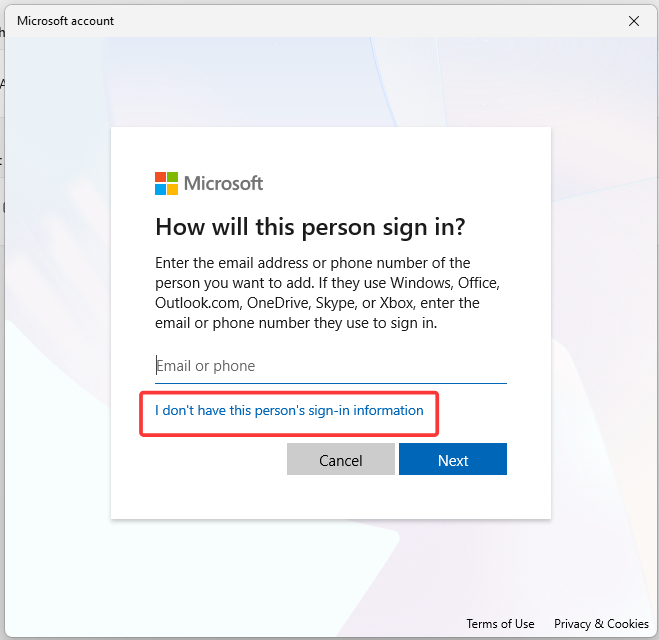
- The system will pop up the "How will this person sign in?" window, and select the option below "I don't have this person's sign-in information".
- In the popped-up window, select "Add a user without a Microsoft account";
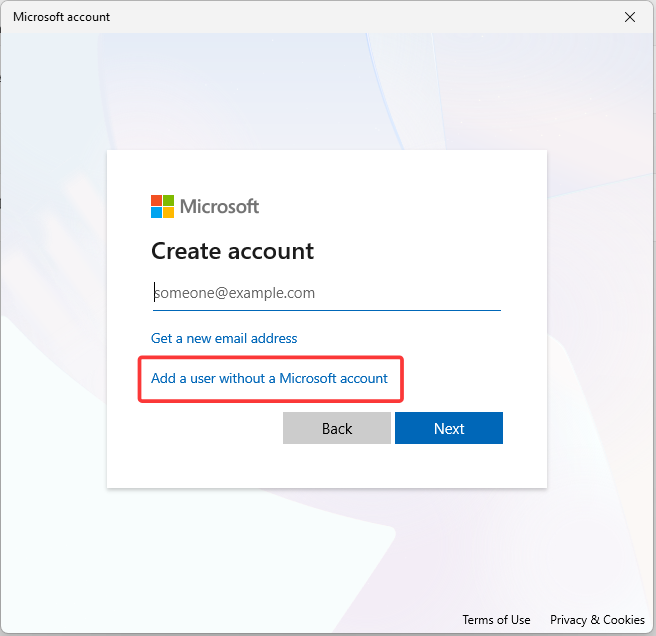
4. Fill in the account information
Enter account information
Username: Enter the name of the new account;
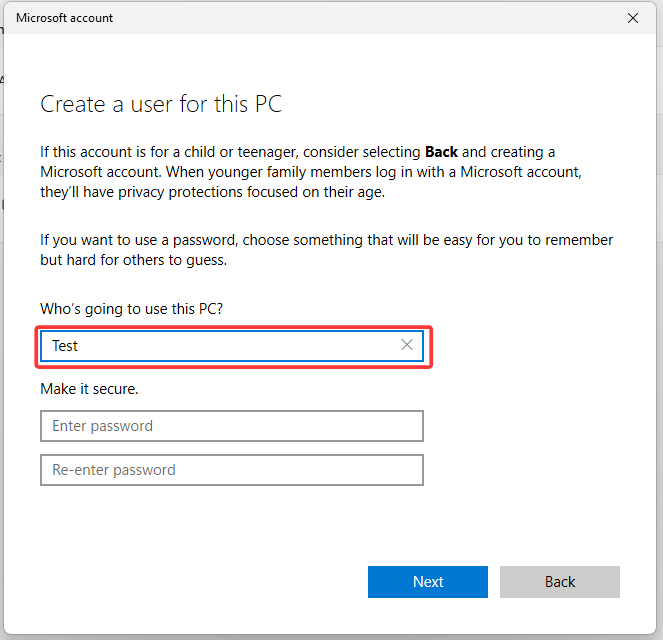
- Password (optional):
(Optional) Fill in security questions (for password recovery): Follow the prompts to select 3 security questions and set the answers. After completion, click "Next".
V. Upgrade account privileges (recommended operation)
Find the newly created local user, and click on the "Change account type" button below the user name.
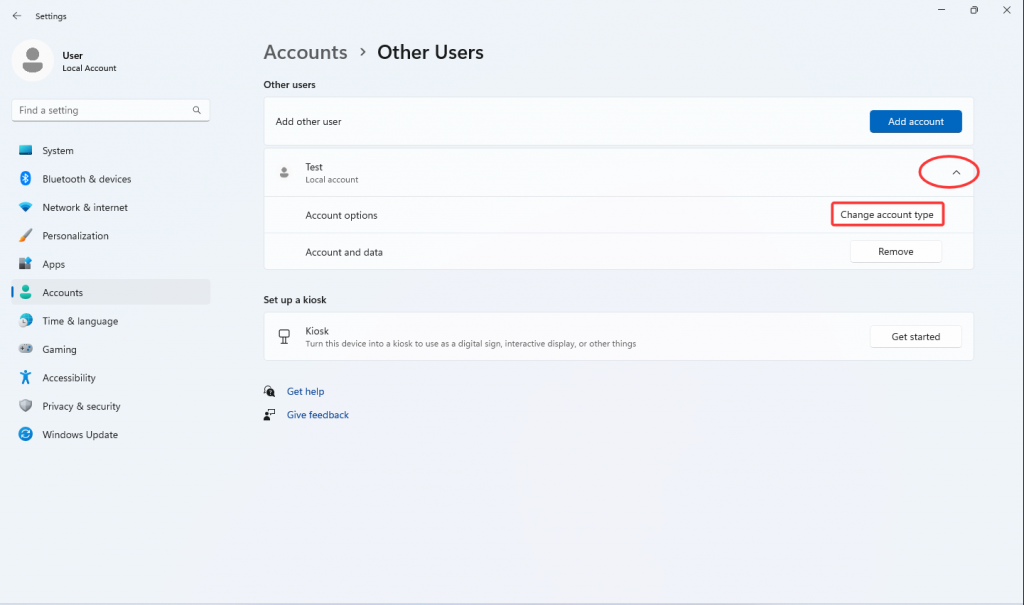
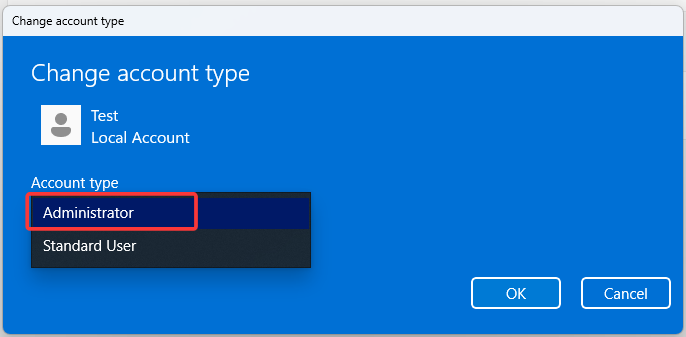
- In the popped-up window, click on the "Change account type" drop-down menu and select "Administrator" (the default is "Standard User" with administrator privileges allowing software installation and system settings modification). Click "OK" to save the permission settings. Once completed, the account permissions will take effect immediately.
6. Cancel the current account and log in to a new one
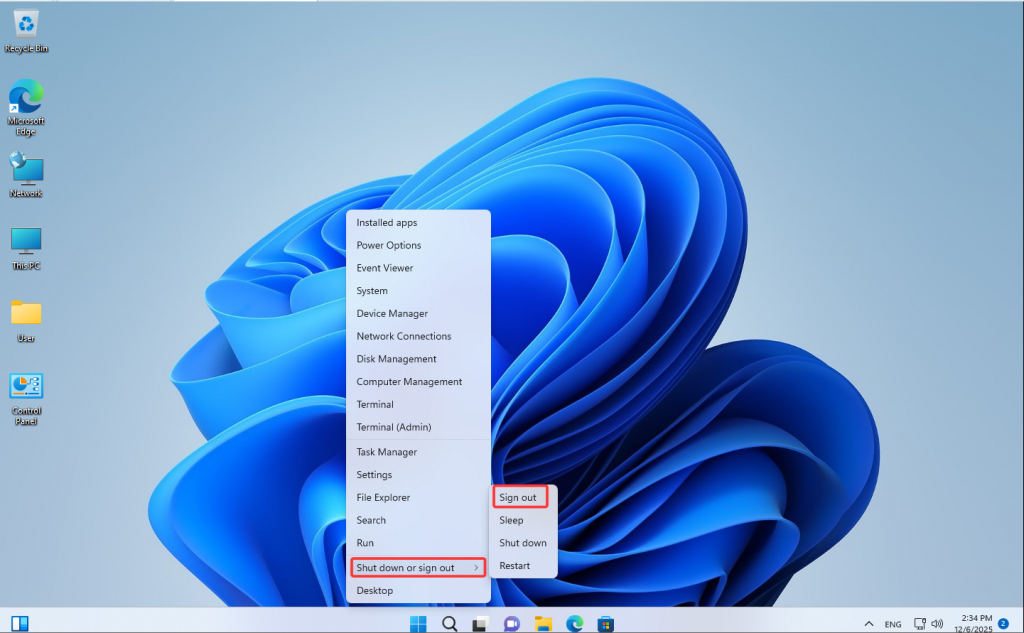
Right-click on the Start menu, then select "Shut down or log out" > "Log out".
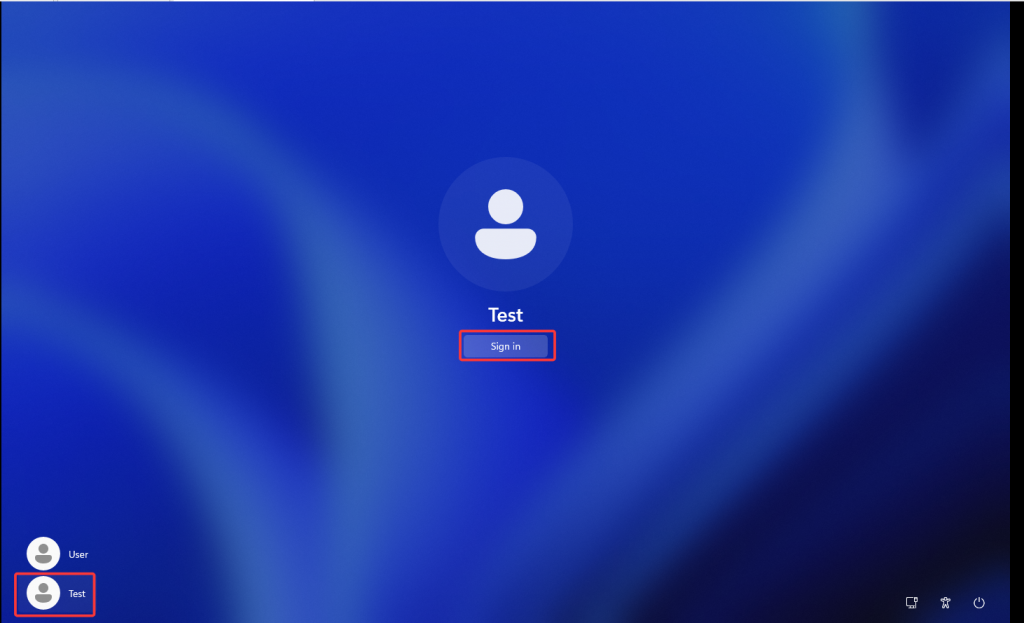
- On the login interface, select the name of the newly created local account. If a password has been set, enter the password and then click "Login".
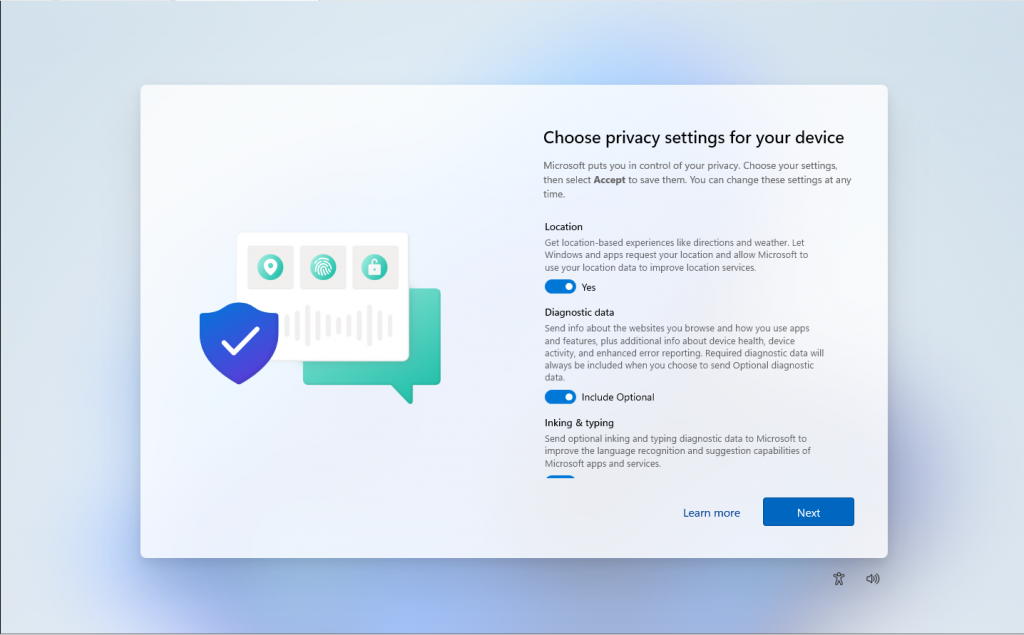
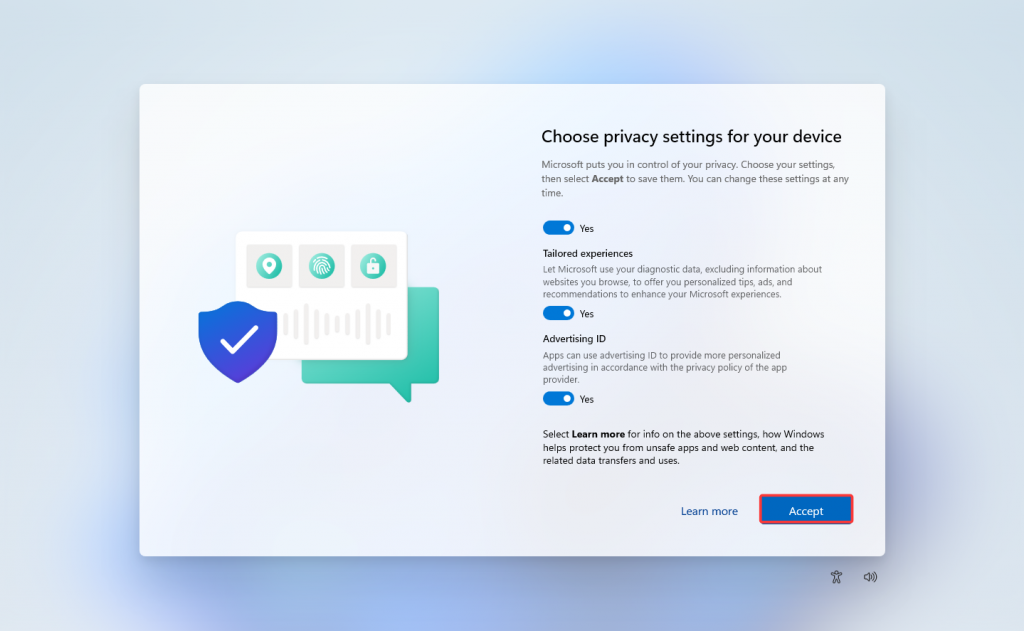
- When logging in for the first time, the system will automatically configure the account environment (approximately 1-3 minutes). During this process, a "License Agreement" window may pop up. Just click "Accept" to complete the initialization.
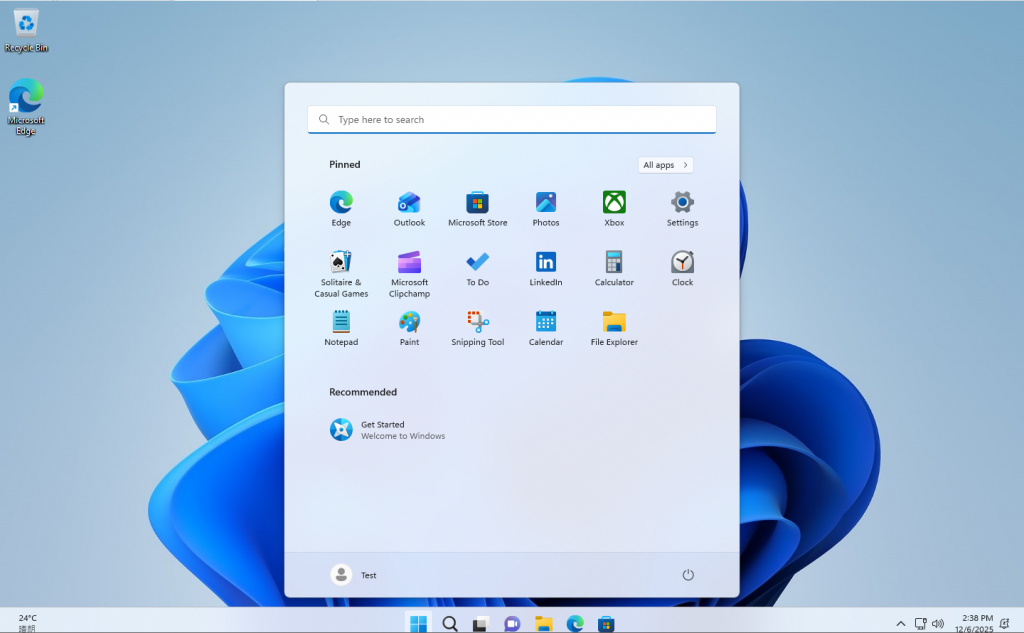
VII. If you do not wish to use the original local user (such as the built-in User), you can disable it. The following are the step-by-step instructions:
Note: If the old users have important data that needs to be saved, please copy the important personal files such as desktop, documents, and pictures from the old account (e.g. User) to the corresponding folders of the new account.
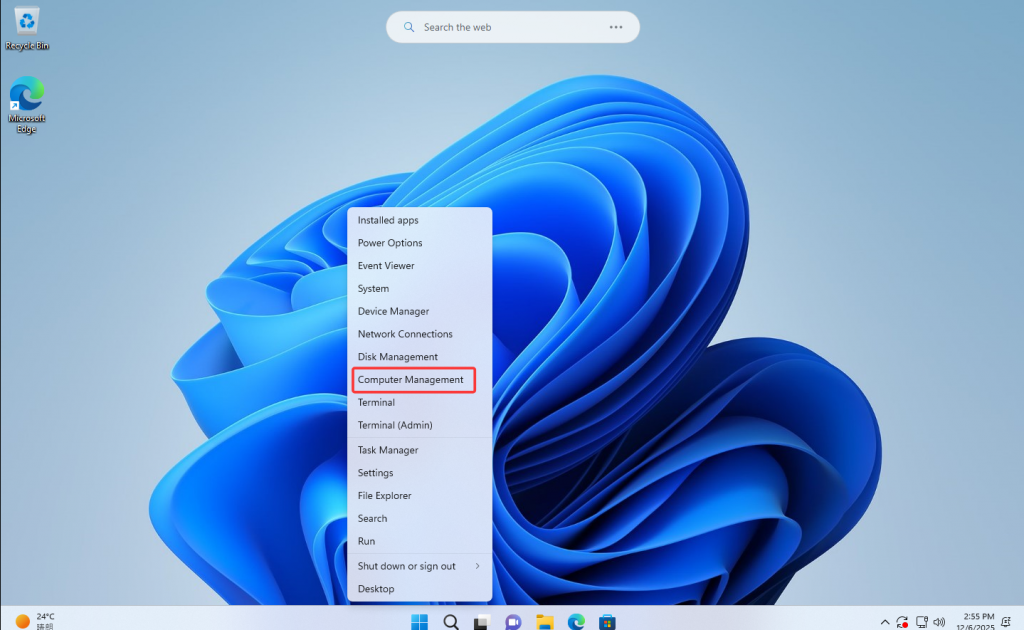
Right-click on the Start menu, then select "Computer Management".
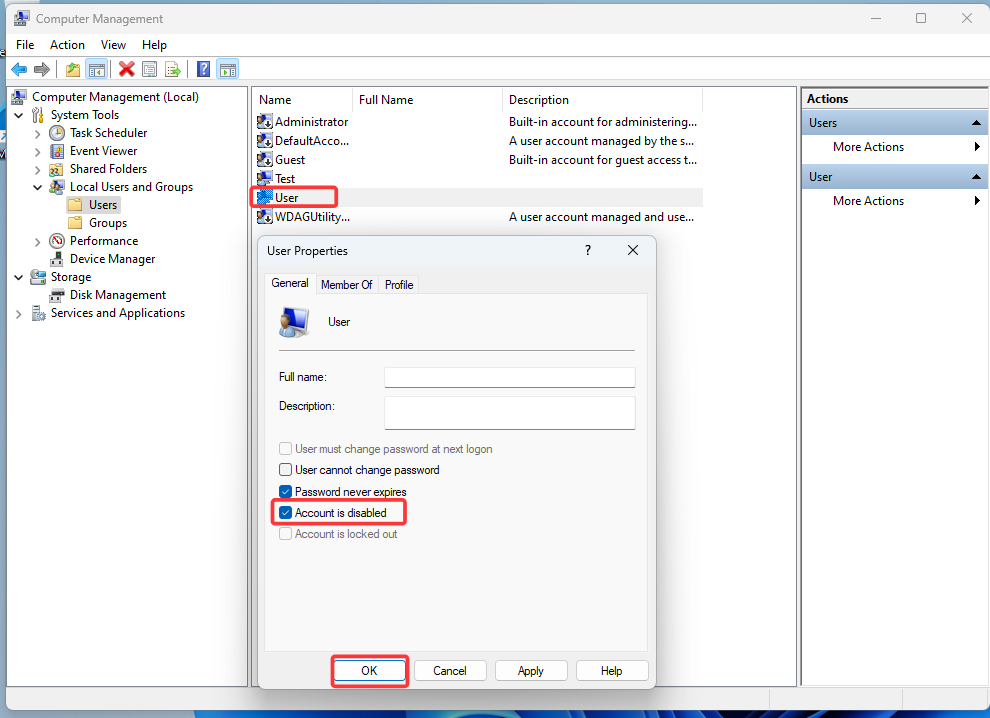
- In the "Computre Management" window, select "Local Users and Groups" > "Users"> in sequence. Double-click the local user name (such as User) that needs to be disabled, check the "Account is disabled" option and click "OK" to make it effective.
How to Use the GT-Core Ultra Series to Remotely Manage Computers via AMT
Industrial Tablet PC (Resistive Touch Screen) Screen Calibration
