
GT-Ultra Series (Ultra5-135H/Ultra7-165H) BIOS Update Guide
author: VENOEN
2026-05-14
GT-Ultra Series (Ultra5-135H / Ultra7-165H) BIOS Update Guide
1 Overview
This guide details the procedure to flash the BIOS for GT-Ultra series mini PCs. Based on the Intel platform, this device uses the EFI version of Intel FPT (Flash Programming Tool) for BIOS flashing. The entire process is completed by booting from a USB flash drive and automatically running the burning script.
1.1 Scope of Application
Applicable Models: GT-Ultra5-135H / Ultra7-165HBIOS File: HYMTLH11.binFlashing Tool: Fpt.efi (Intel Flash Programming Tool EFI Version)Boot Script: startup.nsh (UEFI Shell Auto-Execution Script)
2 File Description
The table below lists all files included in the BIOS flashing package and their functions:
| File Name | Type | Function Description |
|---|---|---|
| startup.nsh | Script | UEFI Shell auto-execution script; automatically runs flashing and restarts the device upon boot |
| Fpt.efi | Tool | Intel Flash Programming Tool, used to write BIOS firmware to the motherboard SPI Flash |
| HYMTLH11.bin | Firmware | BIOS firmware file containing complete BIOS program data |
| EFI/BOOT/ | Directory | UEFI boot files including bootx64.efi, for booting into EFI Shell from USB drive |
2.1 USB Flash Drive Directory Structure
After copying BIOS files to the USB drive, the correct directory structure is as follows:
USB Drive Root/
├── startup.nsh
├── Fpt.efi
├── HYMTLH11.bin
└── EFI/
└── BOOT/
├── bootia32.efi
└── bootx64.efi
★ Key RequirementAll files must be placed in the root directory of the USB flash drive, not in any subfolders; otherwise, startup.nsh cannot locate the BIOS file automatically.
3 Flashing Principle
This package adopts an automated UEFI Shell flashing solution with the following workflow:
- Insert the USB drive into the target motherboard, power on and press F11 to enter the BIOS Boot Menu, then select boot from USB.
- The UEFI firmware automatically loads
EFI/BOOT/bootx64.efito enter the UEFI Shell environment. - UEFI Shell automatically executes the
startup.nshscript in the root directory. - The script scans partitions fs0~fs6 to locate files, then runs
Fpt.efi -f HYMTLH11.binto flash the firmware.
Note: The script automatically traverses all possible filesystem partitions (fs0 to fs6). After finding the partition containing startup.nsh, it executes the flashing command in that partition; no manual path specification is required.
4 Preparations
4.1 Required Items
| No. | Item | Description |
|---|---|---|
| 1 | FAT32-formatted USB Flash Drive | Capacity ≥2GB; must be FAT32 format (UEFI Shell only recognizes FAT32) |
| 2 | BIOS Flashing Package Files | startup.nsh, Fpt.efi, HYMTLH11.bin, EFI folder |
| 3 | GT-Ultra Series Host | Target device for BIOS flashing; ensure normal boot into BIOS |
| 4 | Monitor & Keyboard | For viewing flashing progress and entering BIOS setup |
4.2 Pre-Flashing Precautions
⚠ Important WarningDo not power off, cut power supply or remove the USB flash drive during BIOS flashing; otherwise, the device may fail to boot normally!
5 Operating Procedures
Step 1: Create the Flashing USB Drive
- Plug the USB drive into a computer and confirm it is formatted as FAT32. If not, right-click the USB drive → Format → Select FAT32 as the file system.
- Copy all files from the BIOS folder to the root directory of the USB drive.
- After copying, verify the root directory contains: startup.nsh, Fpt.efi, HYMTLH11.bin and the EFI folder.
Tip: Do not place files in any subfolders of the USB drive; all files must be directly in the root directory, otherwise automatic flashing will fail.
| Tip: Do not place files in any subfolders of the USB drive; all files must be directly in the root directory, otherwise automatic flashing will fail.。 |
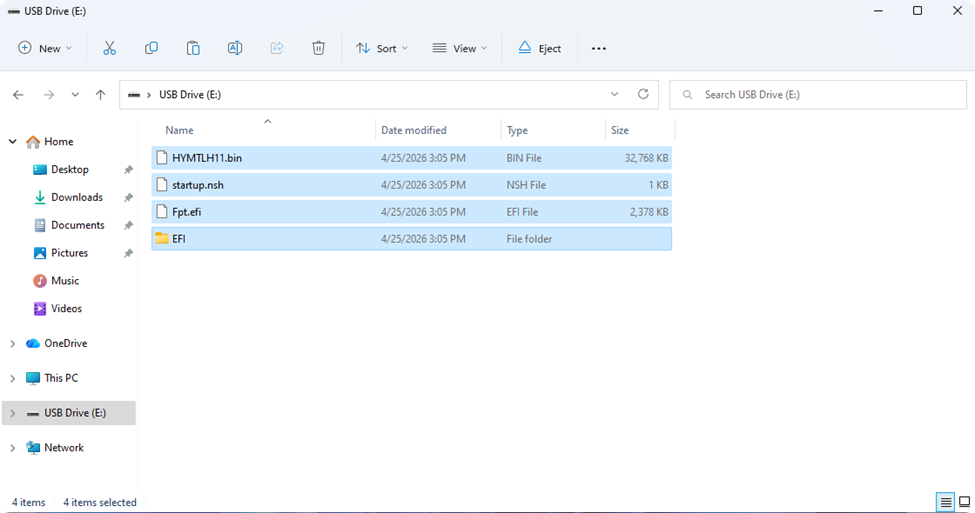
Step 2: Boot from USB Flash Drive
- Insert the prepared USB drive into the USB port of the target host.
- Repeatedly press F11 during power-on to enter the Boot Menu.
- Select the USB boot option (usually labeled with UEFI: USB) from the boot menu.
- The system will automatically enter the UEFI Shell environment and run the startup.nsh script after 5 seconds.
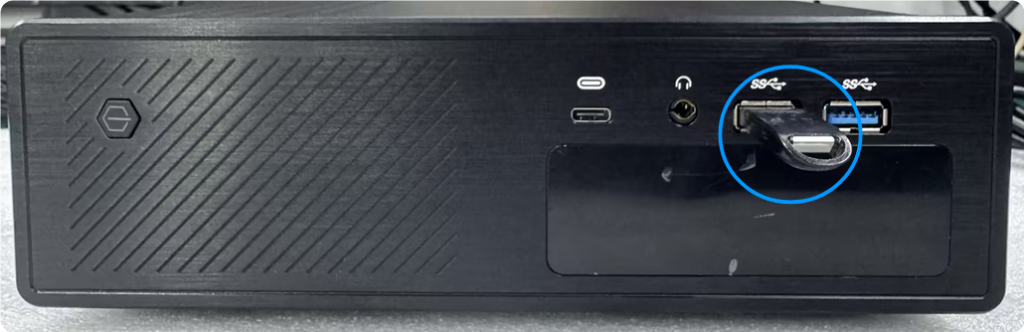
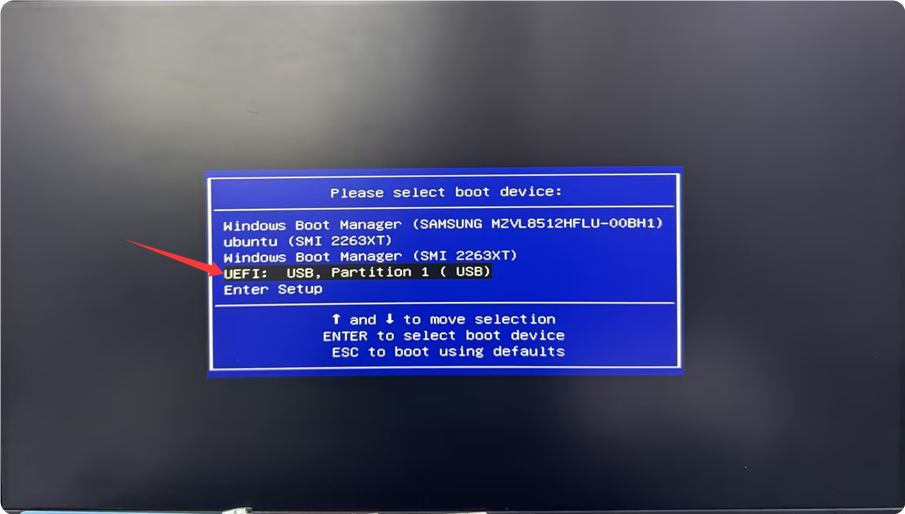
Do not power off the device, unplug the USB drive or press any keyboard keys during flashing; wait for the process to complete automatically.
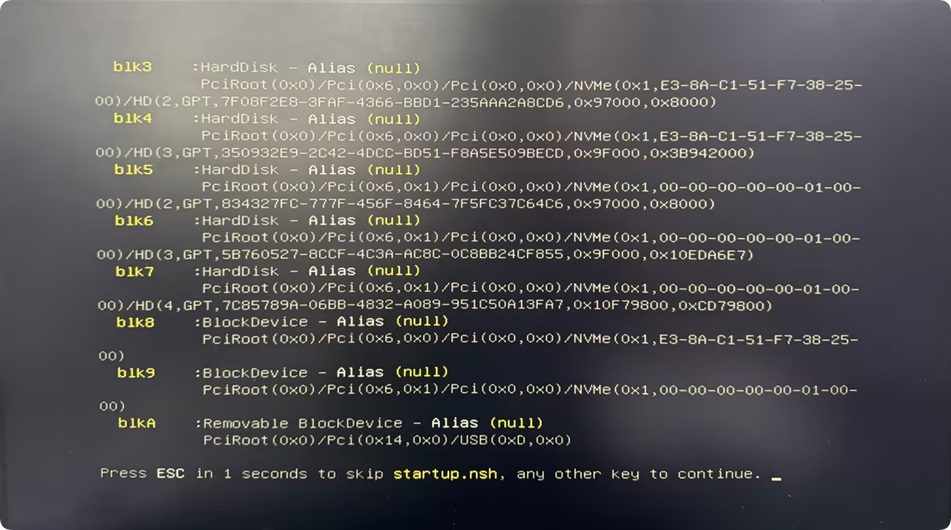
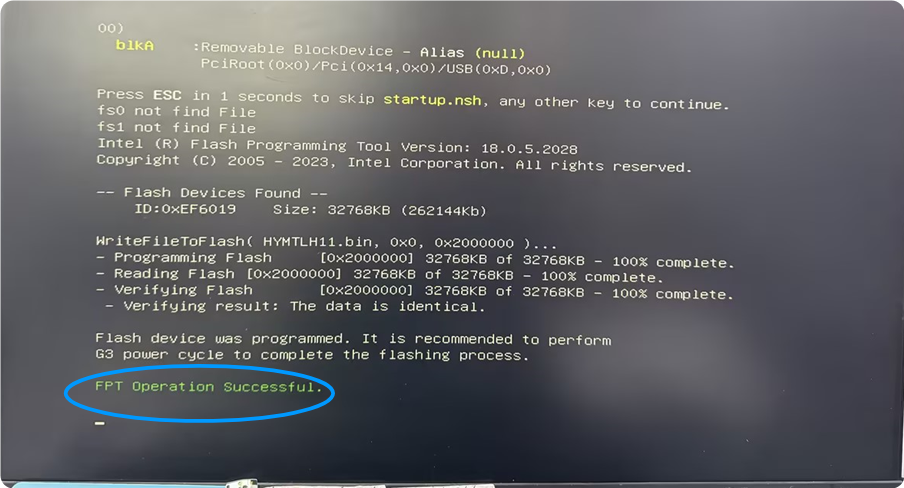
- 5.A green prompt FPT Operation Successful will appear upon completion, indicating the BIOS firmware update is successful.
- 6.Press the power button to shut down the device, remove the USB drive, then press the power button again to power on normally.
FAQ & Troubleshooting
Q1: Cannot enter UEFI Shell after inserting the USB drive
Check items:
- Confirm the USB drive is formatted as FAT32
- Confirm
bootx64.efiexists under theEFI/BOOT/directory - Disable Secure Boot in BIOS
- Try a different USB port
Q2: Entered Shell but startup.nsh does not run automatically
Check items:
- Confirm startup.nsh is located in the USB drive root directory
- Confirm the Shell is booted from the external USB drive (not the built-in Shell)
Q3: FPT reports error "Error 265: Flash Part not found" or similar errors
Cause: The BIOS firmware is incompatible with the motherboard’s SPI Flash chip, or Flash write protection is not unlocked in BIOS. Please confirm you are using the correct BIOS file.
Intel AC 7265 Wi-Fi module causes Windows 11 blue screen - Troubleshooting and solutions
H6-12th automatically powers on after power failure; BIOS configuration guide
