
M6-R7-7840HS: Guide to Enabling AC Power Loss Boot in BIOS
Auto Power-On After AC Power Loss
| Version | V1.0 |
| Product | M6-R7-7840HS (AMD Ryzen 7 7840HS) |
| BIOS Type | AMI BIOS (American Megatrends International) |
| Date | 2025-06-25 |
1. Overview
This document details how to configure the Auto Power-On (AC Power Loss Recovery) feature in BIOS for the M6-R7-7840HS mini PC (based on AMD Ryzen 7 7840HS platform). This function allows the device to automatically power on when AC power is restored after an unexpected outage, ideal for unattended operation and remote management scenarios.
Typical scenarios: Industrial control (unstable power), Server deployment (remote management), Digital signage (continuous operation)
2. Prerequisites & Preparation
Step 1 Connect Peripherals
Ensure the following devices are properly connected for BIOS operation: Keyboard (required, cannot use remote desktop), Mouse (some AMI BIOS versions support mouse), Monitor, Power Adapter.
3.Detailed Configuration Steps
Step 2 Enter BIOS Setup
Press the power button on the front panel to boot. When the AMI logo appears, immediately press the Del key repeatedly to enter BIOS Setup. Tip: Press quickly as the logo display time is brief.
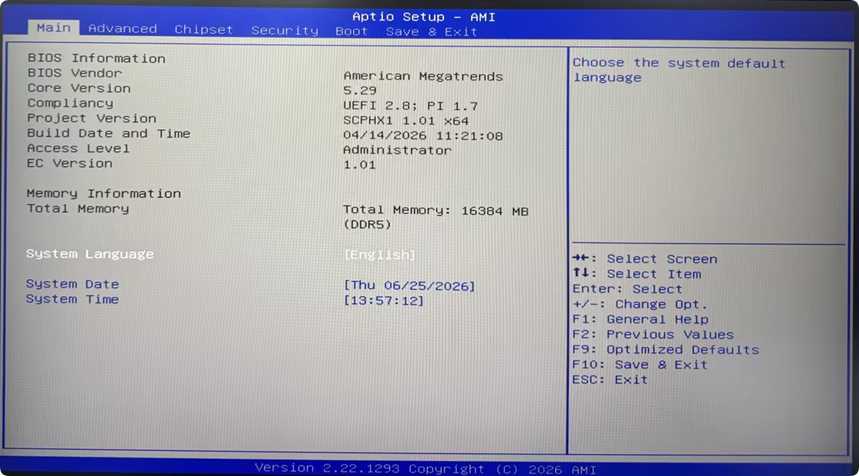
Step 3 Navigate to Advanced Menu
In BIOS Setup, use arrow keys to navigate to the "Advanced" tab in the top menu bar.
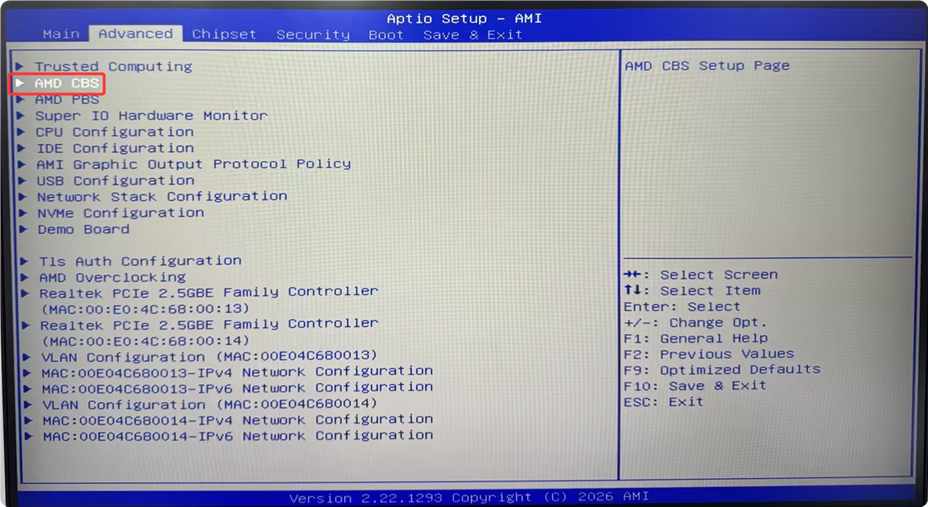
Step 4 nter AMD CBS
In the Advanced menu, locate and select "AMD CBS", press Enter to access the AMD CBS submenu containing deep chipset configuration options.
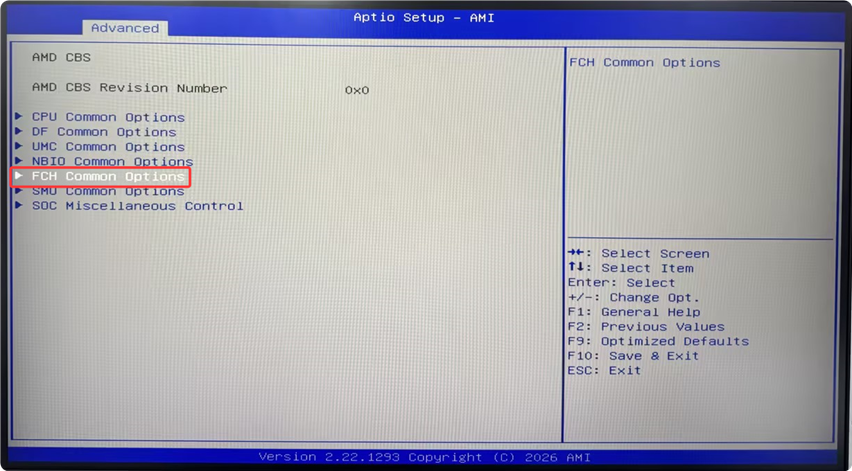
Step 5 Enter FCH Common Options
In the AMD CBS page, scroll down to "FCH Common Options" and press Enter. FCH (Fusion Controller Hub) is AMD's southbridge, managing power management and other low-level functions.
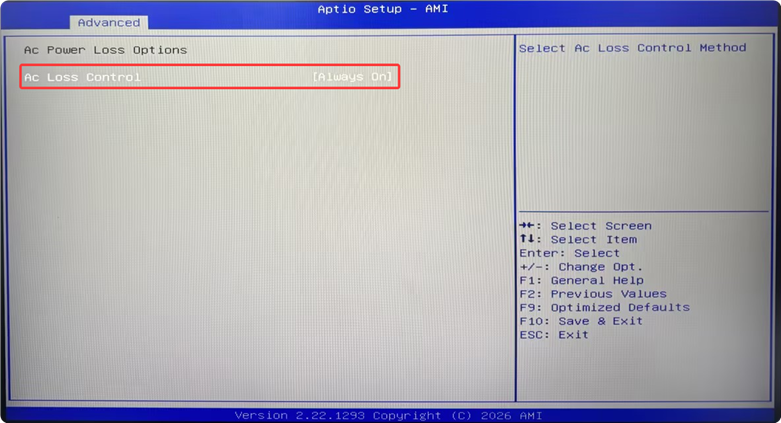
Step 6 Set AC Loss Control to "Always On" ★
Key Step: Core configuration for auto power-on
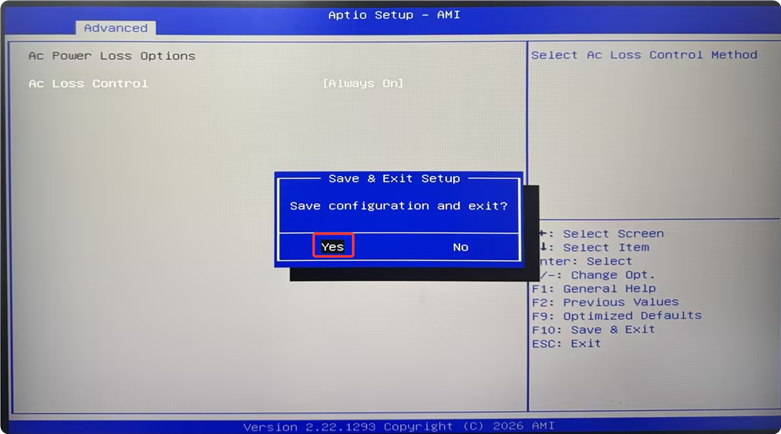
In FCH Common Options, locate "AC Power Loss Options" > "AC Loss Control". Use arrow keys to highlight, press Enter, select "Always On", and confirm. This means: when the system shuts down due to power loss, it will automatically restart once AC power is restored.
Step 7 Save and Exit
Press F10 to save. Select "Yes" in the confirmation dialog and press Enter. BIOS will save changes and reboot. Settings take effect immediately. Alternative: Exit > Save Changes and Exit from the top menu.
Steps for assembling RAID with NVME protocol SSDs
Intel AC 7265 Wi-Fi module causes Windows 11 blue screen - Troubleshooting and solutions
