
EFI Shell Steps to update BIOS in mode
Procedure for updating BIOS in EFI Shell mode
EFI Shell is a UEFI-based (Unified Extensible Firmware Interface) command line environment that can be used to perform a variety of system administration and configuration tasks, including BIOS brushing.
Preparation work:
Blank USB flash drive
BIOS files and auxiliary files (Obtain BIOS files from the hardware vendor)
Windows PC
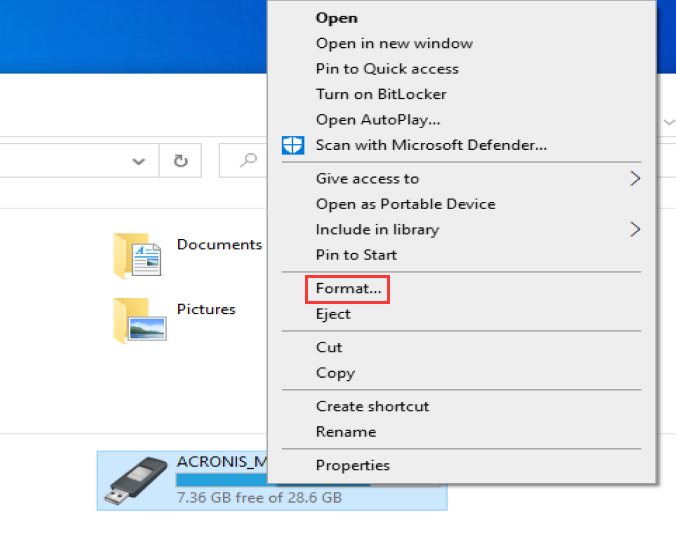
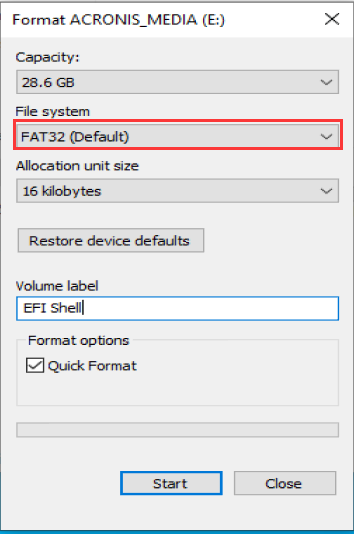
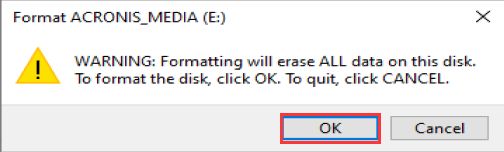
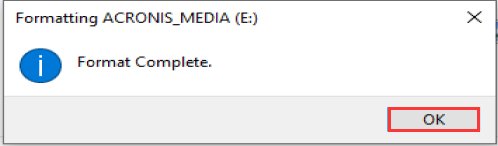
Step 1: Insert the USB flash drive into the computer, make sure that the computer has recognized the USB flash drive, right-click the USB flash drive, select Format>File system, select FAT32 format >Start>OK>OK;
PS: Ensure that you have backed up all data on the USB flash drive before performing this operation. This operation will delete all data on the USB flash drive!
- Step 2: Decompress the BIOS folder and copy all files in the folder to the root directory of the USB flash drive.
What is the root directory of USB flash drive?
The root directory of the USB flash drive refers to the top-level directory of the storage area of the USB flash drive.
When you open the USB flash drive, the first thing you see is the root directory of the USB flash drive. In the root directory, you can directly create and store files and folders.
For example, you insert the USB flash drive into the computer, open "My computer", double-click the drive letter of the USB flash drive to enter, and the root directory of the USB flash drive is displayed.
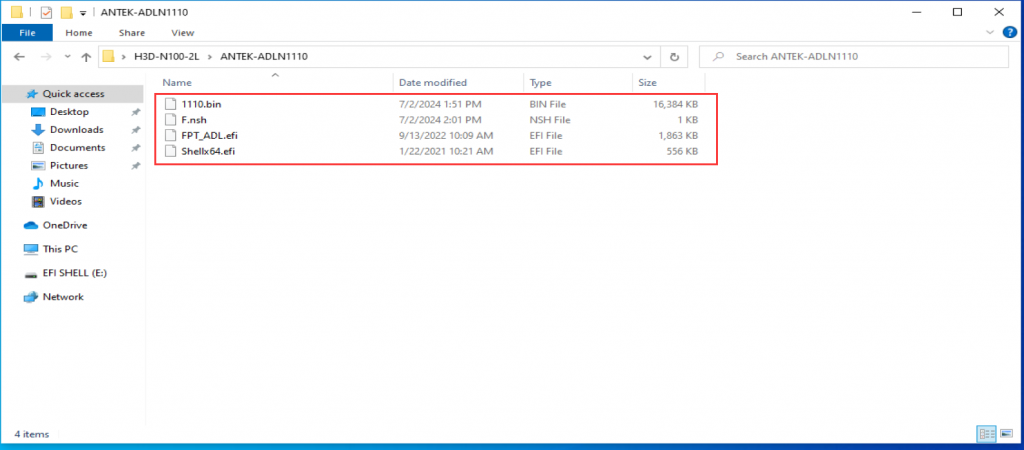
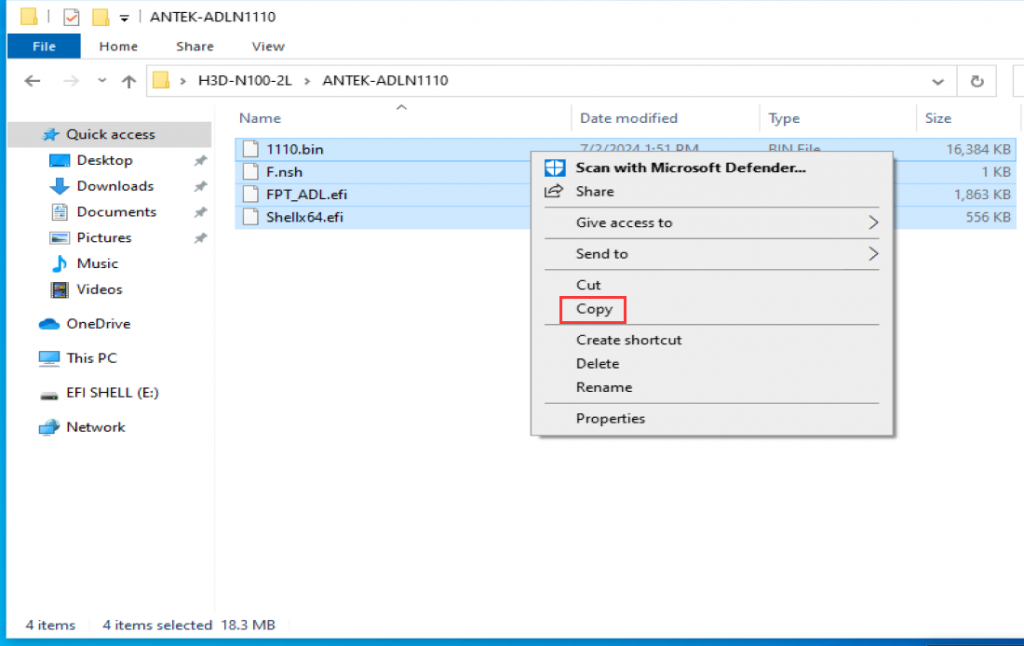
- Select all files in the folder and copy them.
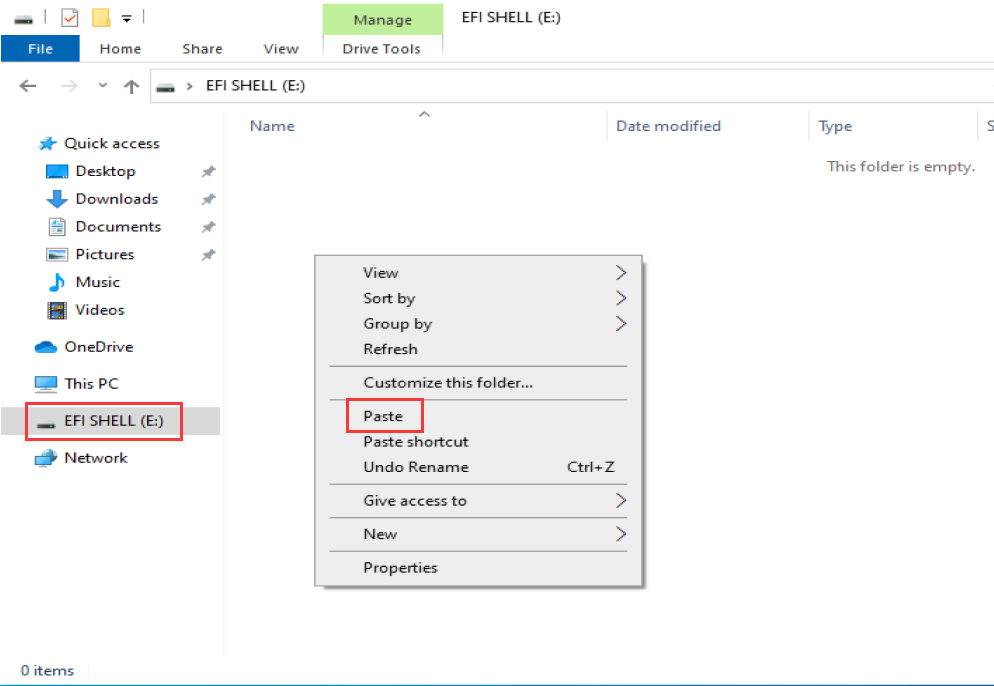
- Paste to the root directory of the USB flash drive;
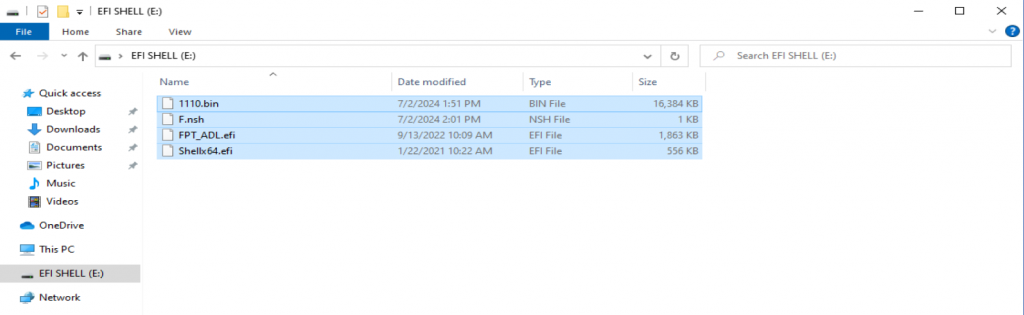
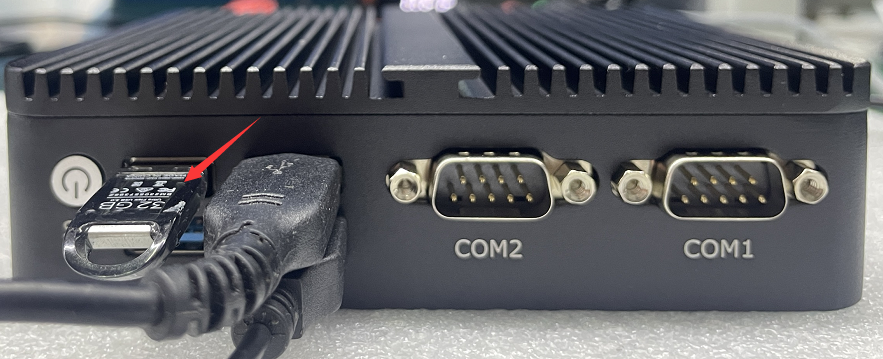
- Step 3: Insert the USB flash drive into the USB port of the computer that requires the BIOS;
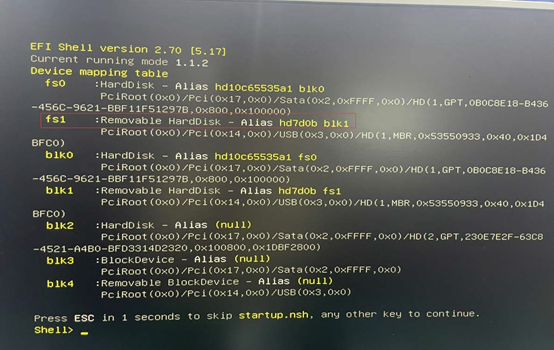
- Step 4: Press the SW button to start the system, press the Del key on the keyboard to go to BIOS Setup, and choose Save & Exit>Launch EFI Shell from filesystem device> Enter the EFI Shell of the USB flash drive. In the Device mapping table, obtain the drive name in front of Removable HardDisk. The drive name may be fs0/fs1/fs2.
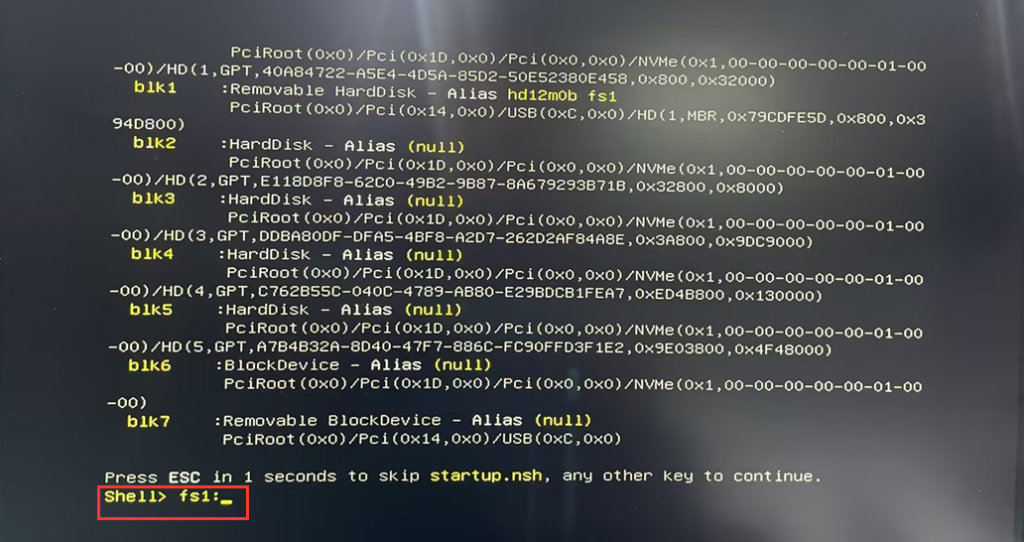
- Enter fs1 in Shell> and enter to confirm;
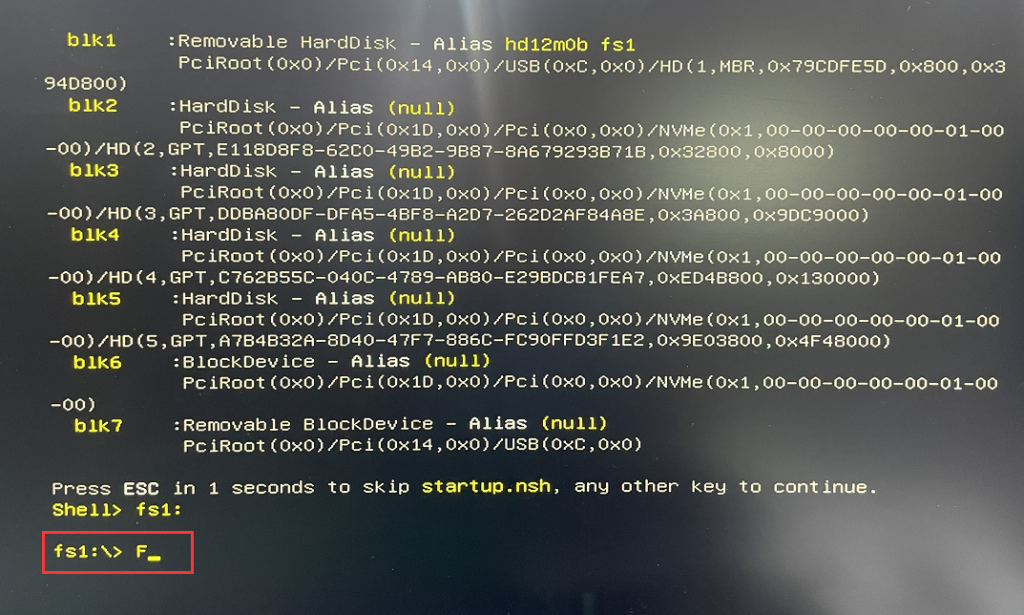
- Enter F in fs1:\> and press Enter to execute the BIOS update command;
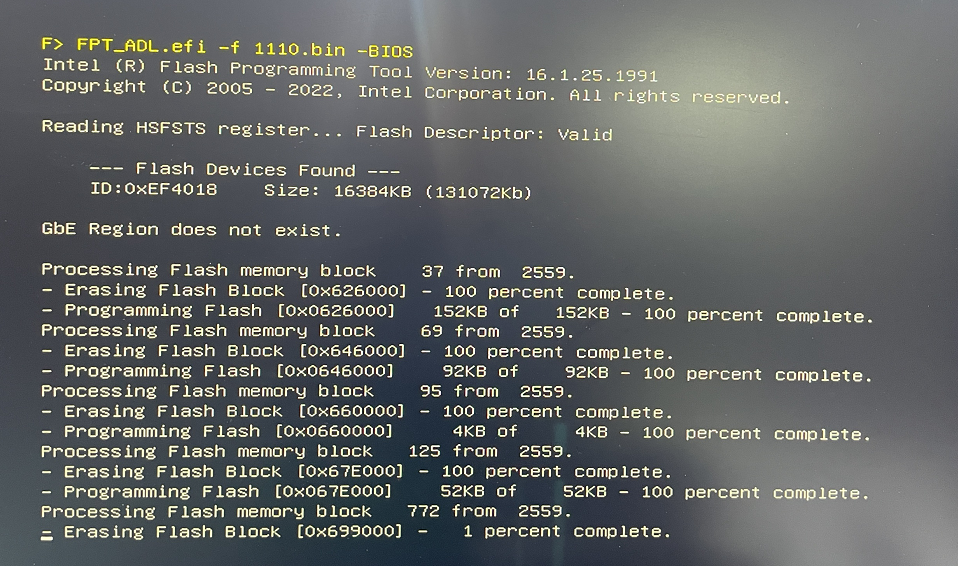
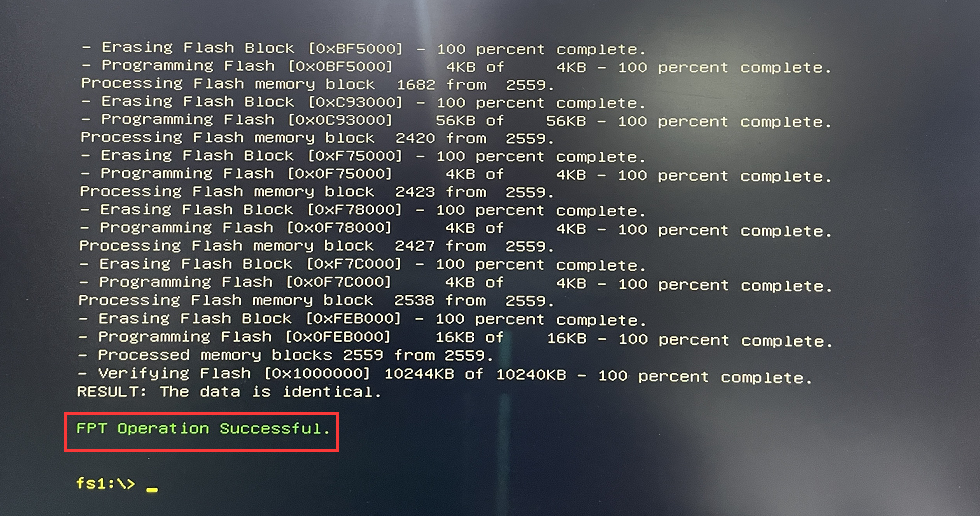
- Step 5: Wait until the update is complete. If the message "FPT Operation Successful." is displayed, the update is successful.
- PS: When refreshing the BIOS, note the following:
1. Do not interrupt the power supply or operation, otherwise the computer may not start.
2. Strictly follow the instructions and steps provided by the manufacturer.
3. When you obtain the BIOS file, provide the current model and a screenshot of the Main page of the BIOS to the customer support service.
Step 6: After the update is successful, press the SW button to power off the device and unplug the power cable. Connect the power cable again and press the SW button to power on the device.
Method for querying motherboard SN serial number and UUID number on Windows 10 and Ubuntu systems
Delete unnecessary local user accounts under Windows 11 system
