
Hard disk expansion and partitioning steps for Windows systems
author: VENOEN
2025-09-06
- 1. Use the Windows Disk Management function to divide the C drive into 2 or more partitions (Shrink Volume). This partition method will not affect the C drive data. In this article, the C drive is divided into 2 areas.
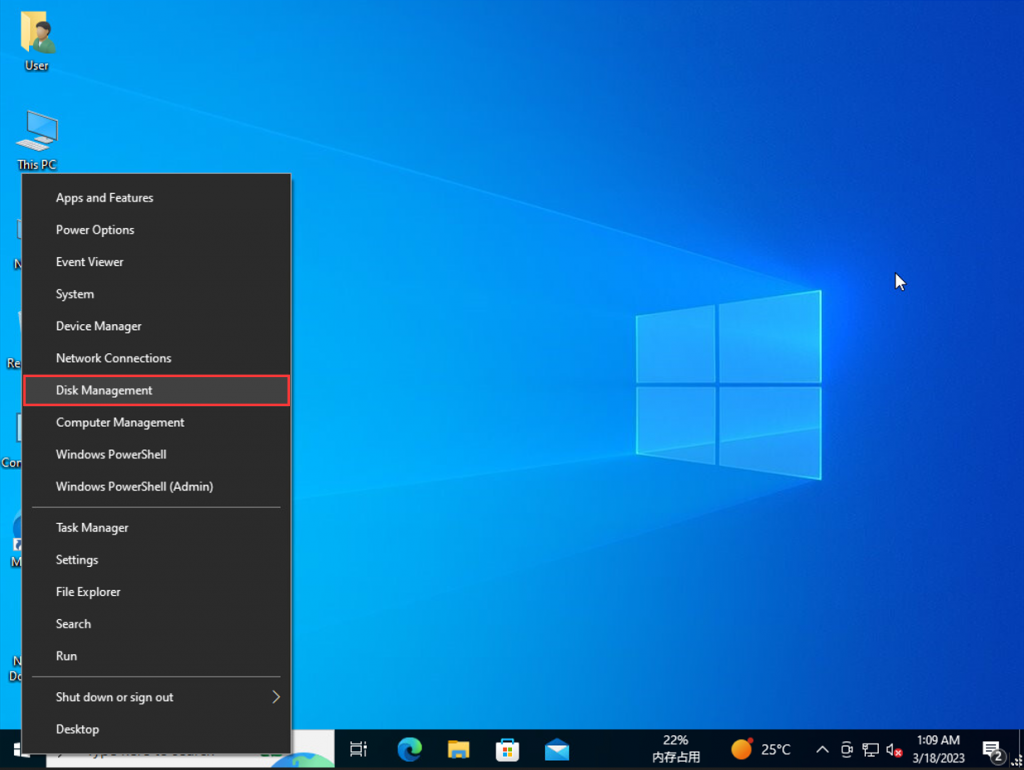
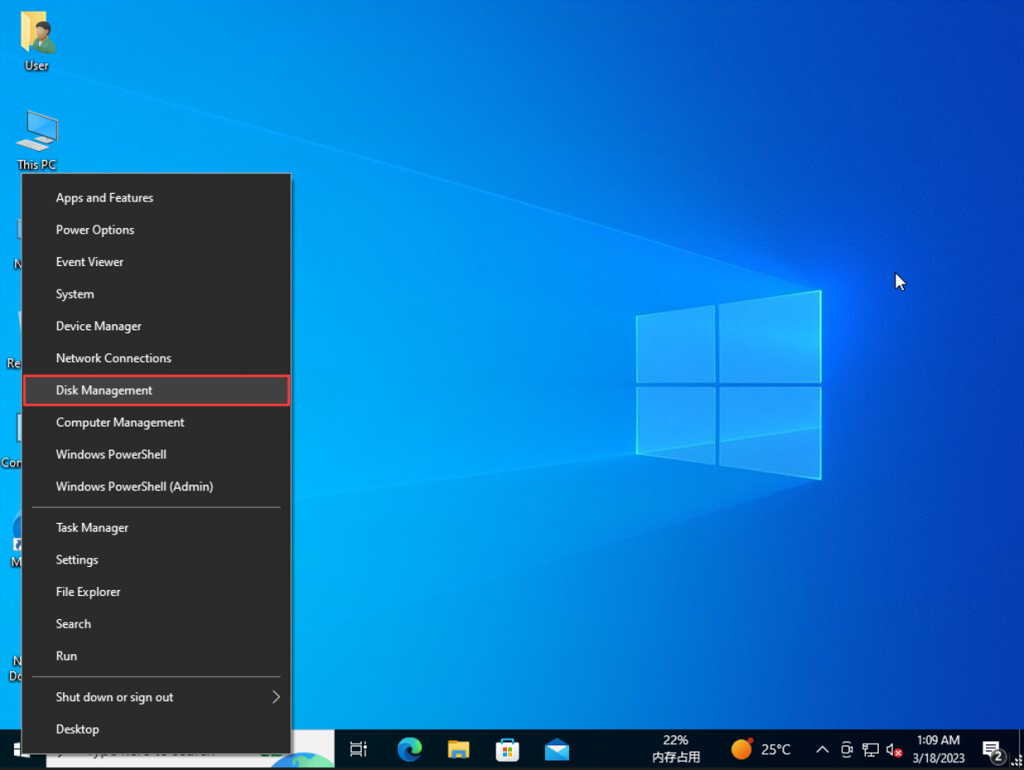
1-1. Right-click the start menu in the lower left corner of the desktop and select Disk Management.
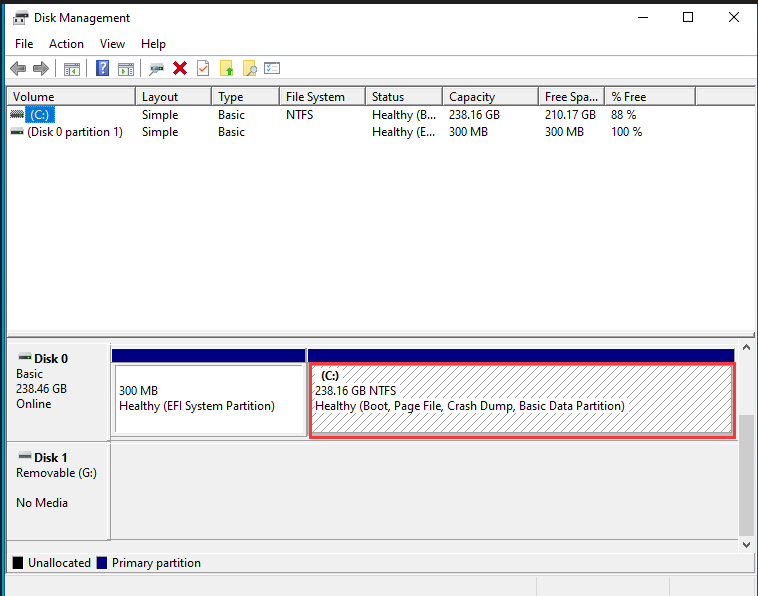
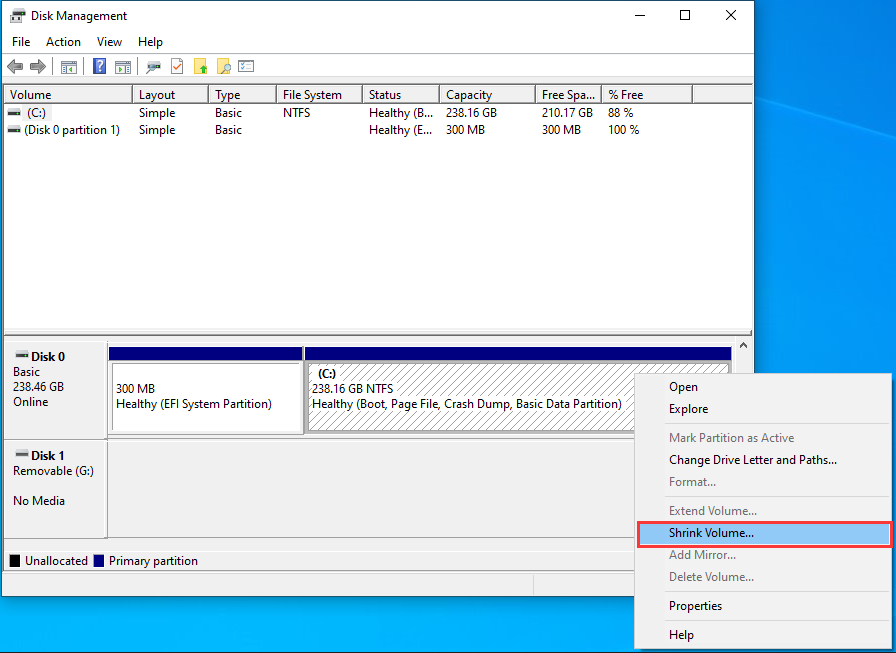
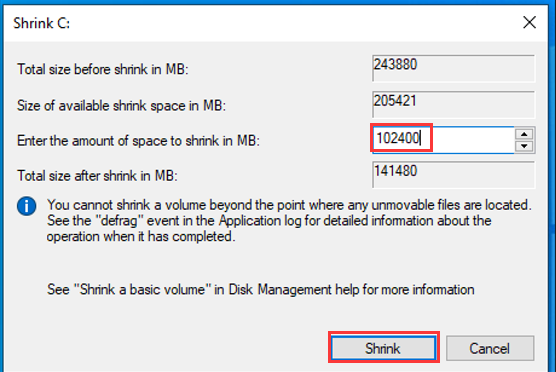
- 1-2. Right-click the C drive and select Shrink Volume. In "Enter the amount of space to shrink in MB:" fill in the amount of space to be compressed according to your needs. If the D drive requires 100G, fill in 102400 (100*1024=102400). Then click Shrink.
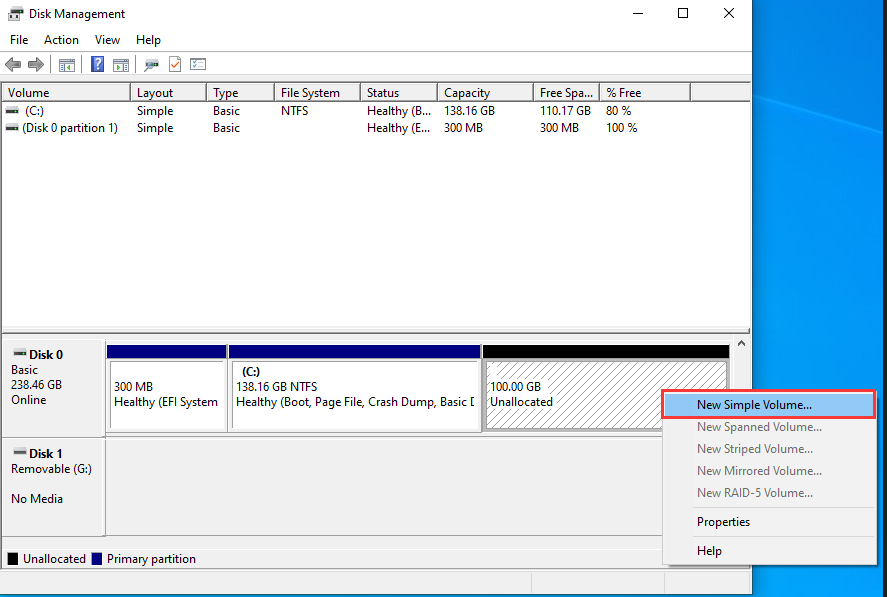
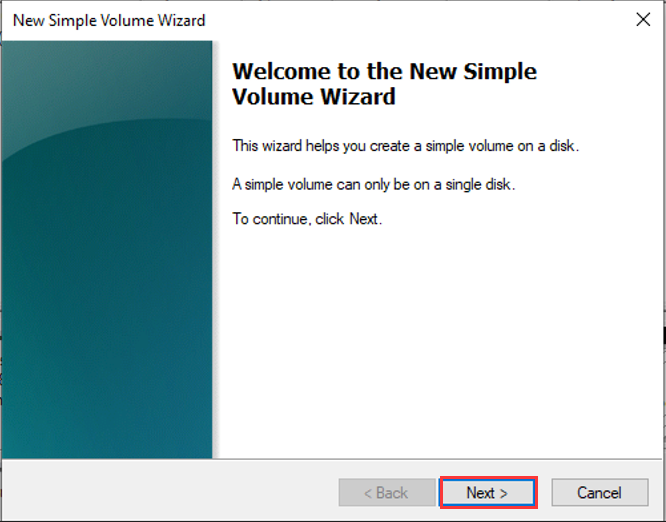
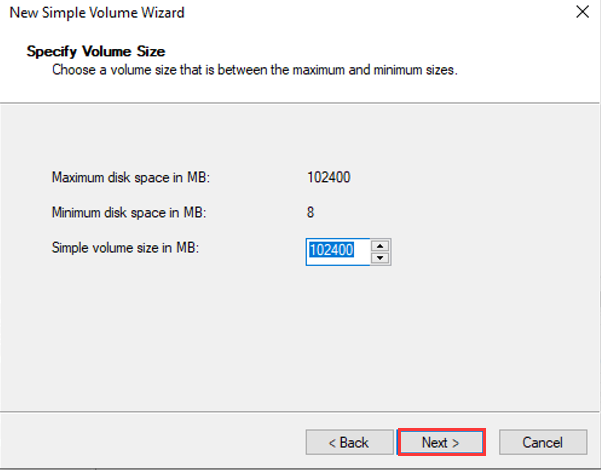
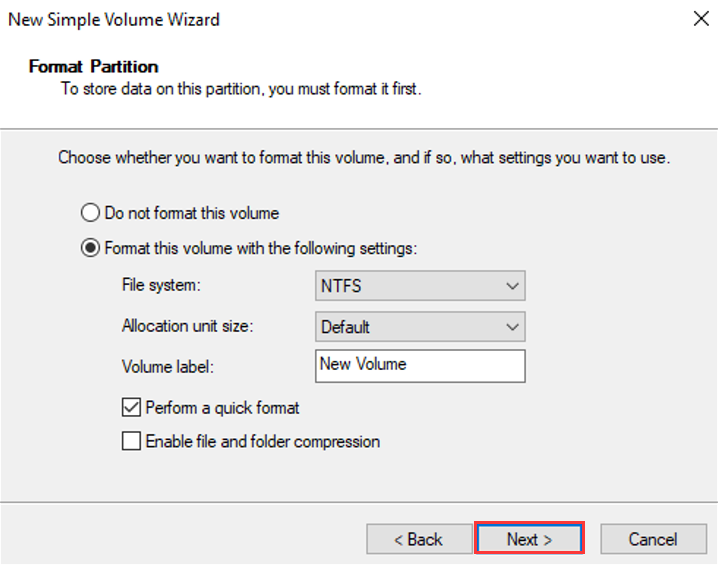
- 1-3. After Shrink, you will find an extra Unallocated (black partition). Right-click it and select "New Simple volume..." to open the New Simple Volume Wizard. Keep clicking "Next" and select "Simple volume size in MB". :"Fill in the size of the disk to be created (if you want to create multiple partitions, you can fill in a value less than 102400 here. For example, fill in 51200 to divide the D drive into 50G capacity, and the remaining 51200 can be used to divide the E drive) , continue to click "Next".
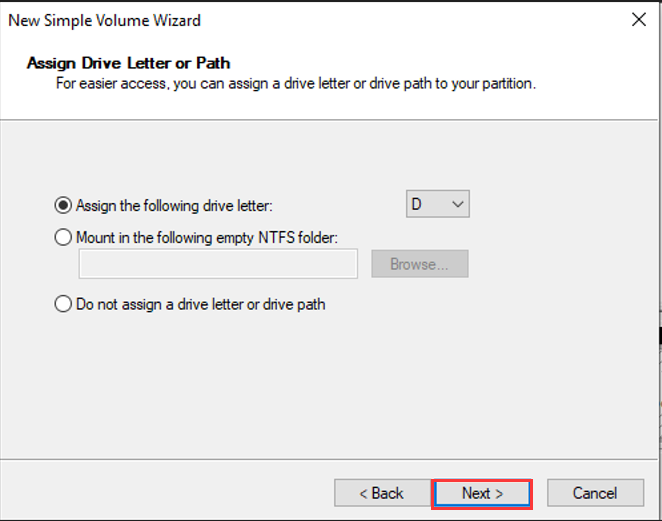
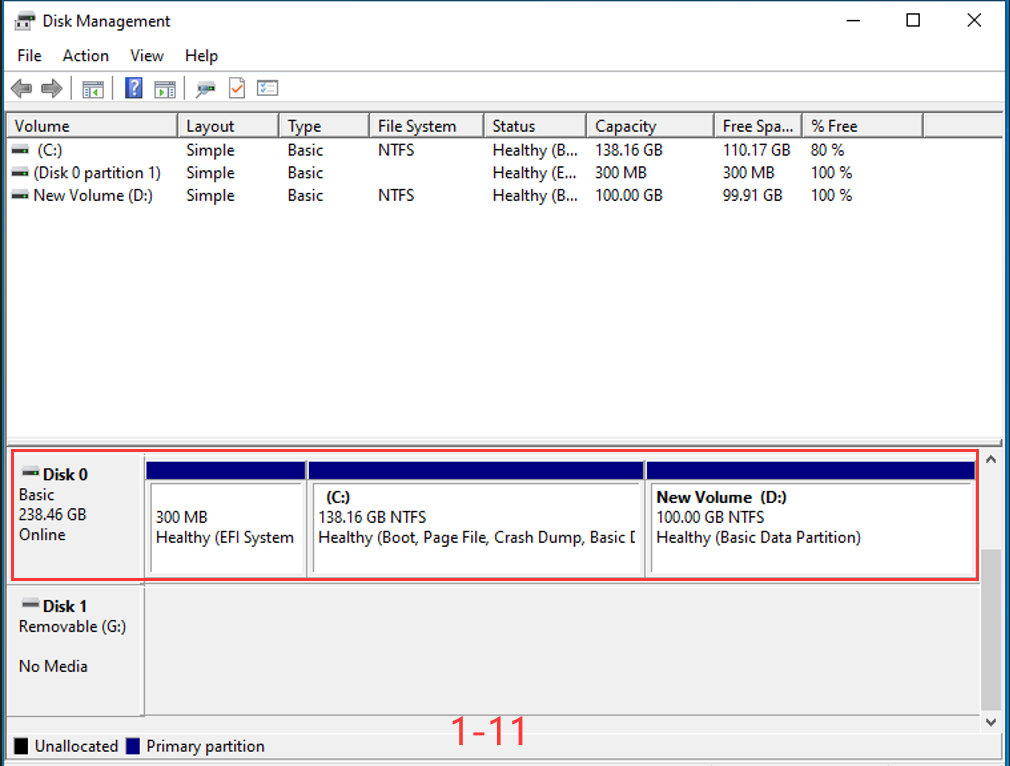
- As shown in Figure 1-11 below, the partitioning of disk D is completed.
- 2. Delete redundant partitions and merge all partition capacities into C drive. Note: This operation will delete the data in all drive letters except C drive. Please back up the data before operation!
2-1. Right-click the start menu in the lower left corner of the desktop and select Disk Management.
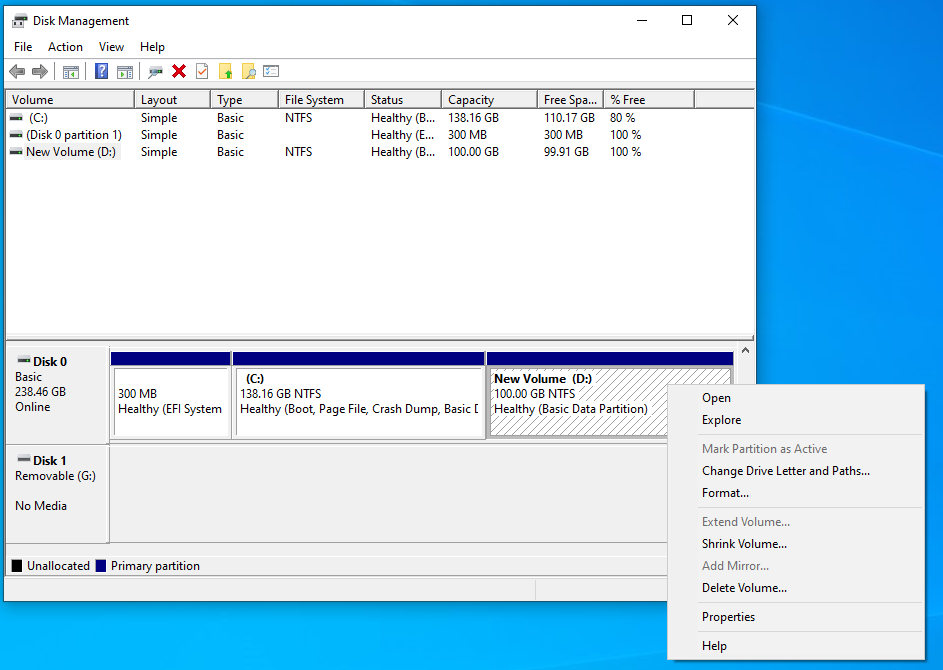
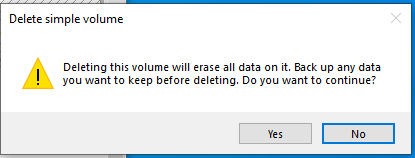
- 2-2. Right-click the disk that needs to be deleted and select "Delete Volume..." >Yes. After confirming the deletion, you will find an extra Unallocated (black partition).
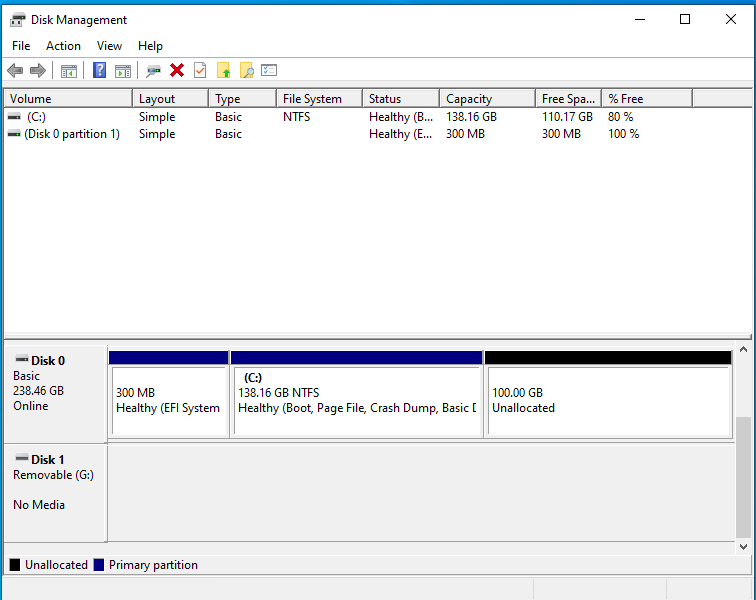
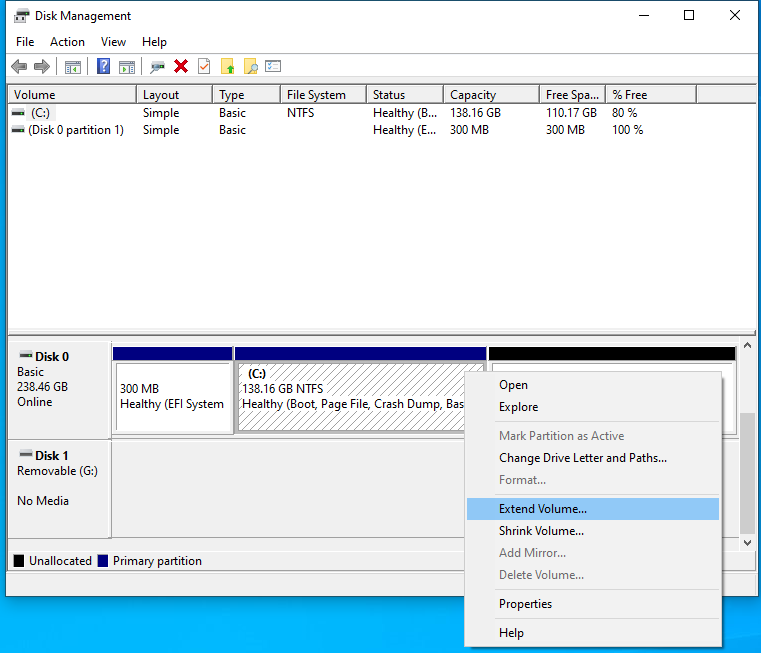
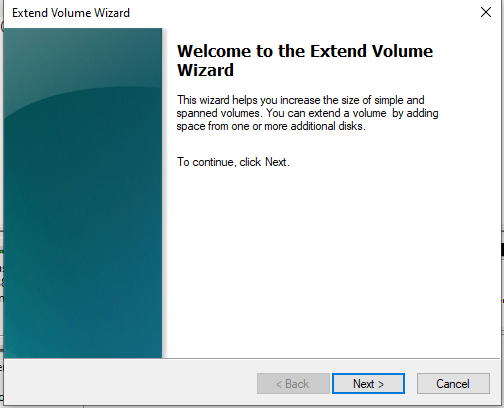
- 2-3. Right-click the C drive letter, select "Extend Volume...", and keep clicking "Next"
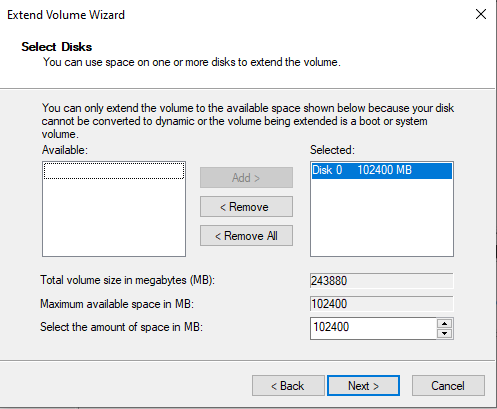
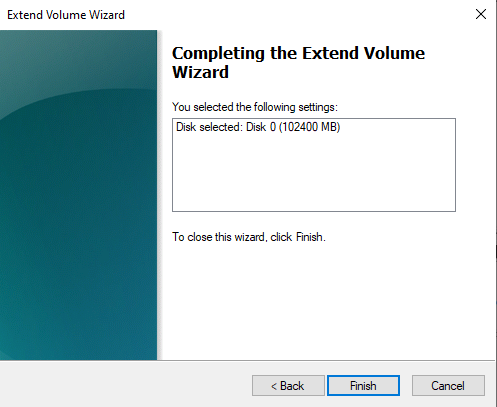
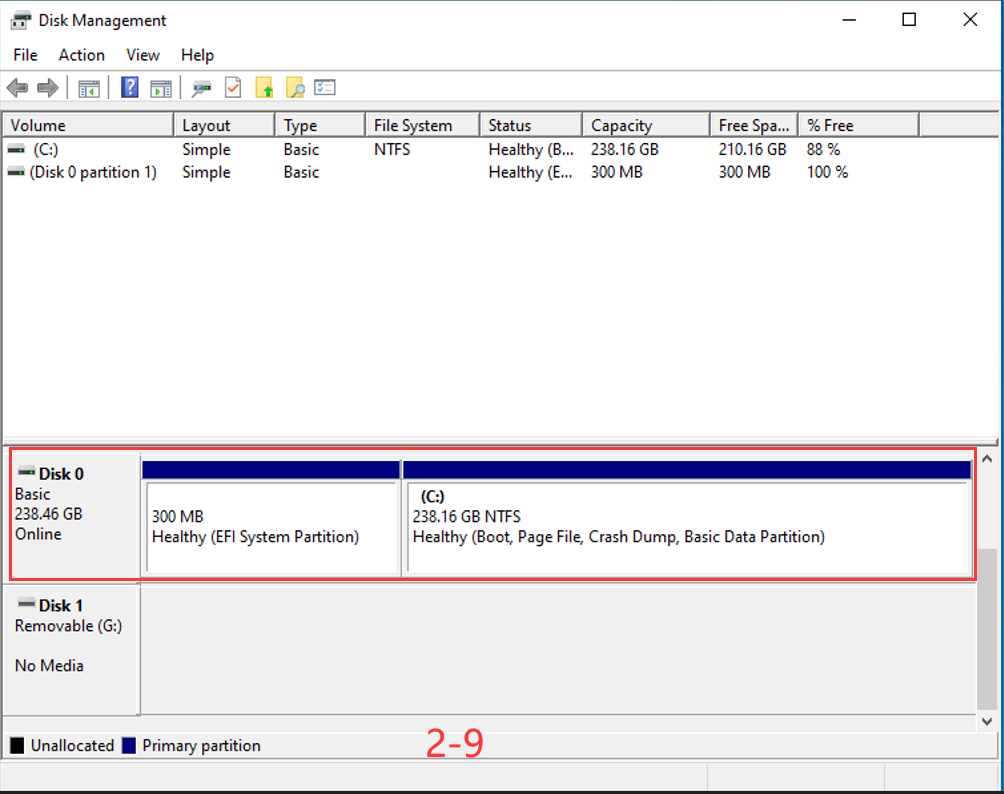
- 2-4. As shown in Figure 2-9 below, the expansion of drive C is completed.
Debian11 Installation Guide
Restoring factory settings on Windows 10 systems
