
Installation Guide for opnsense24.1
author: VENOEN
2025-07-29
- Prepare tools:
Opnsense 24.1 image file;
Win32 disk image Image writing tool;
4Gb or more capacity U disk;
Mini PC with more than 2 network ports;
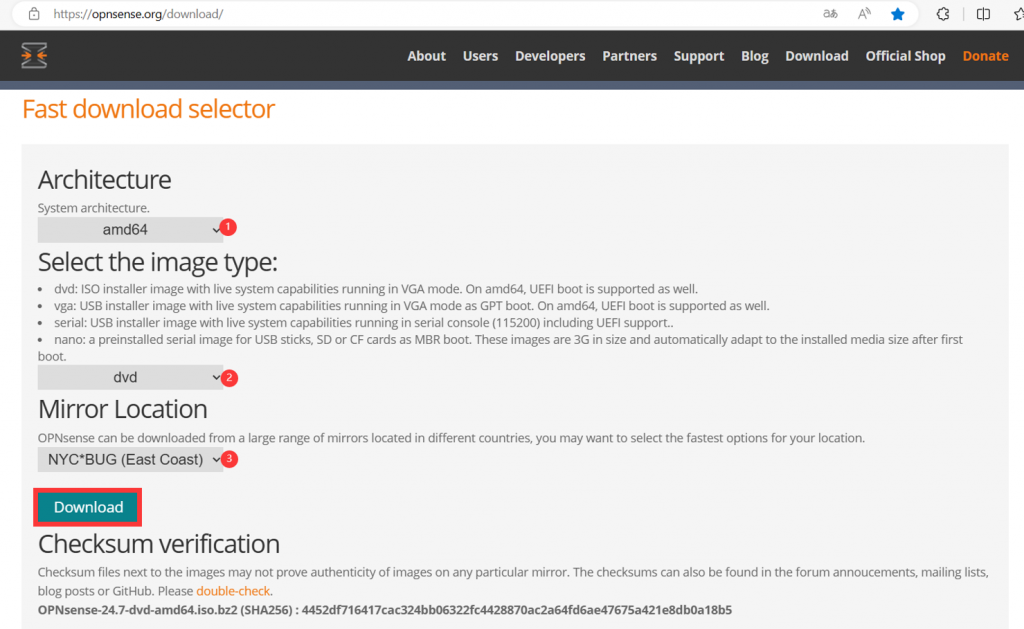
- 1. Download Opnsense 24.1 image file, download address://opnsense.org/download/ore
Architecture Select amd64

	Select the image type Select dvd

	Keep the default Mirror Location

	Click Download to download the image. By default, the OPNsense image is compressed in.bz2 format. Therefore, after downloading and verifying the file information, decompress the image ISO file.
- 2. Download and install the Win32 disk image, download address: //win32diskimager.org/
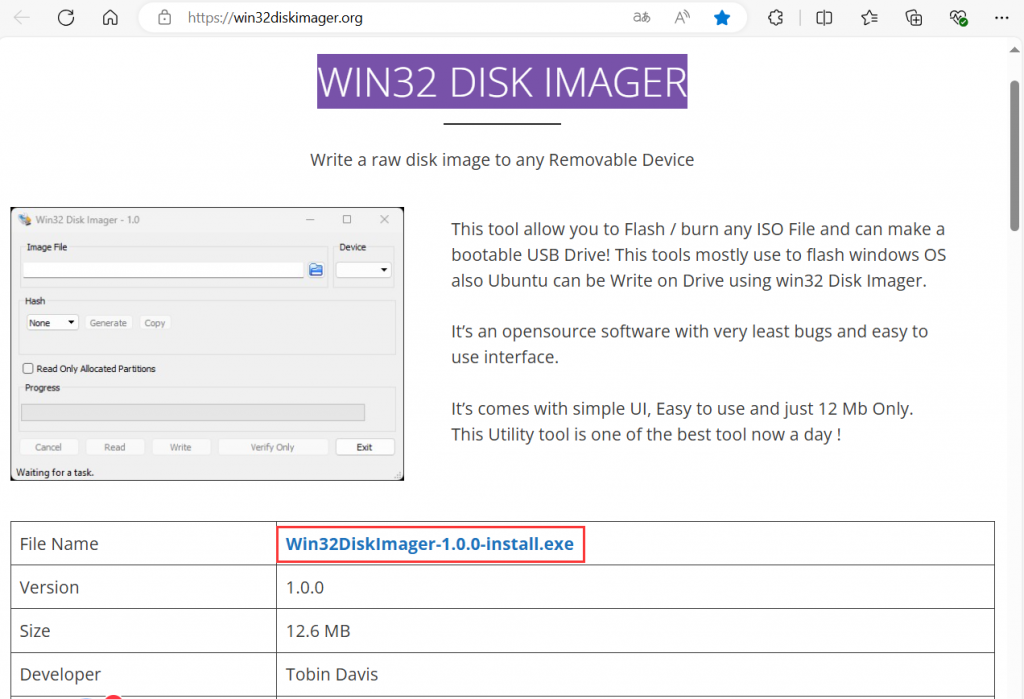
- 3. Insert the USB flash drive into the computer, and use Win32 disk image to write the Opnsense 24.1 image file to the USB flash drive;
- 4. Insert the USB flash drive that has been successfully written into the USB port on which the system needs to be installed. Press F7 or F11 to Enter the Boot menu.
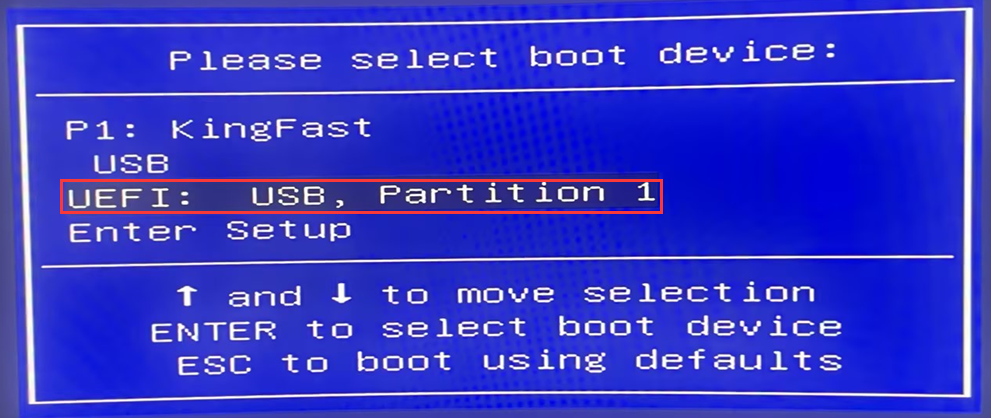
- 5. Configure the import
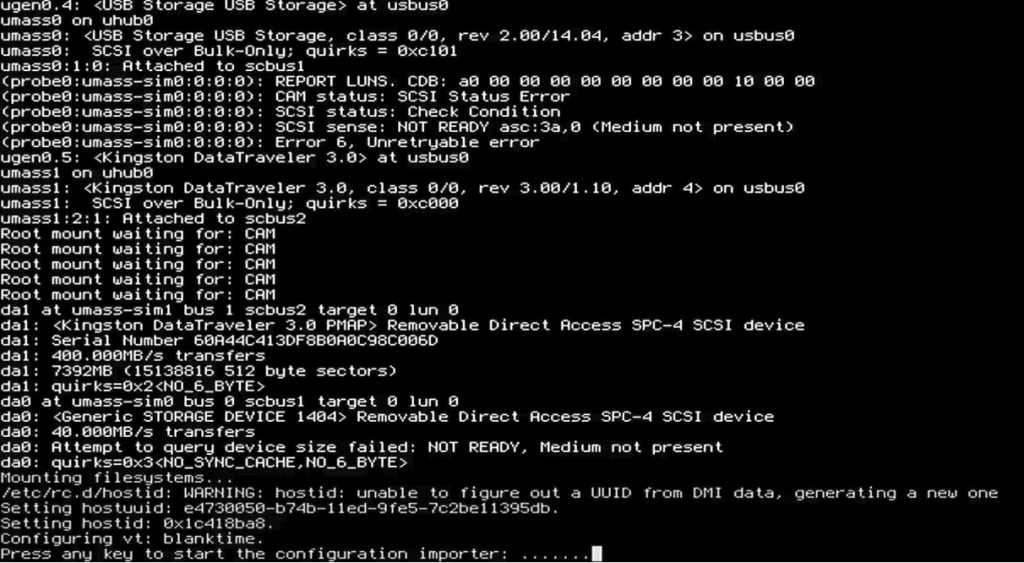
Enter the boot run phase, the system will appear prompt, the information is as follows:
Press any key to start the configuration importer: …
It indicates that the system is waiting for the user to decide whether to import the configuration. In normal cases, you can ignore it.
- 5. Assign network ports
The system will continue to run the code, and the prompt will appear again with the following message:
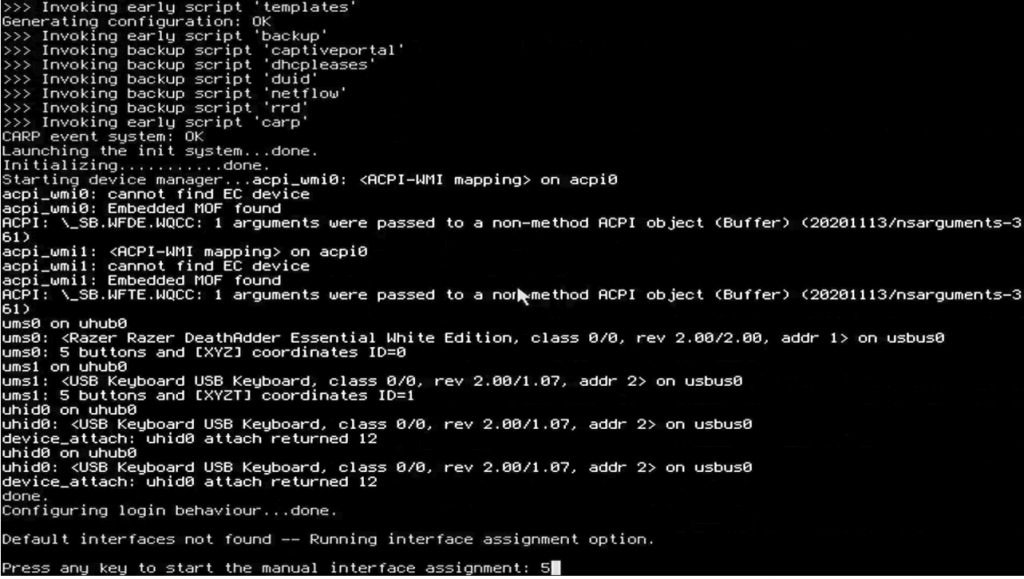
Press any key to start the manual interface assignment: 5
Indicates that the system is waiting for the user to decide whether to manually assign network ports. The countdown time is 5 seconds.
Before the countdown ends, press any key on the keyboard (such as the space bar or Enter key) to enter the network port assignment process.
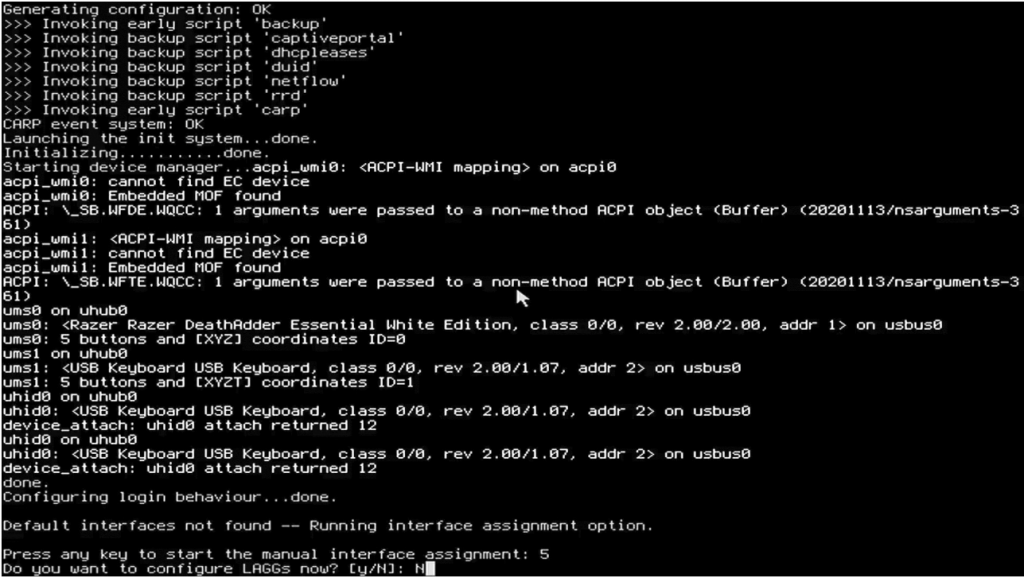
- The system prompts you whether to configure LAGGs. Enter N and press Enter:
Do you want to configure LAGGs now? [y/N]: N
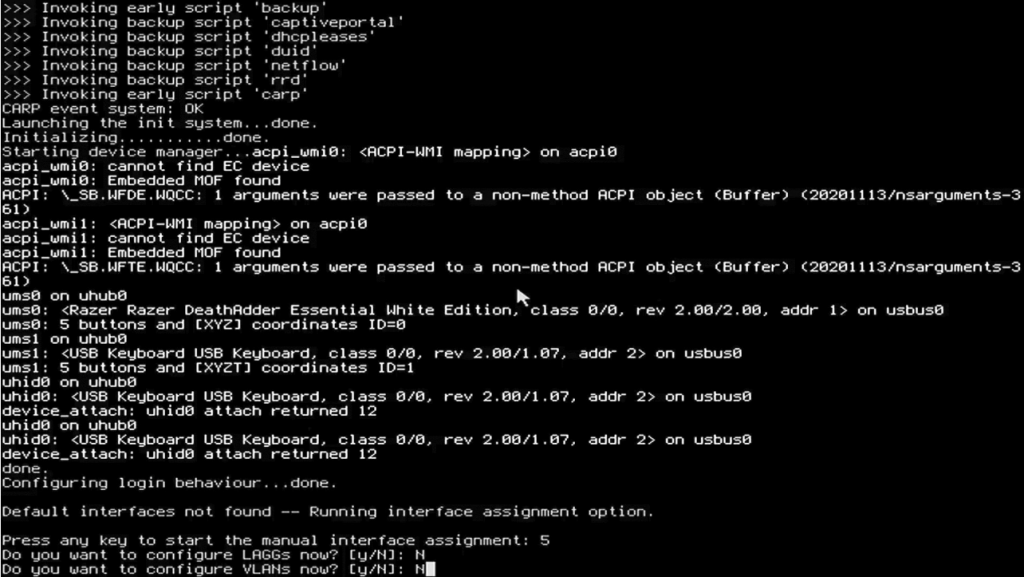
- If the system prompts you to configure VLANs, enter N and press enter.
- Do you want to configure VLANs now? [y/N]: N
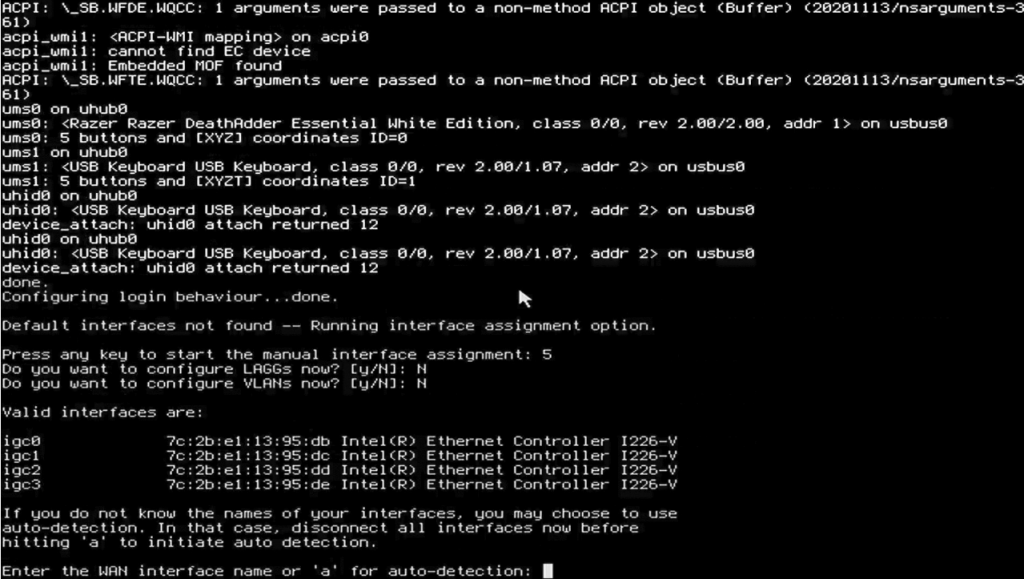
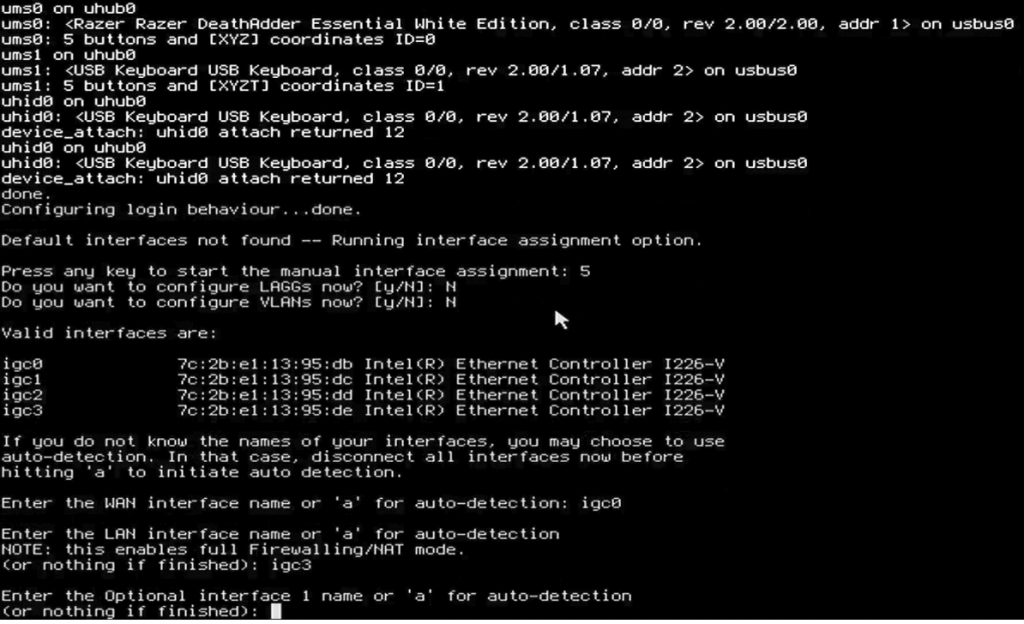
- 6. The network port list is displayed with the following information:
Indicates that the system waits for the user to enter the network port name corresponding to the WAN, or enters a for automatic detection.
In this case, select the network port corresponding to the WAN based on the information in the Valid interface are list.
Note: The network port names displayed here vary according to the hardware type of the network adapter. You are advised to distinguish MAC addresses in the MAC address list corresponding to the RJ45 network adapter on the mainboard.
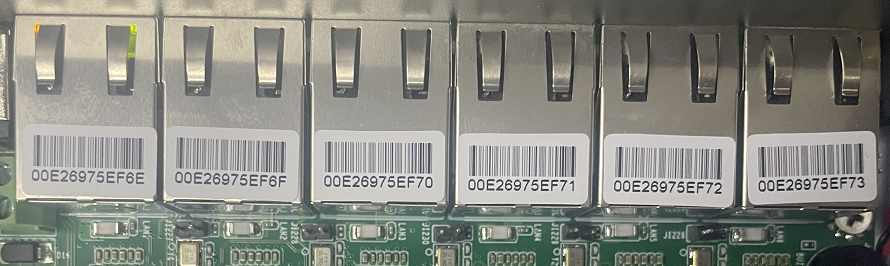
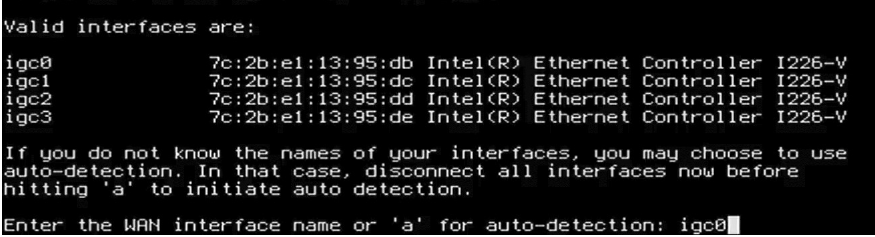
- In this article, the first network port igc0 is assigned as the WAN port to demonstrate:
After the WAN port is assigned, the system displays the following information:- Enter the LAN interface name or 'a' for auto-detection
NOTE: this enables full Firewalling/NAT mode.
(or nothing if finished):
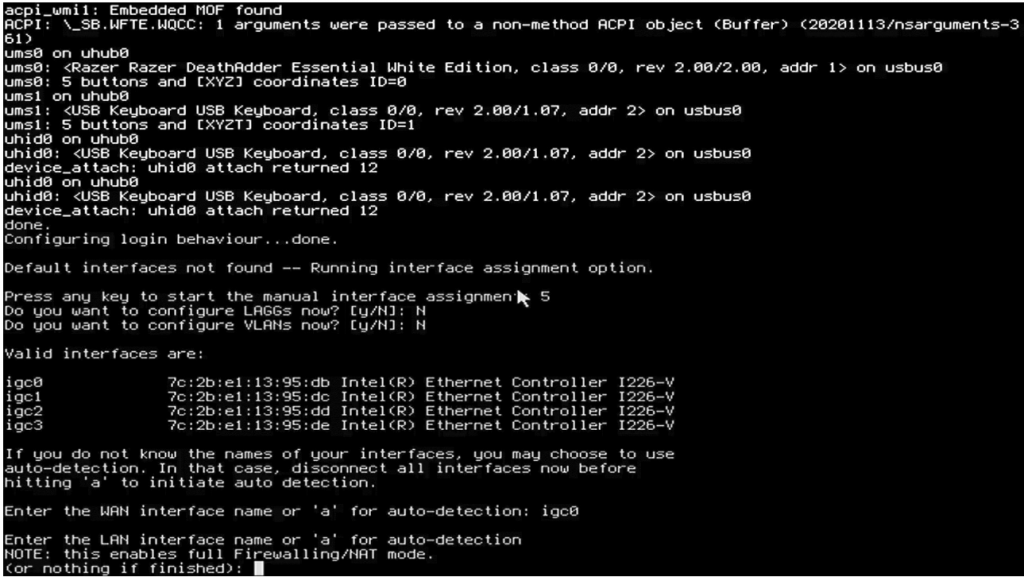
- Indicates that the system waits for the user to enter the network port name corresponding to the LAN, or enters a for automatic detection.
And once a LAN is assigned, OPNsense will activate firewall and NAT-related features by default.
If the user does not want to specify any LAN, leave it blank.
To ensure that the sequence of OPNsense network ports is consistent with that of physical network ports, select the last network port.
The last network port is igc3 and is assigned as a LAN port.
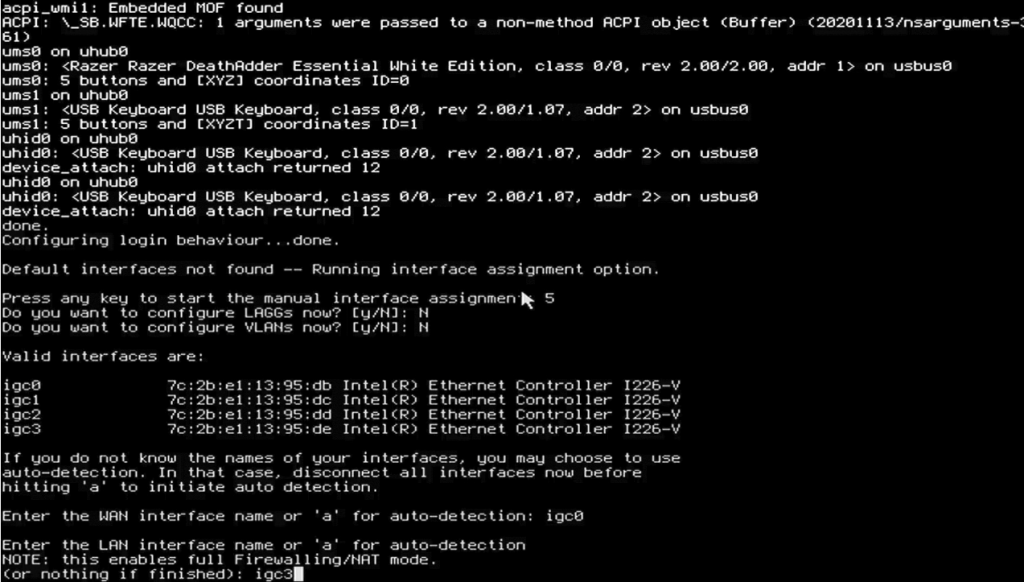
After the LAN port is assigned, the following message is displayed:- Enter the Optional interface 1 name or 'a' for auto-detection
(or nothing if finished):
- Indicates that the system waits for the user to enter the network port name corresponding to OPT1 (Optional network port), or enters a for automatic detection.
If the user does not want to specify any OPT1, leave it blank.
This section describes how to create an internal network bridge. Therefore, do not assign network ports to the internal bridge. Press Enter to end the network port assignment process.
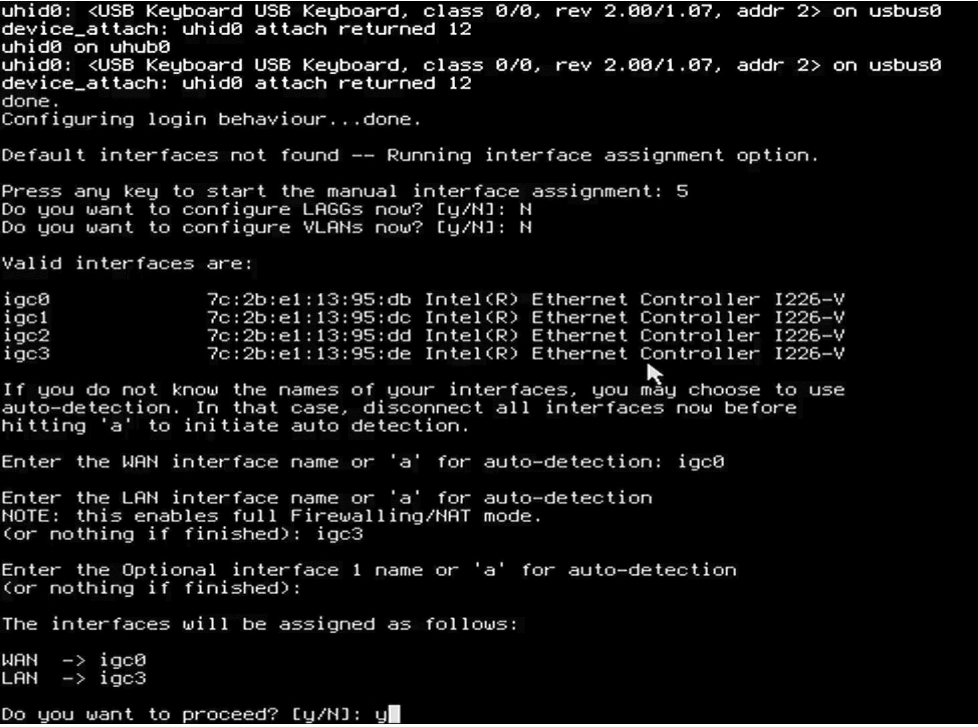
- The system displays the network port assignment result and asks whether to execute it. Enter y and press enter:
- Do you want to proceed? [y/N]: y
- 7. Log in to the installation account
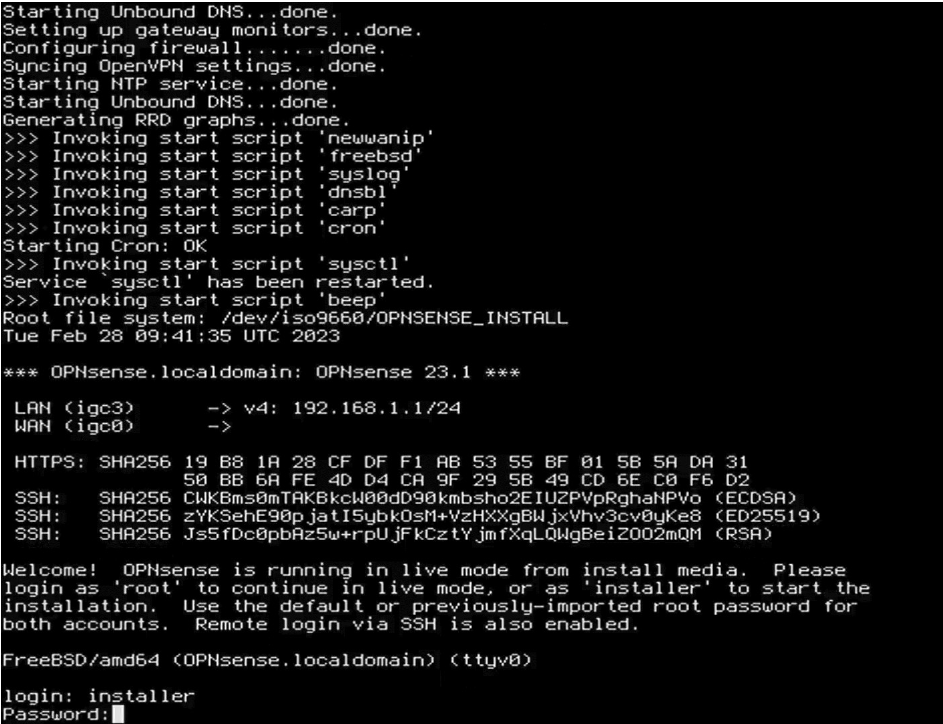
Log in using the installer account and default password opnsense to enter the system installation process.
As with Linux, no prompt will appear when you enter your password.
- 8. Select keyboard keys
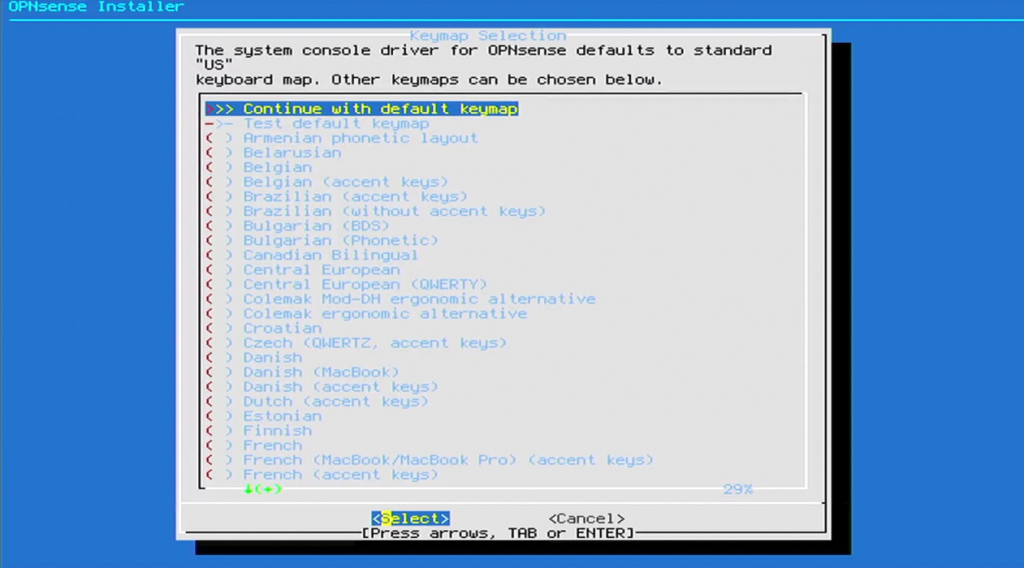
Generally keep the default US keyboard key, press the keyboard enter key to continue.
- 9. Configure the file system
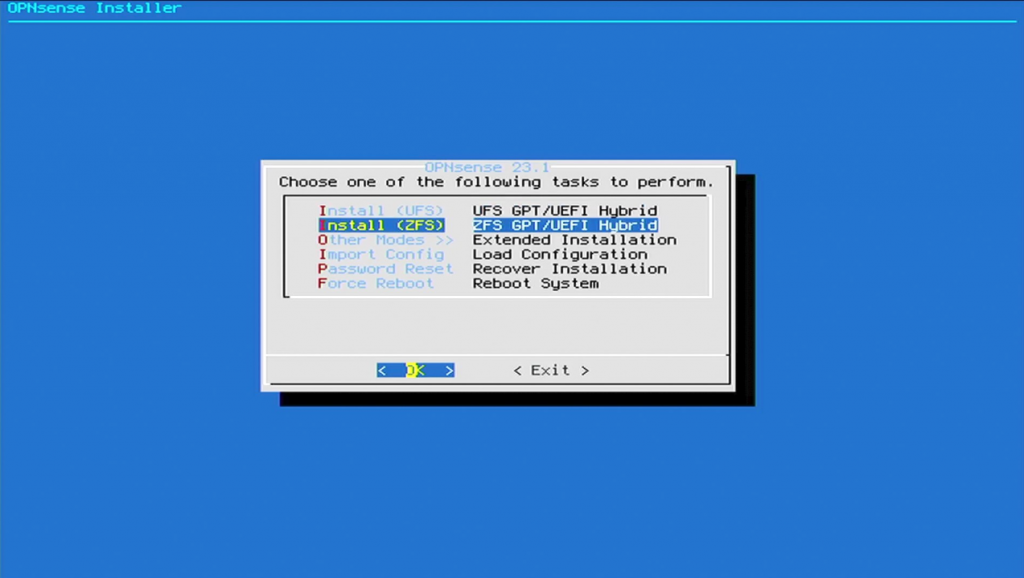
By default, OPNsense uses the UFS file system, but this article demonstrates it as ZFS.
Because OPNsense is underpinned by FreeBSD, there is already good support for the ZFS file system.
Press the keyboard arrow keys to select Install (ZFS) and press Enter to continue.
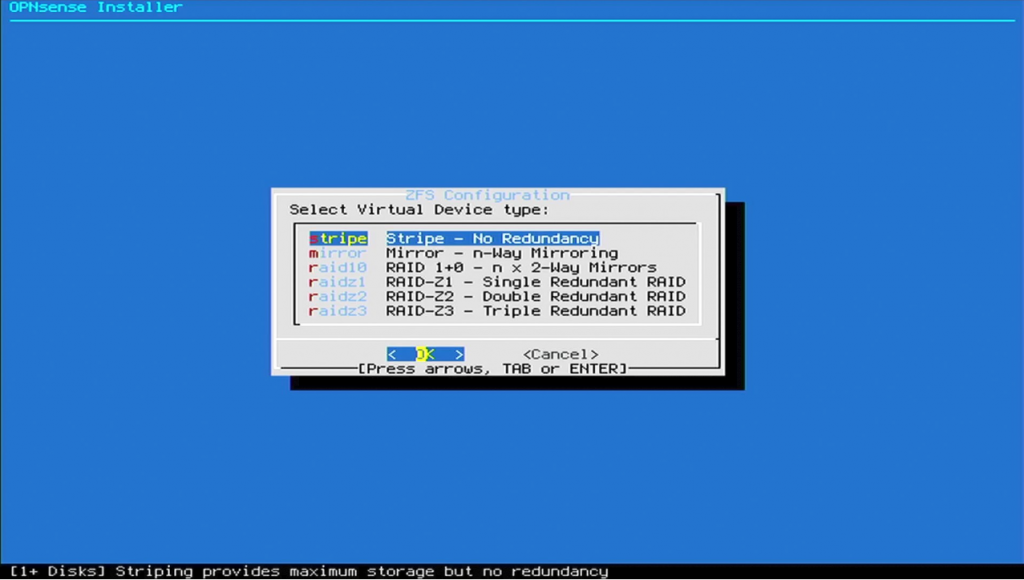
ZFS provides a variety of redundancy modes, the differences between different modes can be referred to the TrueNAS related documents, in brief, the differences are as follows:
stripe: single disk stripe pool
mirror: mirror pool (similar to raid-1, ≥ 2 disks, 1:1 redundancy)
raidz1 pool (similar to raid-5, ≥ 3 disks, 1 disk redundancy)
raidz2 pool (similar to raid-6, ≥ 4 disks, 2 disks redundancy)
raidz3 pool (similar to raid-7, ≥ 5 disks, 3 disks redundancy)
- The stripe mode is selected because only one hard disk is available.
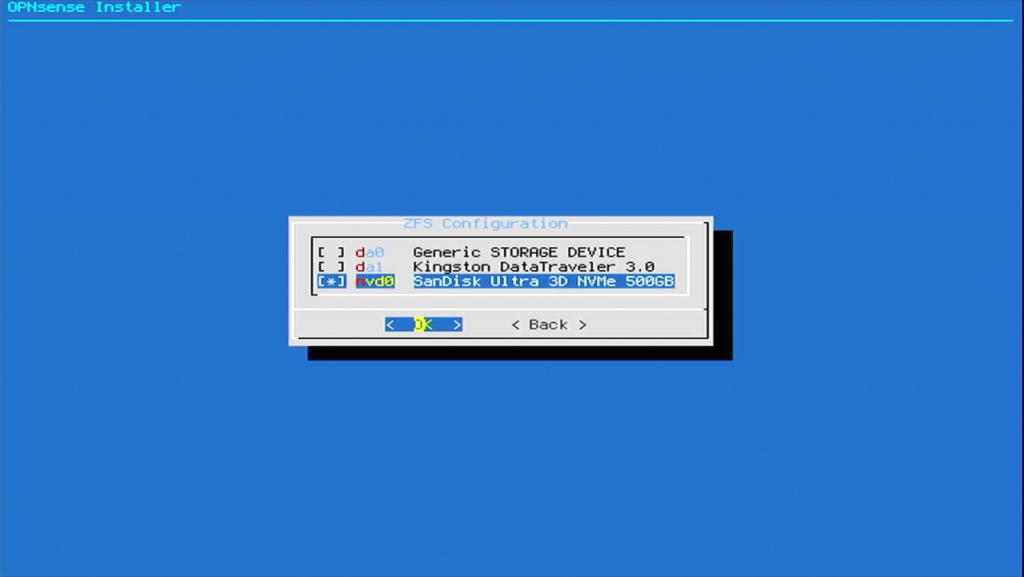
- Select the installation target hard disk, press the keyboard arrow key to select, press the space bar to select, press the enter key to continue.
The [*] mark will appear in front of the selected drive, which is demonstrated here with an NVMe SSD.
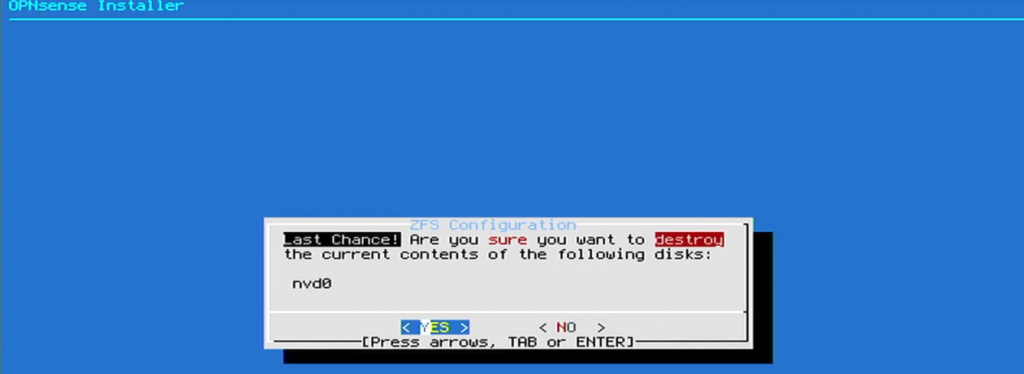
- The system prompts that this operation will format the hard disk. Press the arrow key to select YES and press Enter to continue.
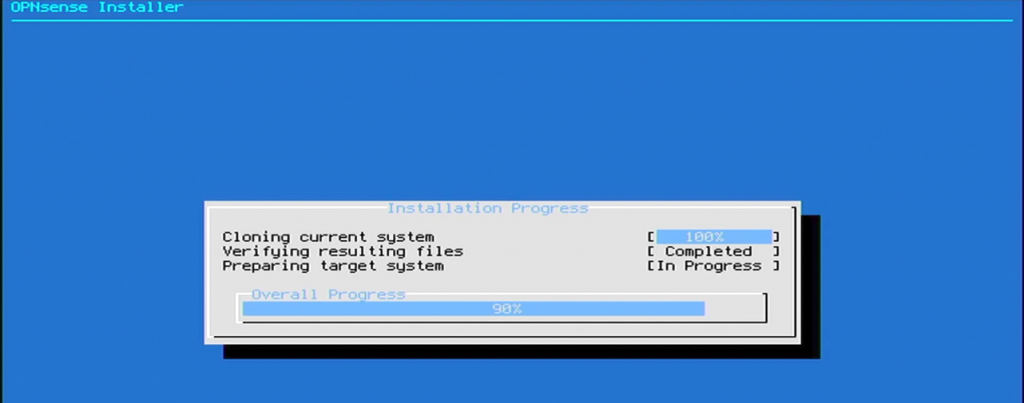
- 10. Installation progress
The installation of OPNsense starts. You can view the current step and progress.
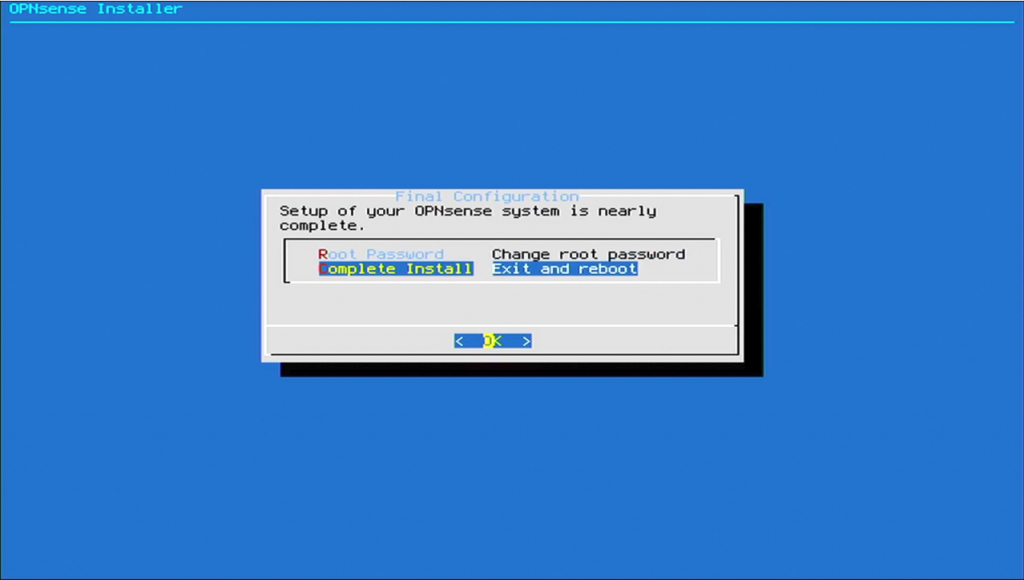
- 11. The installation is complete
Press the keyboard arrow keys to select Complete Install and press Enter to continue.
At this time, the system will restart, and the boot USB flash drive can be removed during the physical server installation.
Mini computer reports "Verification failed: (0X1A) Security Violation" when booting from USB drive. Solution
Windows 10 IOT Enterprise Edition LTSC 2021 Installation Guide
