
M1-How to set Auto Power On
author: VENOEN
2025-09-19
- Applicable to M1-11 generation CPU, BIOS version: ZTGLH1 1.06 X64, ZTGL1 1.03 x64
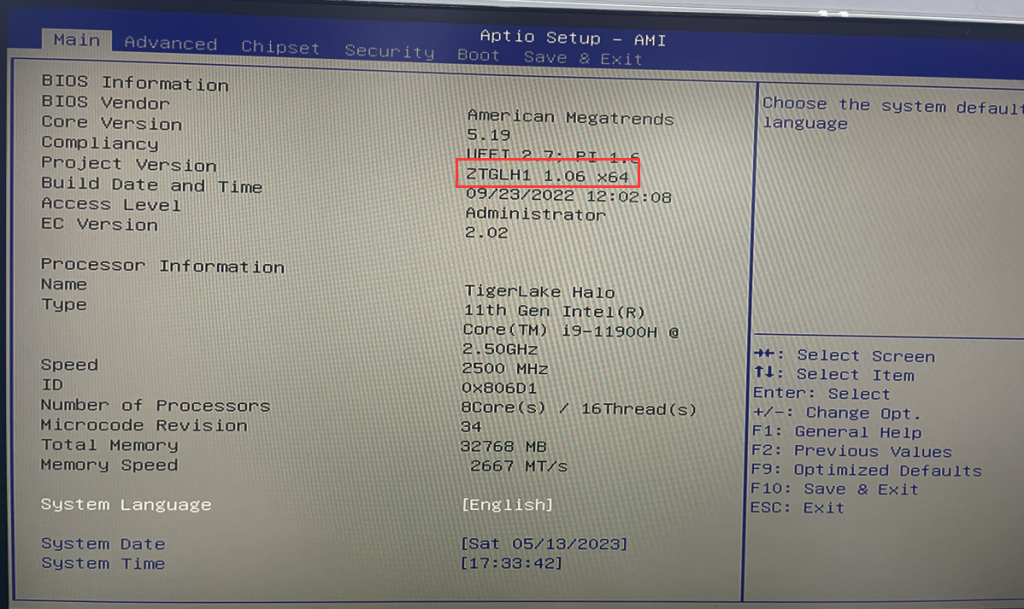
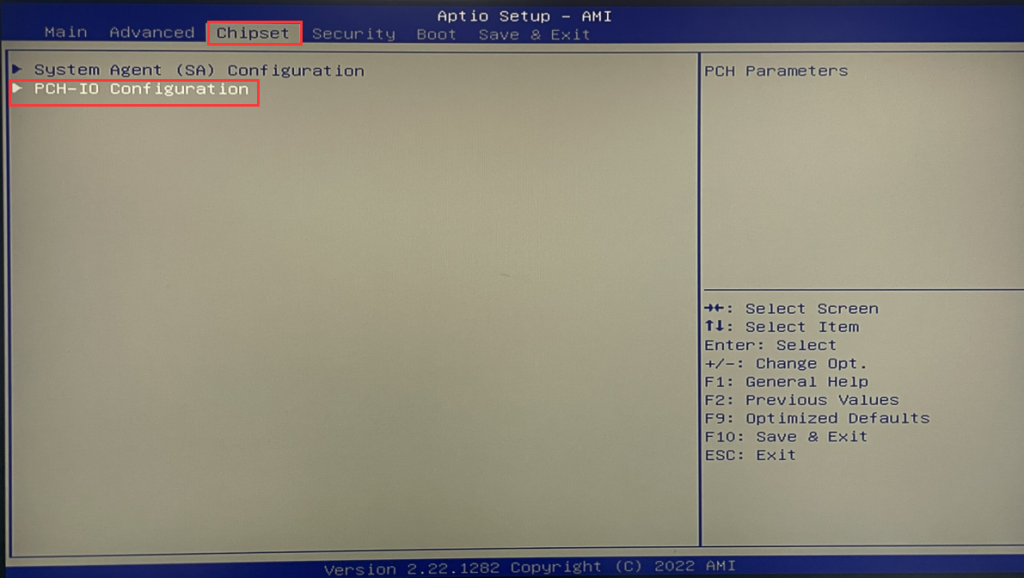
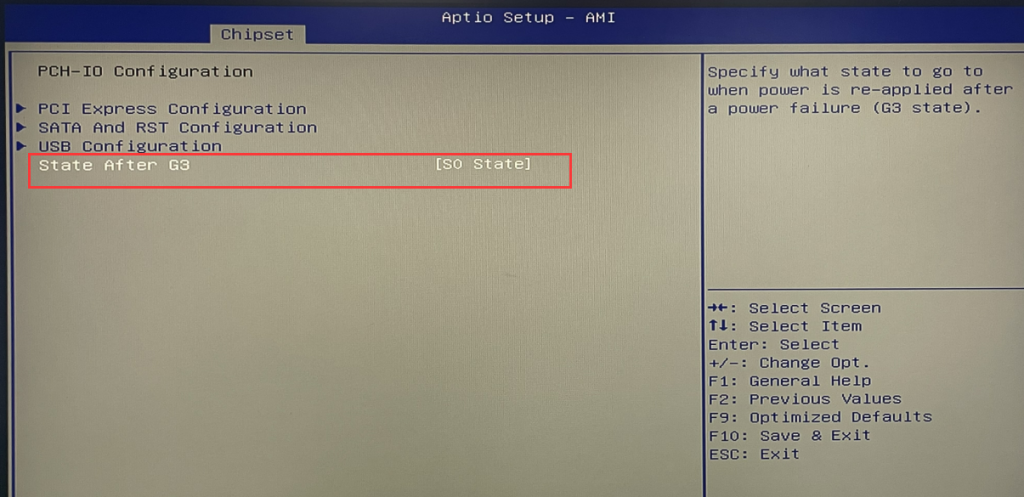
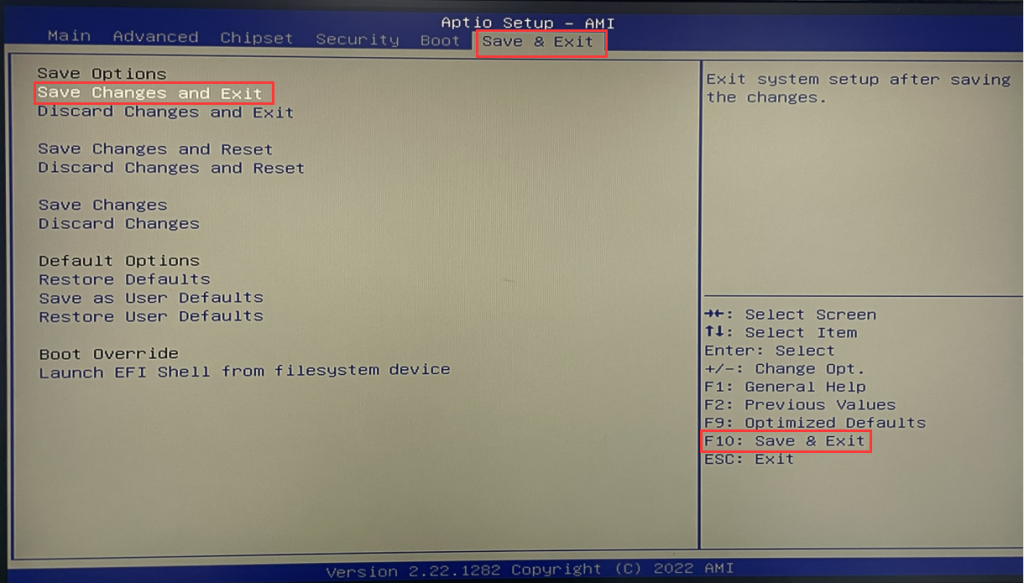
- 1-1. Press the switch button and quickly tap the Delete key on the keyboard to enter BIOS Setup, then select Chipset>PCH-IO Configuration>Set State After G3 to S0 State. After the settings are completed, select Save & Exit>Save changes and Exit, or press F10 to save and exit.
- Suitable for M1-12th Gen, Bios version: ZADL1 1.04 X64
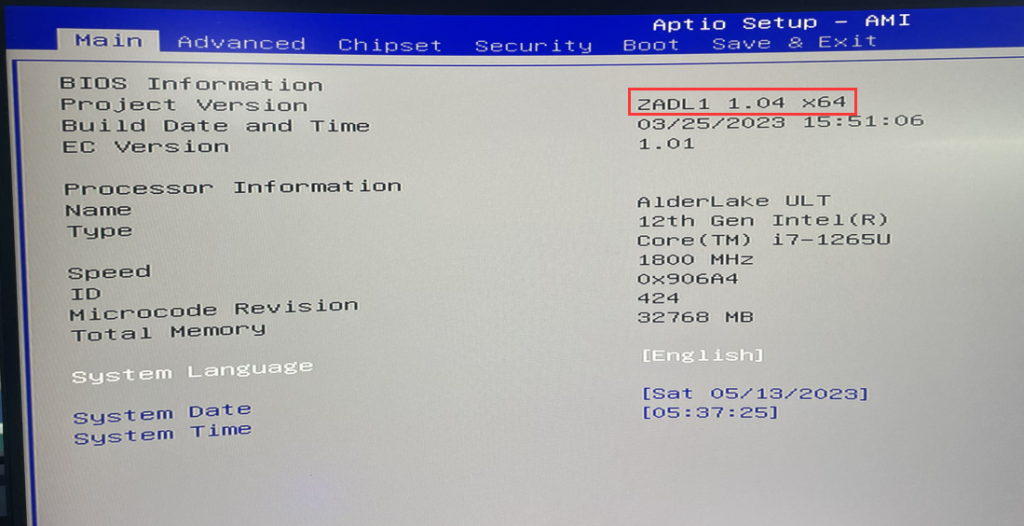
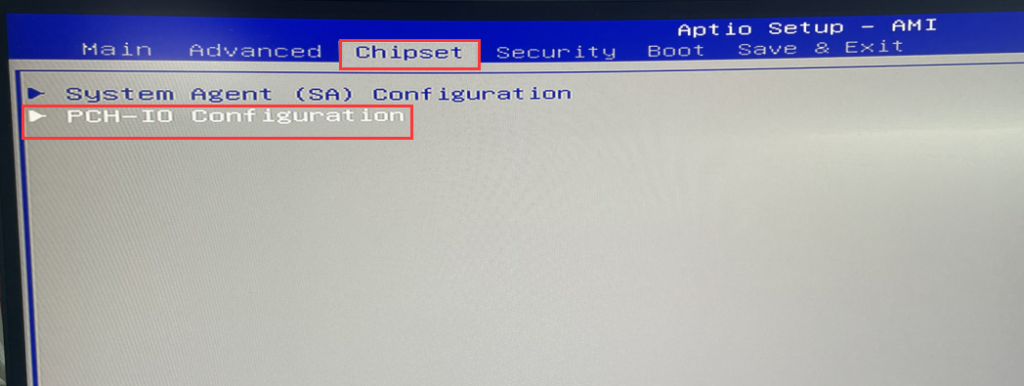
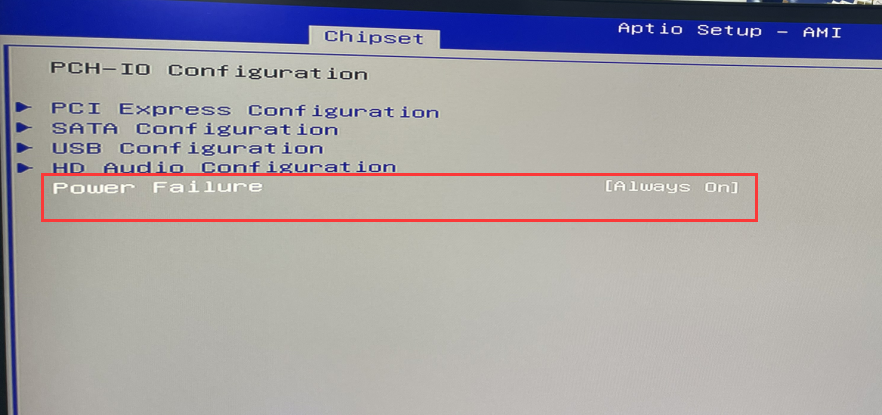
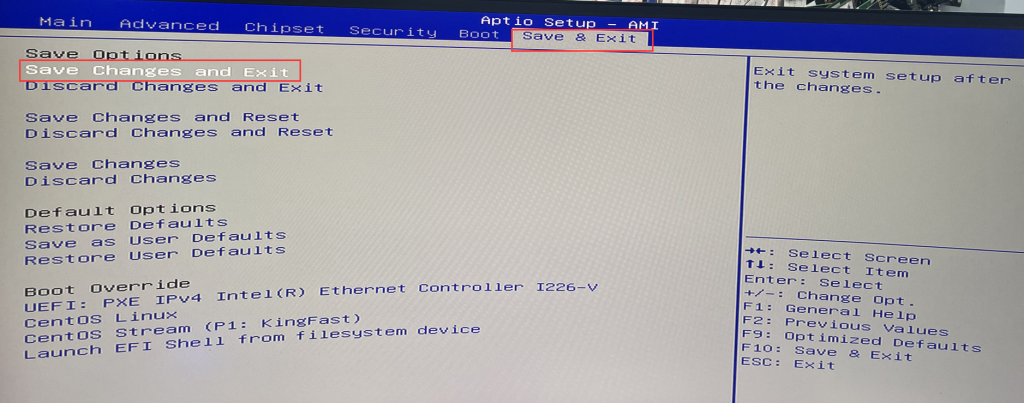
- 2-1. Press the switch button and quickly tap the Delete key on the keyboard to enter BIOS Setup, then select Chipset>PCH-IO Configuration>Set Power Failure to Always on. After the settings are completed, select Save & Exit>Save changes and Exit, or press F10 to save and exit.
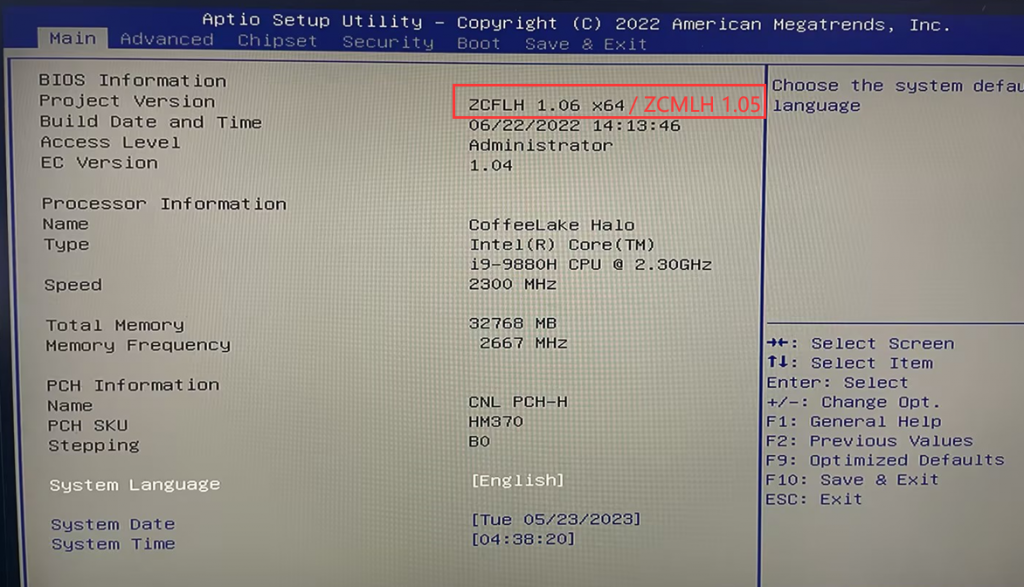
- Applicable to M1-8-9-10th Gen, applicable bios version: ZCFLH 1.06 and ZCMLH 1.05.
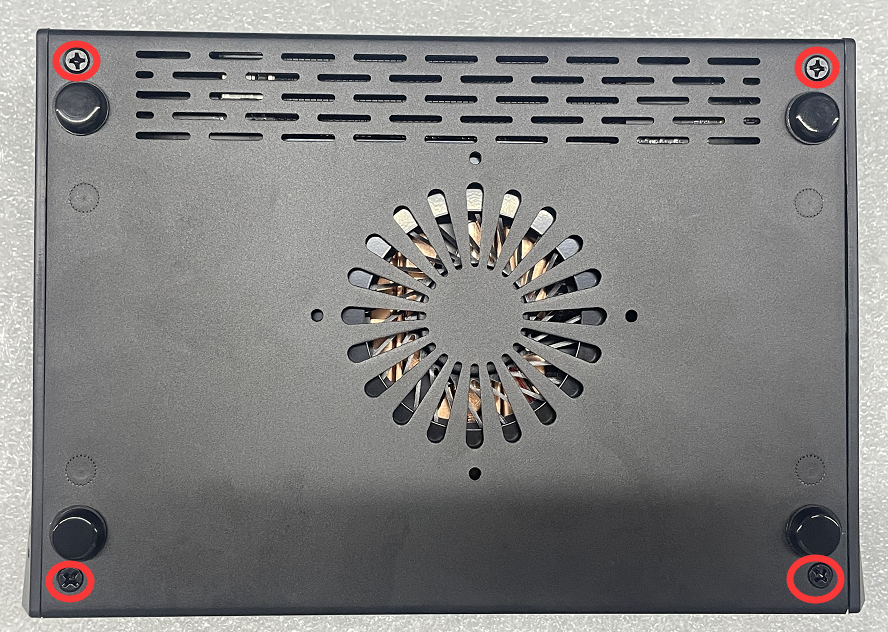
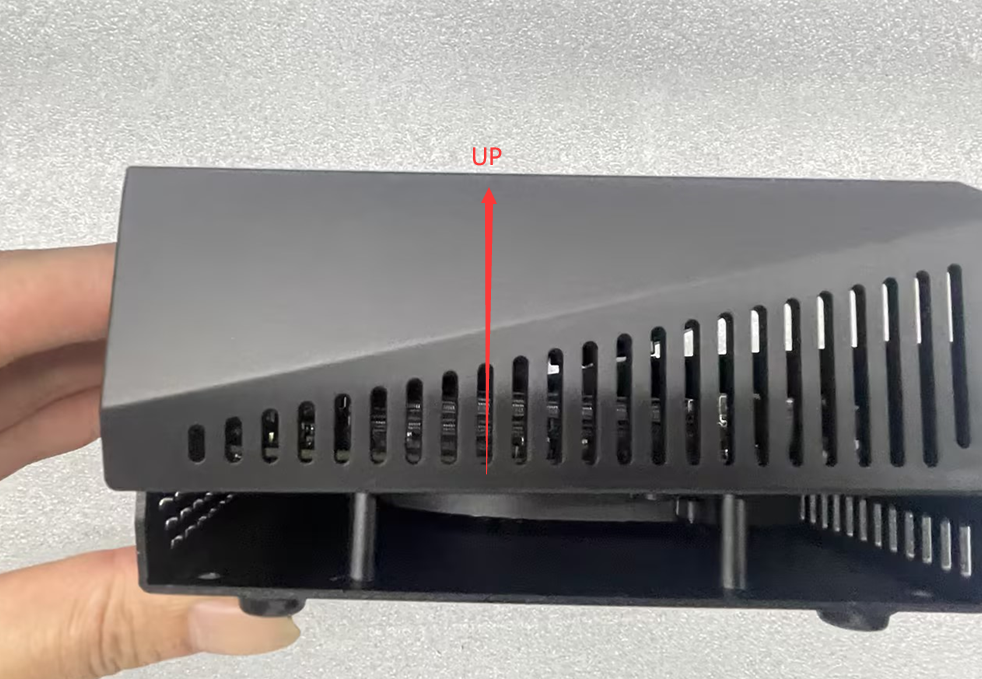
- 3-1. Use a screwdriver to loosen the 4 screws at the bottom of the chassis, and open the A case to see the motherboard. (Be careful not to break the connection between the built-in antenna and WIFI on the A case, and pay attention to the opening angle when opening the A case!)

- 3-2. Find the PWRON1 pin header on the motherboard. The pin header comes with a jumper cap. By default, it is inserted into pin1 and pin2 pins, and Auto Power on is turned off. When the jumper is moved to pin2 and pin3, Auto Power on is enabled, and the computer will automatically turn on when it is powered on.


M2-How to set Auto Power On+Common Function Configuration
M3-How to set Auto Power On
Related Article
