
Steps for installing Ubuntu 22.04 LTS
author: VENOEN
2025-09-02
- Preparation
Larger than 8G U disk
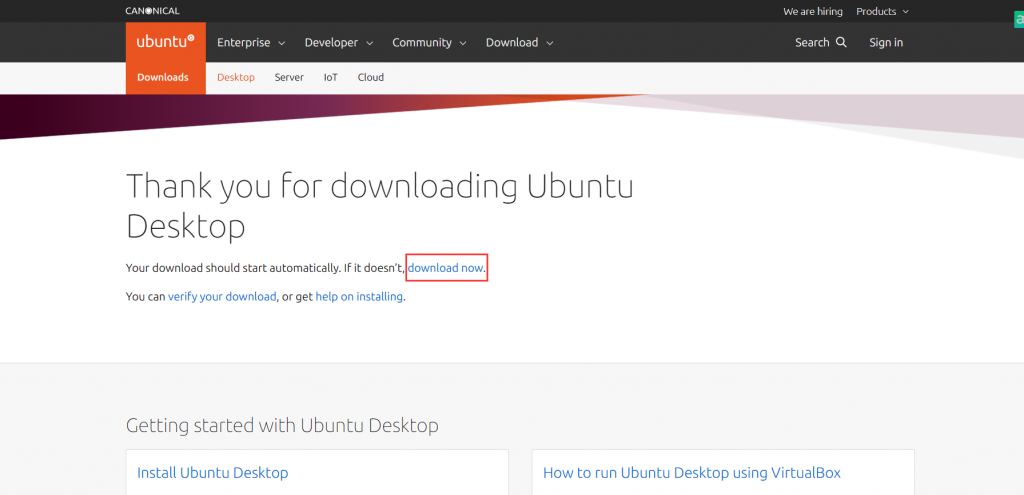
Download Ubuntu22.04 LTS ISO file, download address: //ubuntu.com/download/desktop/thank-you?version=22.04.2&architecture=amd64
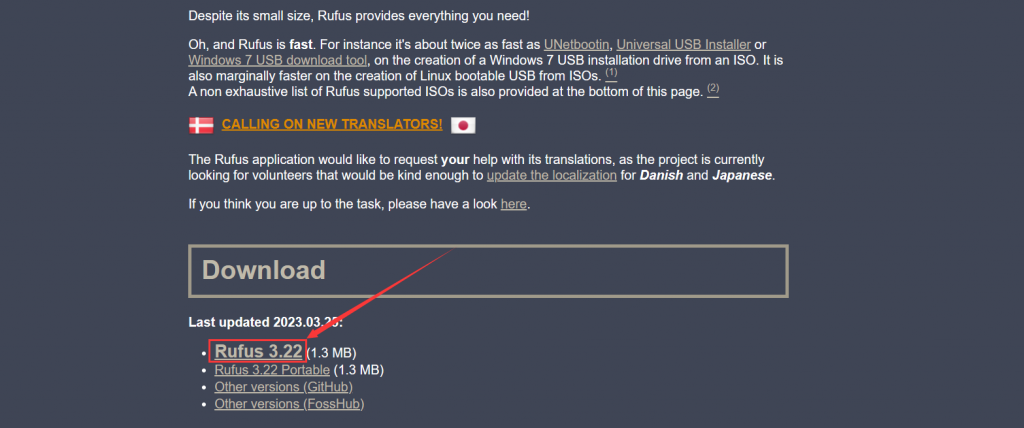
Download the Rufus image file writing tool, download address: http://rufus.ie/en/#
1. Make a bootable USB disk
1-1. Go to Ubuntu official website to download the image file. Download address: //ubuntu.com/download/desktop/thank-you?version=22.04.2&architecture=amd64
After downloading, remember the directory where the image file is saved.
- 1-2. Go to the Rufus official website to download the Rufus.exe software. Download address: http://rufus.ie/en/#
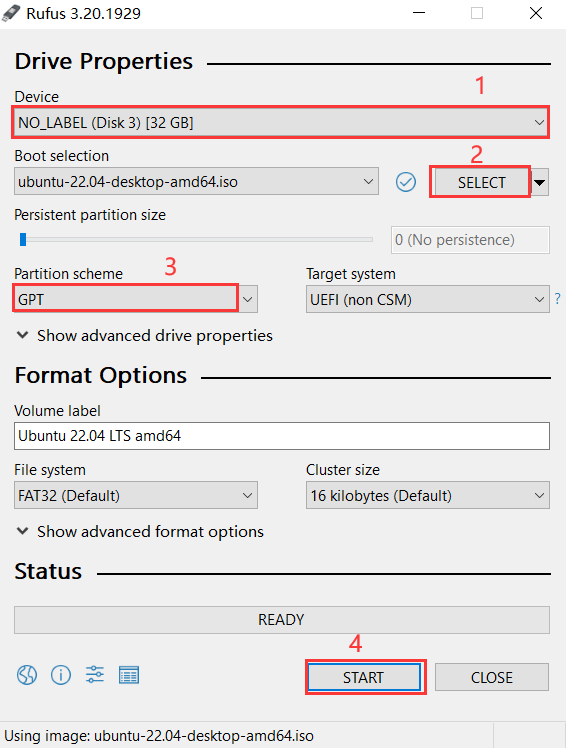
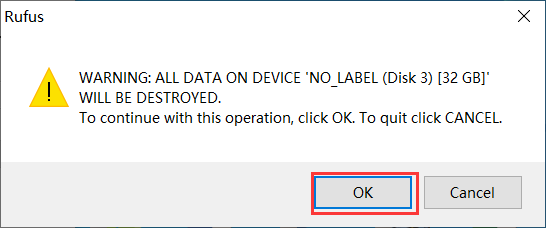
- 1-3. After the download is successful, insert the U disk and run Rufus.exe. Select the U disk in Drive Properties (this operation will format all the data in the U disk. If you have important data, please back it up in advance!). Select the Ubuntu image file in SELECT. , select GPT in Partition scheme, confirm it is correct, and click START.
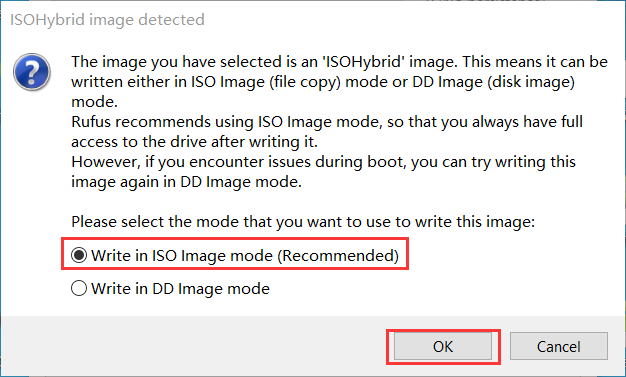
- 1-4. Select the production mode, usually select the default mode, confirm to start writing, and wait for the production to be completed.
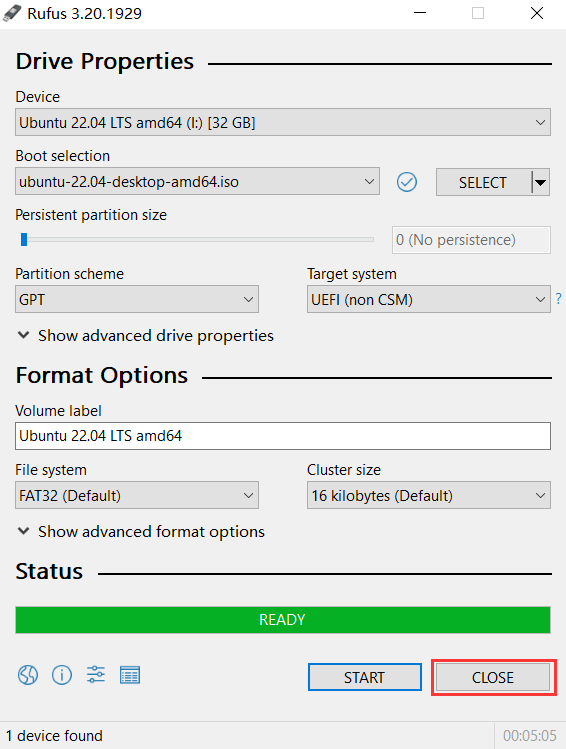
- 1-5. As shown in the figure below, it will prompt that the creation is successful, click CLOSE.
- 2. Install Ubuntu 22.04
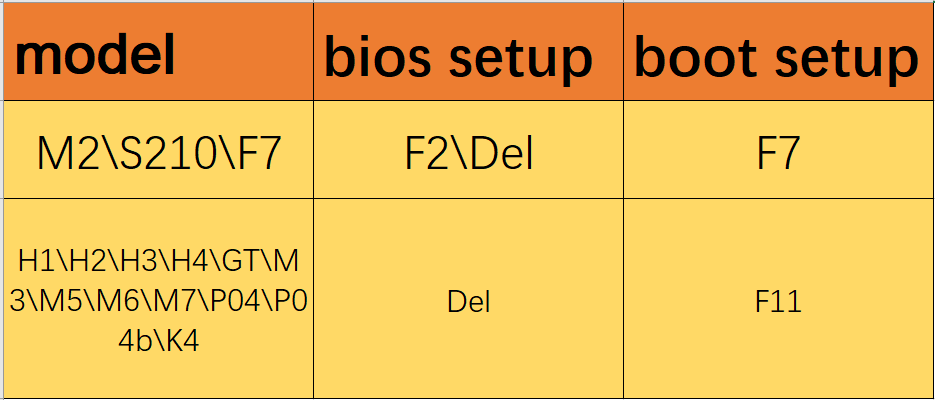
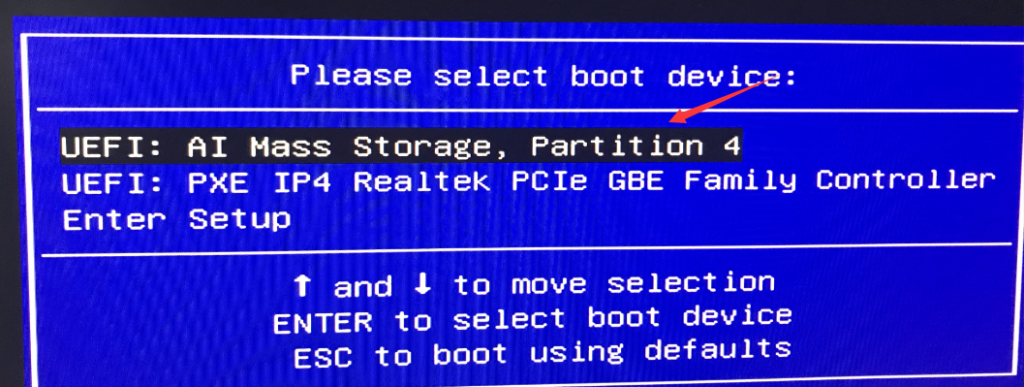
2-1. Insert the successfully written U disk into the USB port of the computer where the system needs to be installed, press the switch button and quickly tap the F7 or F11 key on the keyboard (depending on the model, please refer to the corresponding shortcut keys for the model in the figure below) to enter. Boot Setup, select the U disk with UEFI: prefix and Enter to enter the installation wizard. If the USB flash drive is not recognized in the Boot setup, press Del or F2 to enter the BIOS Setup, select Save & Exit>Boot override, and select the USB flash drive with the UEFI: prefix. Enter to enter the installation wizard.
- 2-2. Select the installation mode, generally choose Try or install Ubuntu.
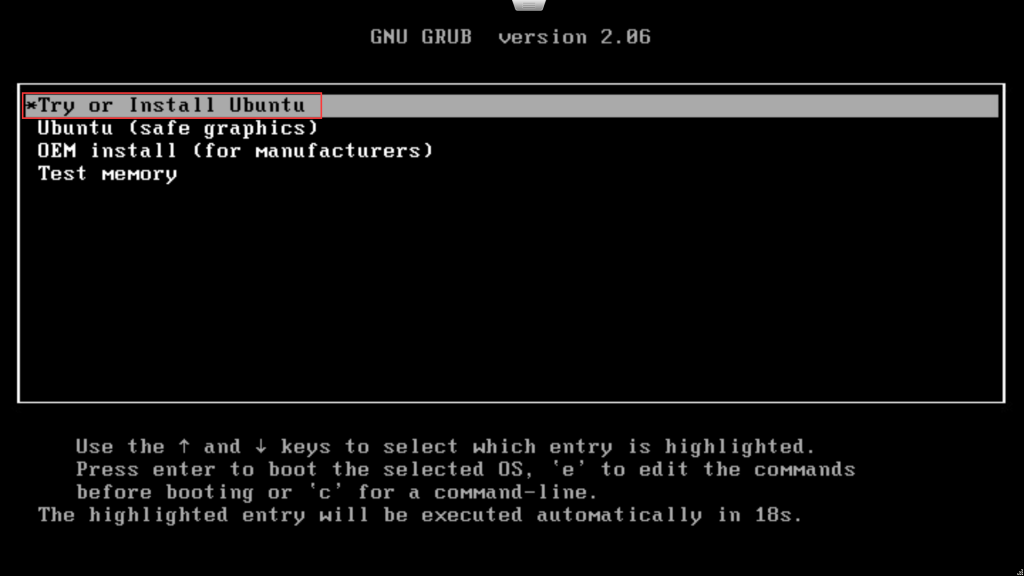
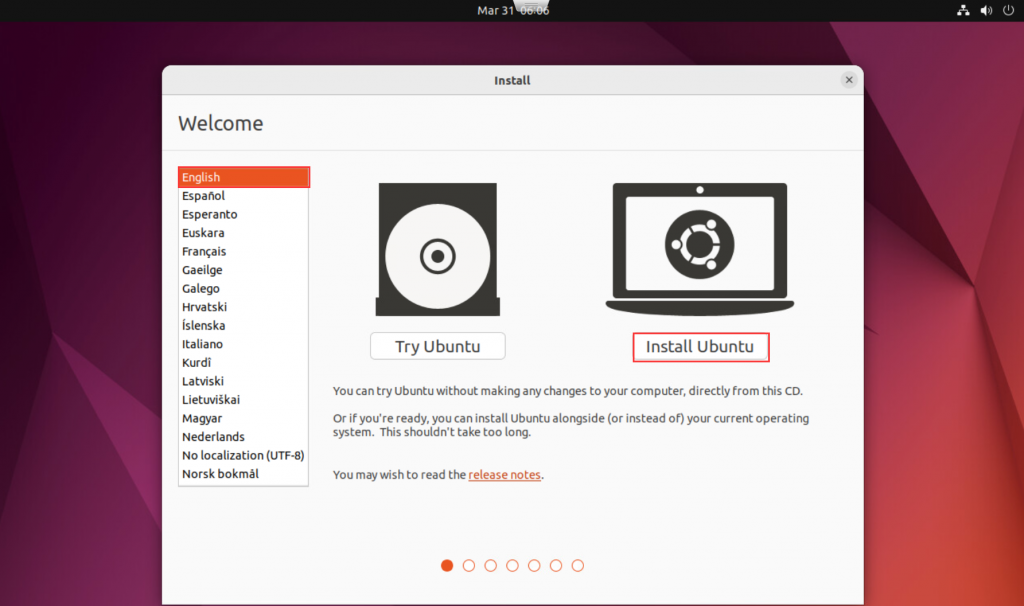
- 2-3. Select the system language and click lnstall Ubuntu.
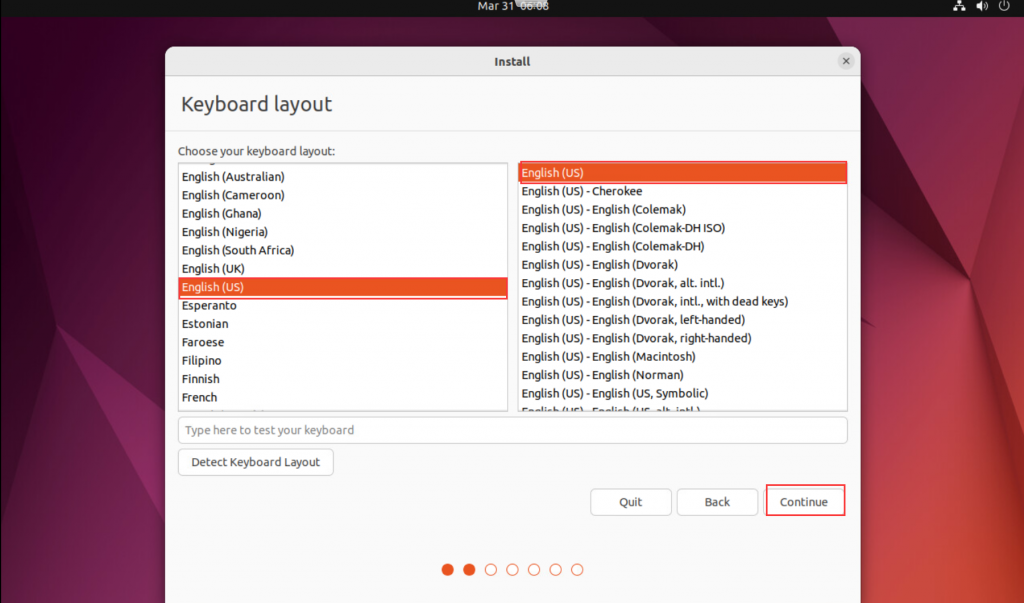
- 2-4. Select the keyboard layout and click Continue to proceed to the next step.
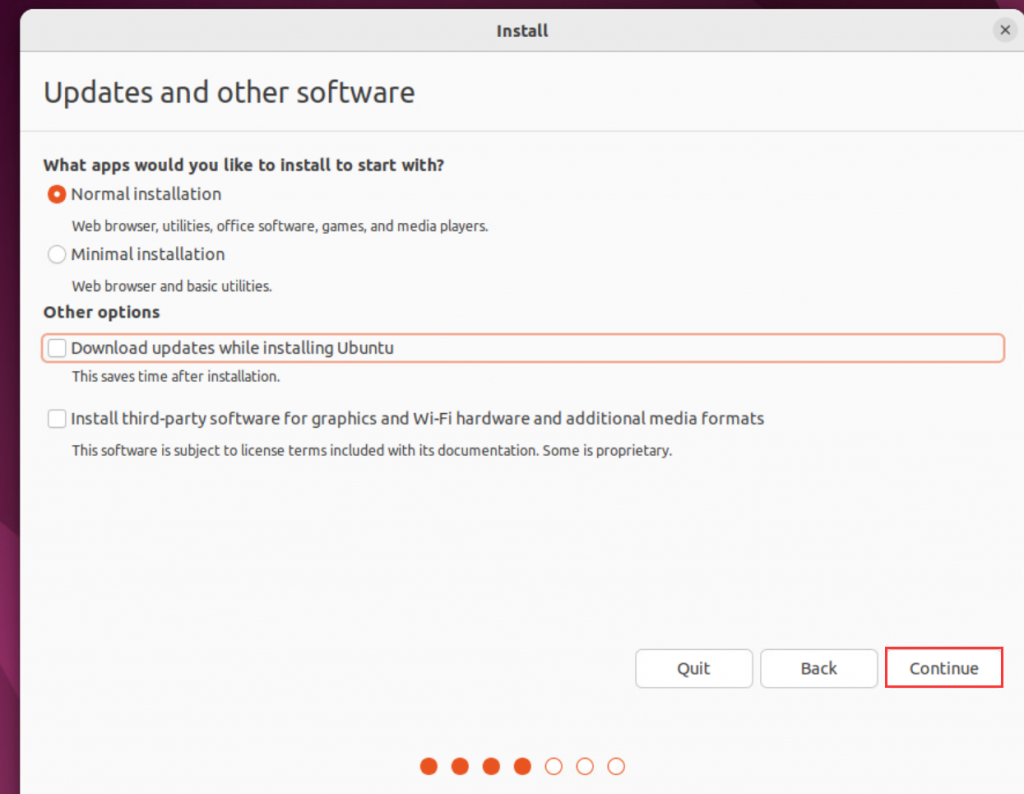
- 2-5. Select Normal installation and cancel Download updates while installing Ubuntu to save installation time. Click Continue to proceed to the next step.
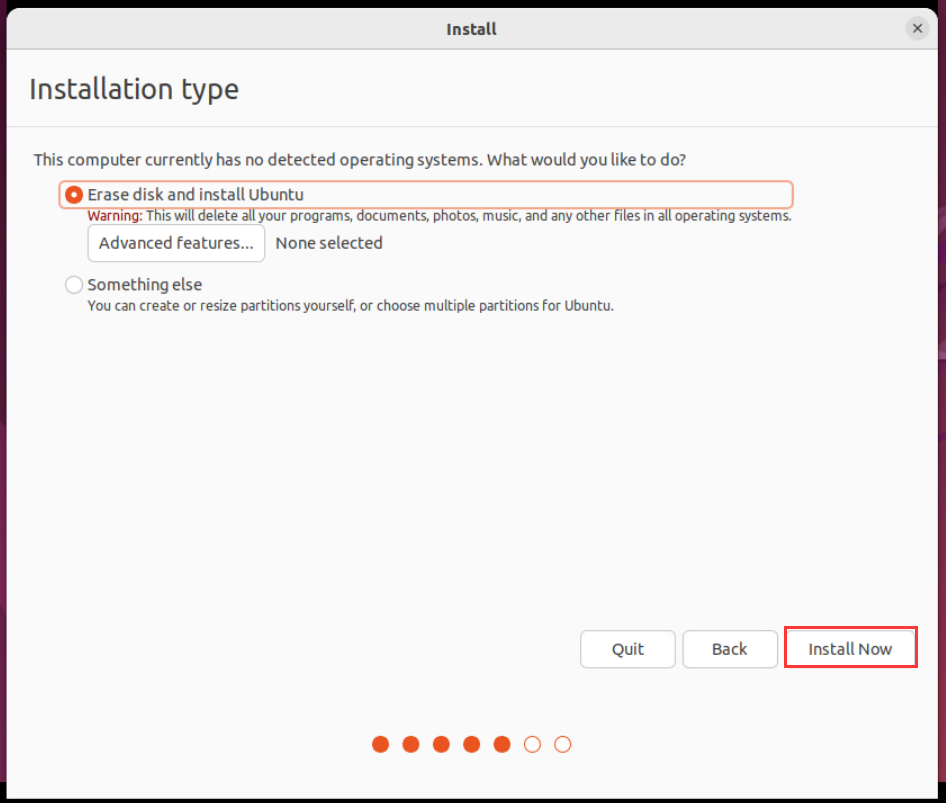
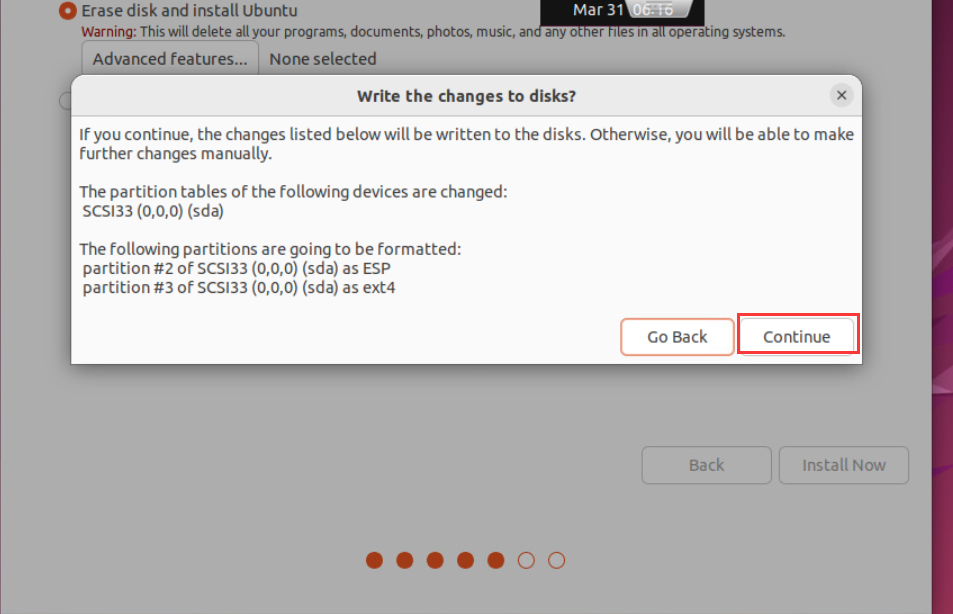
- 2-6. Select Erase disk and install Ubuntu and click Install Now, select the Continue partition and enter the next step.
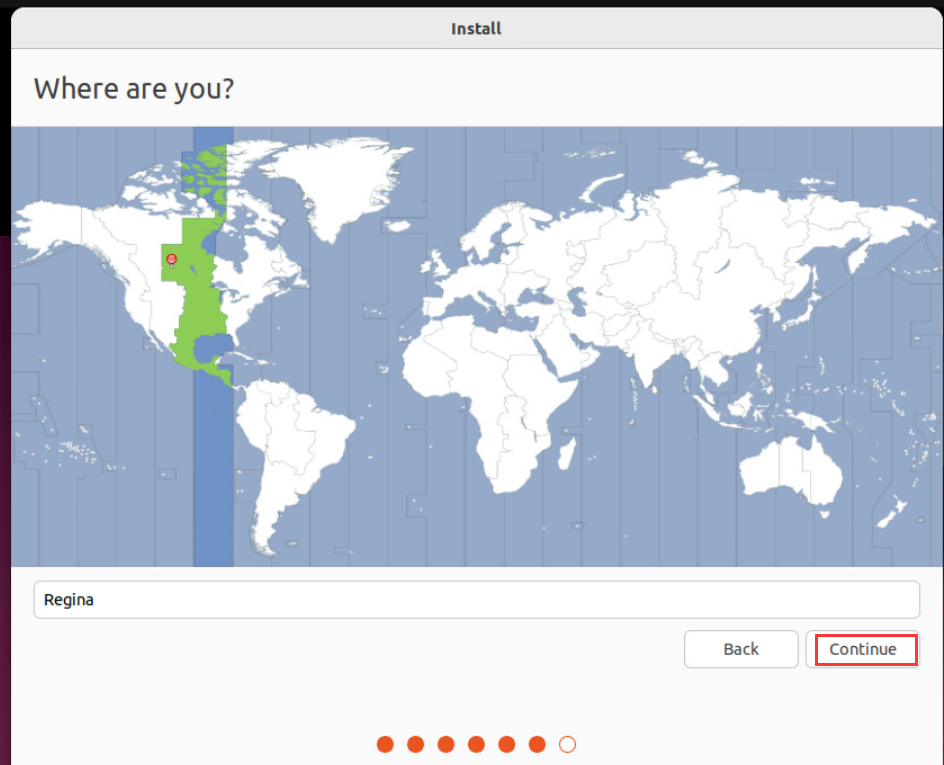
- 2-7. Select your region and click Continue.
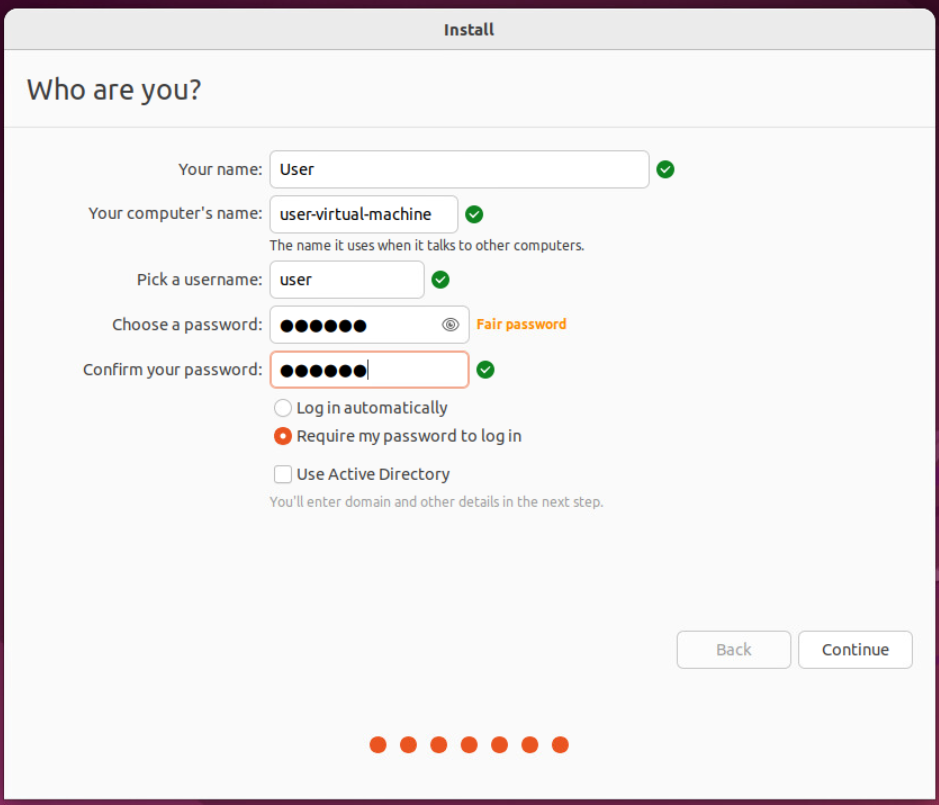
- 2-8. Your name: Enter the user name, Choose a password: Enter the password. (Please remember the password entered here) After confirmation, click Continue to start installing the system. This step usually takes about 10 minutes, please wait for the installation to complete.
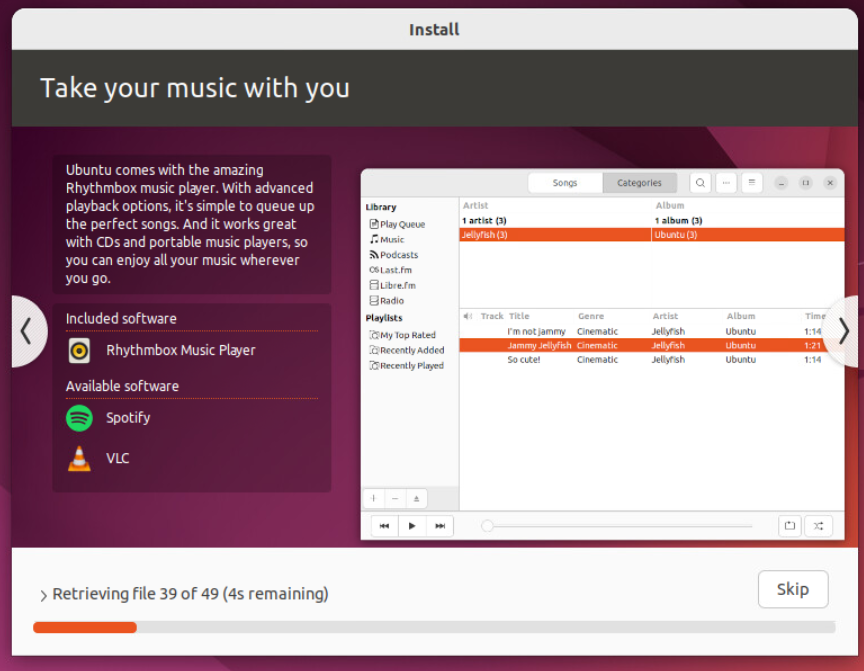
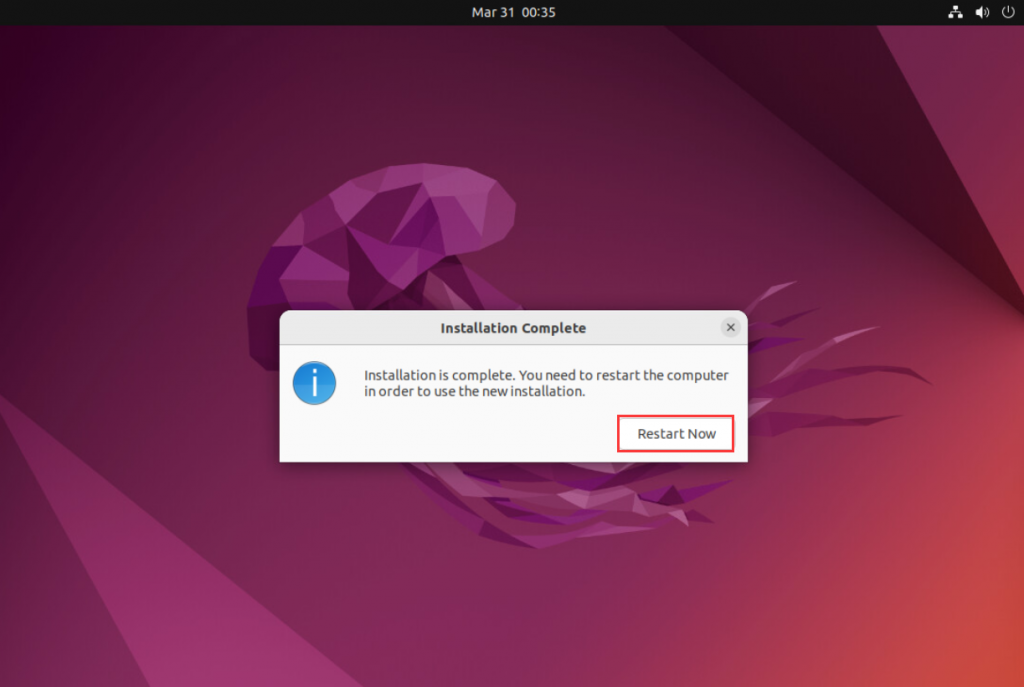
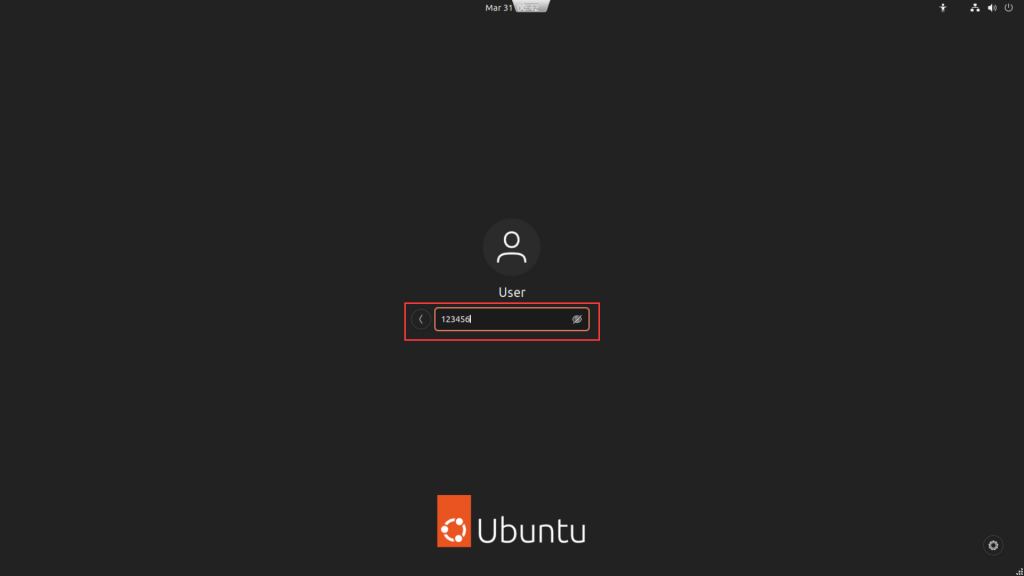
- 2-9. After completing the installation, remove the USB flash drive, select Restart Now, and press Enter after restarting to enter the system desktop.
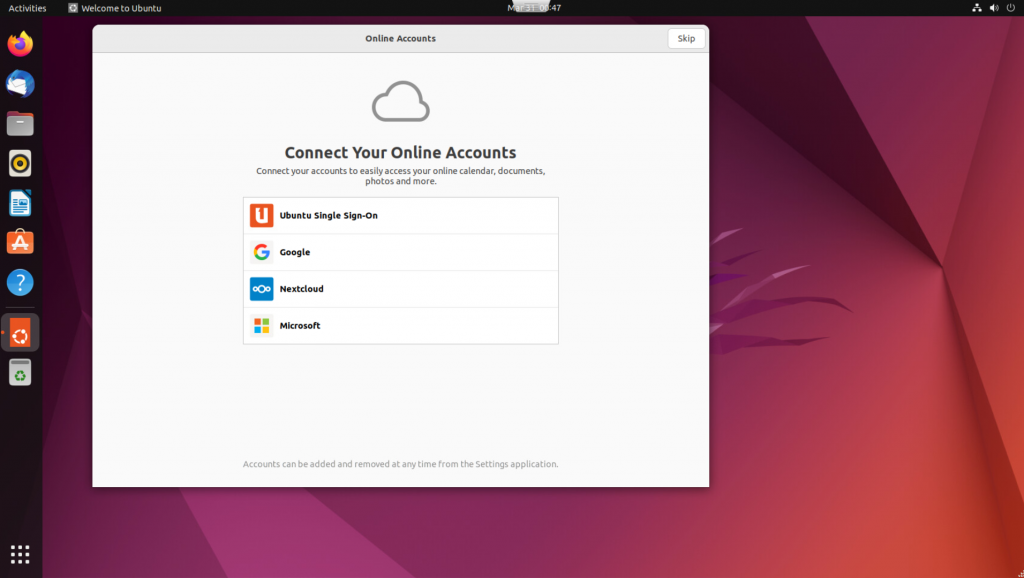
- 3. Ubuntu systems often require root permissions for normal use. The following describes the steps to open the root user and set the root password.
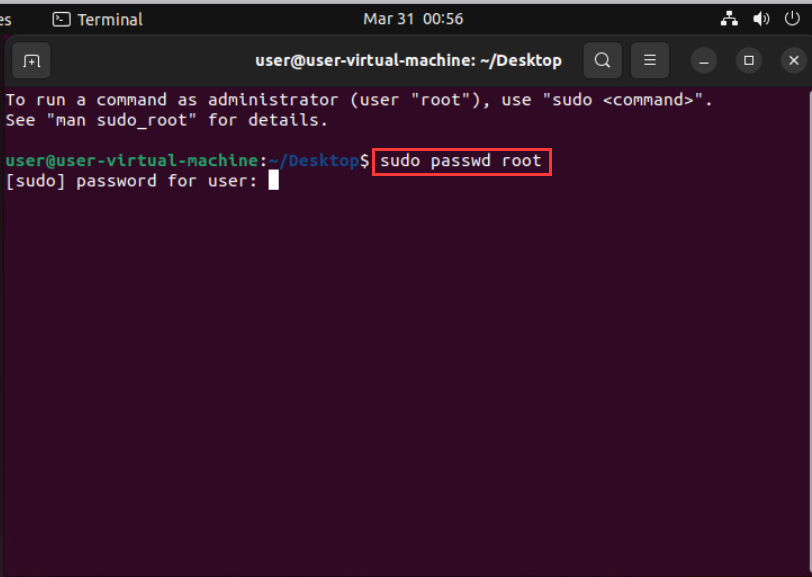
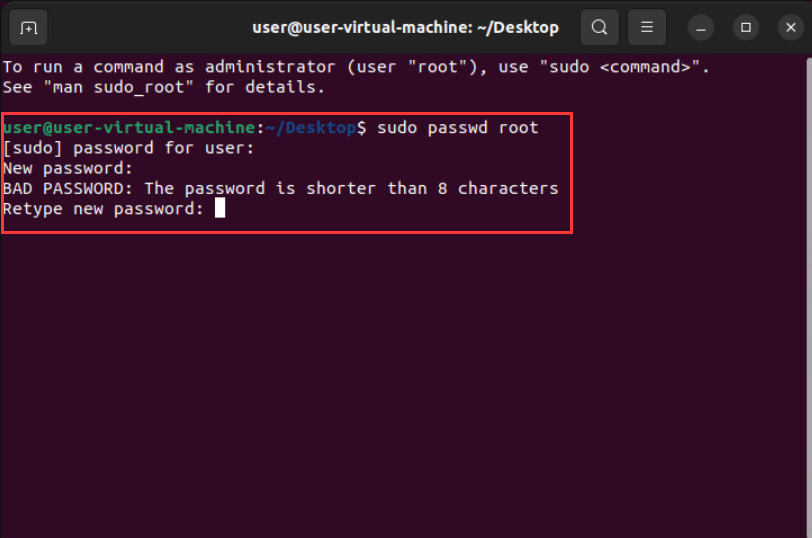
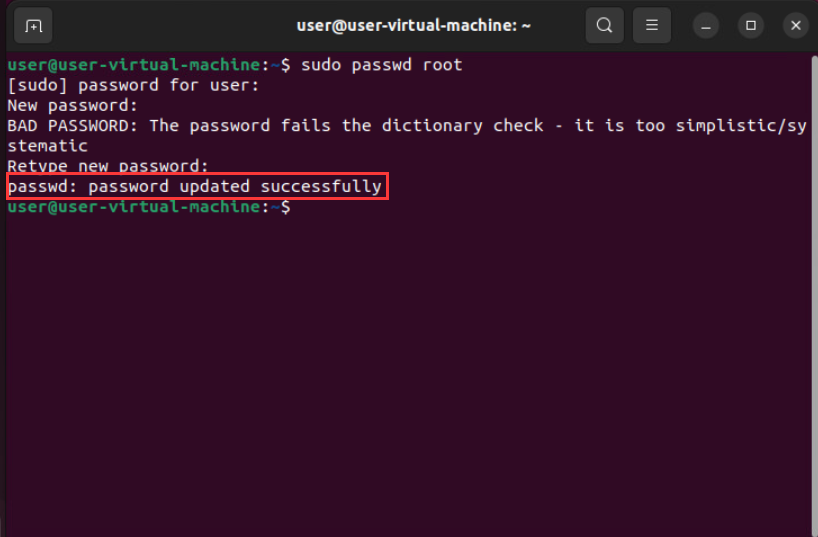
3-1. Press Ctrl+Alt+T to open Terminal (terminal), user@user-virtual-nachine:~s: enter sudo passwd root and press Enter, enter the current login user password in sequence, the root password to be set, and confirm root password. (Note: It is recommended to use a combination of uppercase and lowercase letters + numbers for the root password, which must not be less than 8 digits, for example, set to Abc123456). When "passwd: password updated successfully" appears, it means the password is set successfully!
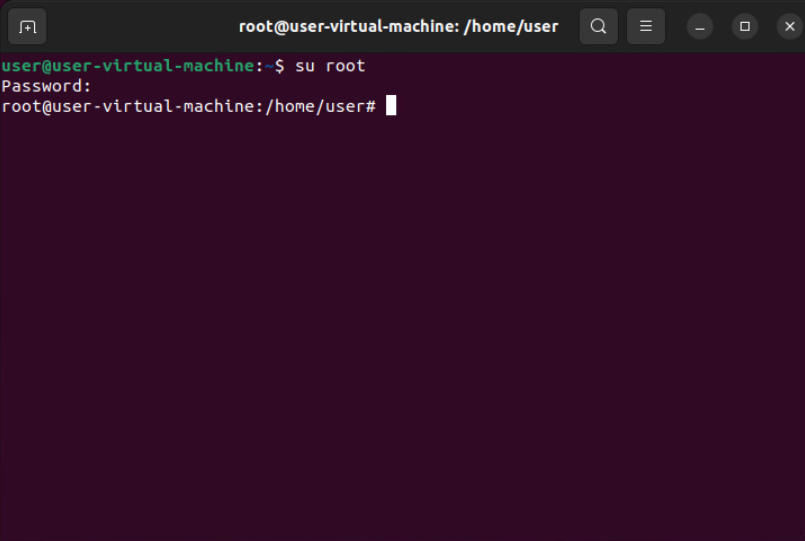
- 3-2. When you need to use root privileges, enter su root in Terminal and press Enter. Enter the root password in Password to switch to the root user. When "root@user-virtual-machine: / home/user#" appears, it means the root user switch is successful!
Restoring factory settings on Windows 10 systems
How to Change Language on Windows 10 System
