
Troubleshooting steps for computer not recognizing hard drives after expanding SSD/HDD
author: VENOEN
2023-12-04
-
Overview: When we buy a new SSD or HDD, the hard disk cannot be recognized after extending to the computer, you can follow the following steps to troubleshoot.
-
1, hard disk installation
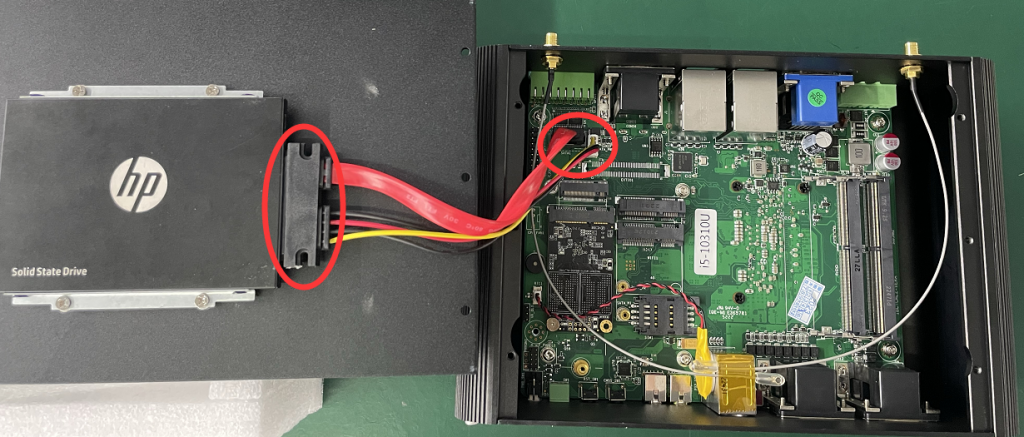
PS: When installing the hard disk, please disconnect all the IO data cables on the computer, especially the power adapter. Do not operate with power on, otherwise the computer or hard disk may be damaged.1-1, 2.5-inch SATA hard disk: Check whether the SATA data cable and power cable are correctly installed, and then reinsert the SATA data cable and power cable.
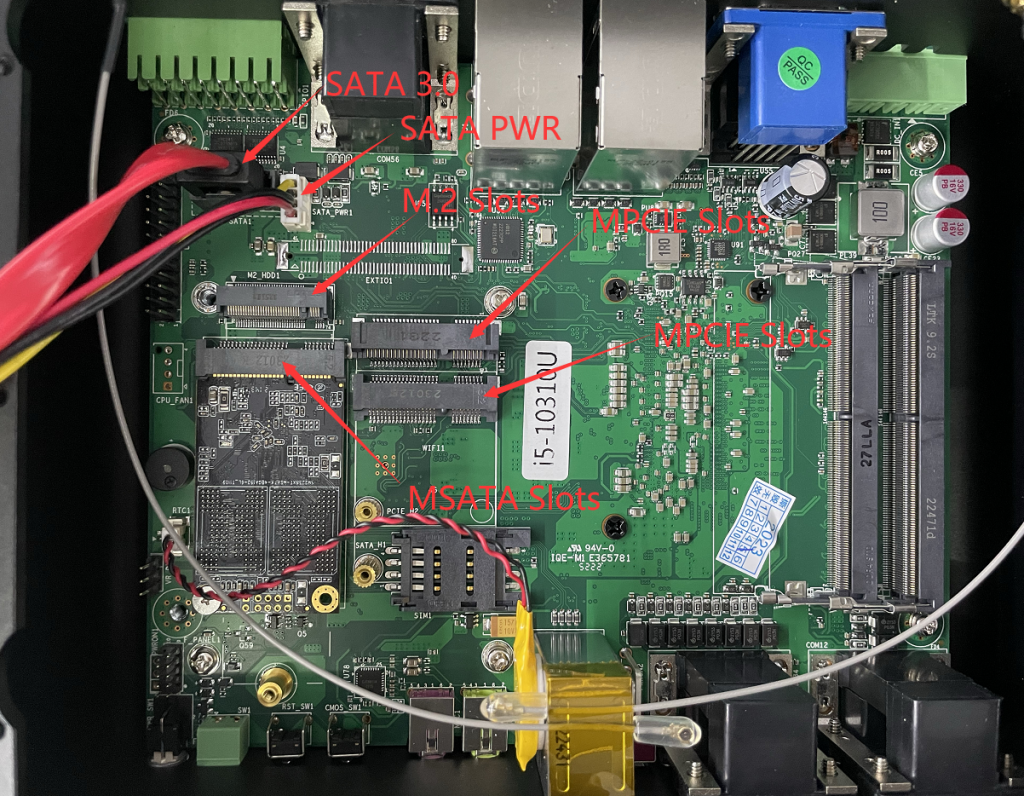
- 1-2. MSATA hard disk: Check whether the MSATA SSD is correctly inserted into the corresponding slot on the mainboard. PS: MSATA slot and MPCIE (full height) slot specifications are easy to mistake, please carefully check the motherboard slot mark when inserting a hard disk.
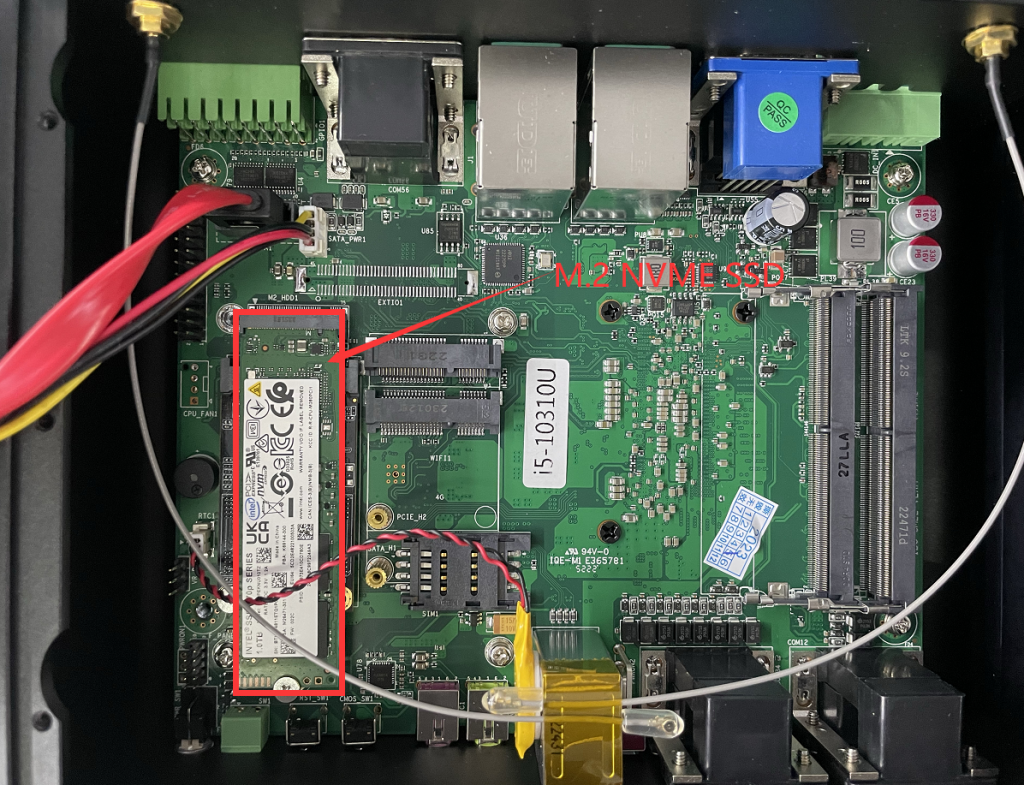
- 1-3, M.2 hard disks: The M.2 hard disks can be classified into NVEM and SATA protocols. Some models of the M.2 slot support NVEM and SATA protocols, and can identify SSDS of two different protocols. Some M.2 slots support NVEM protocol SSDS. Please check the product manual carefully or consult your hardware supplier when installing the hard drive.
- 2. Check whether the hard disk is detected in the BIOS
SATA protocol hard disk query method (PS: Different models of the BIOS menu may be different, this post provides the steps for reference)
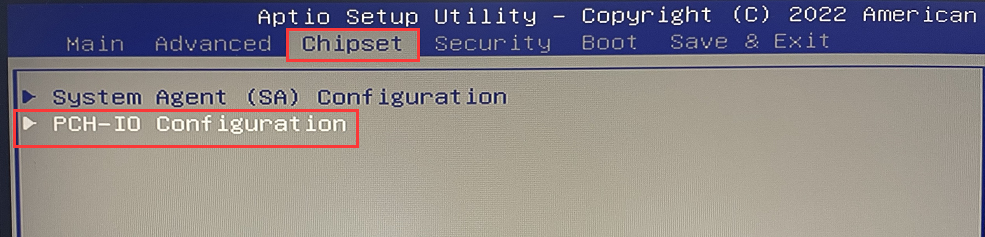
2-1. Press the switch button and quickly press Del/F2 on the keyboard to enter the BIOS Setup. Choose Chipset>PCH-IO Configuration>SATA And RST Configuration> Check whether the disk name and capacity are identified in Serial ATA Port0 to Serial ATA Port0 5. If the hard disk name and capacity are identified, the hard disk is successfully installed.
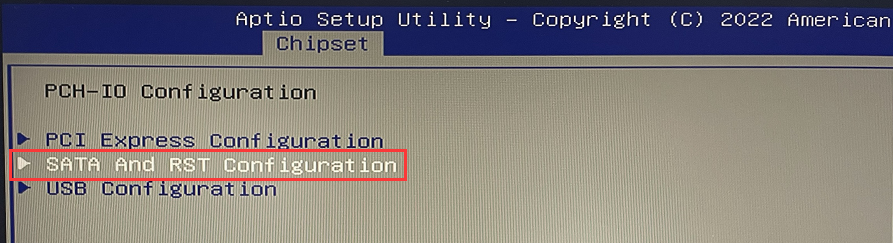
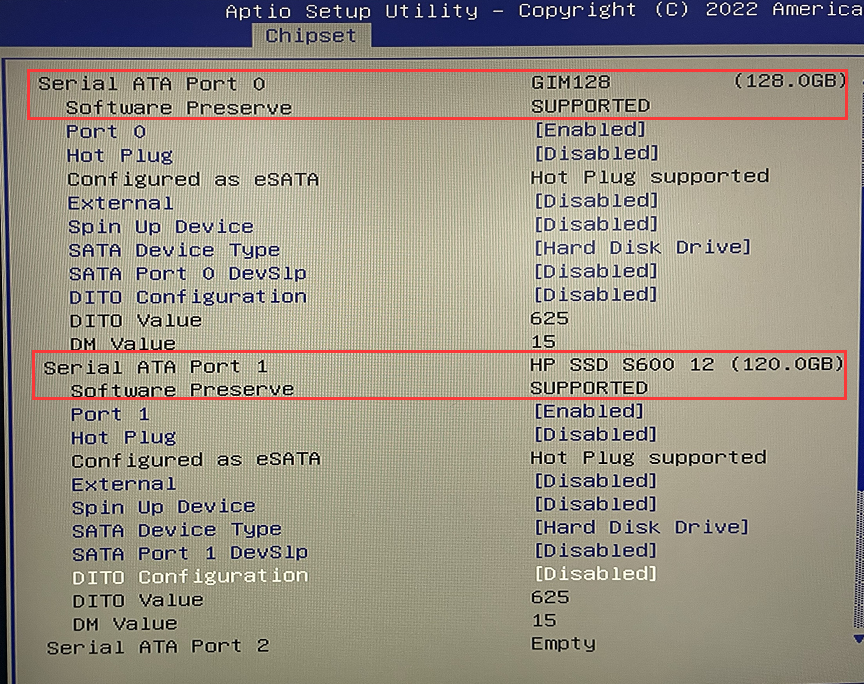
- NVME SSD query method:
2-2. Press the switch button and quickly press Del/F2 on the keyboard to go to BIOS Setup. Choose Advanced>NVME Configuration and check whether the SSD name is displayed in this option.
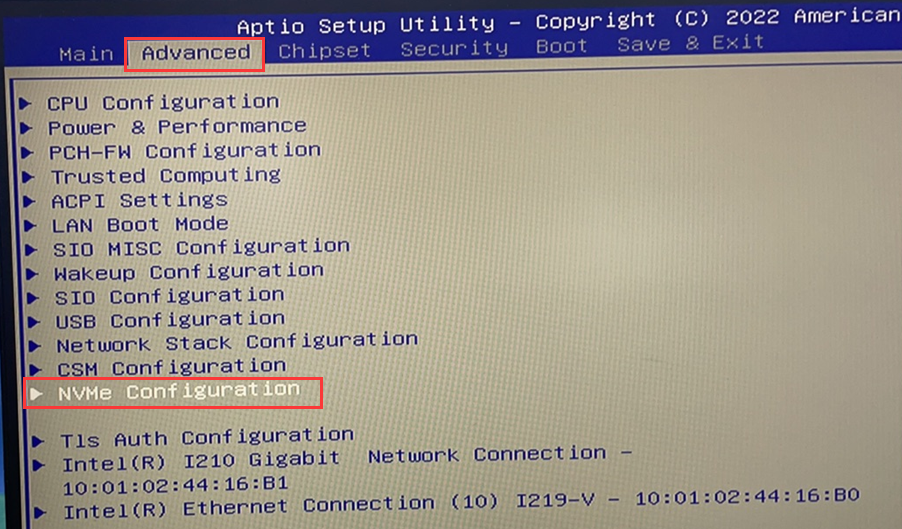
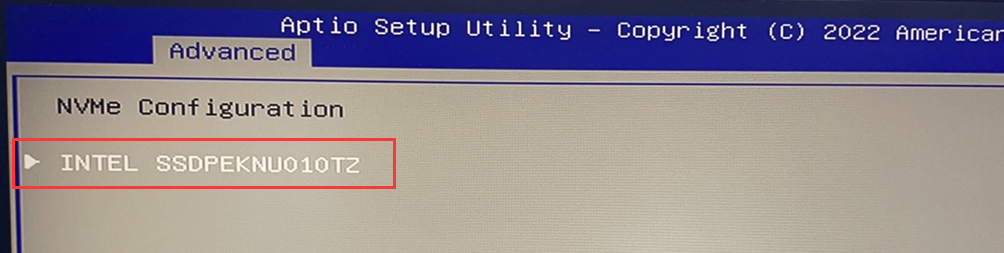
- 3. Initialize disks and create partitions on the operating system
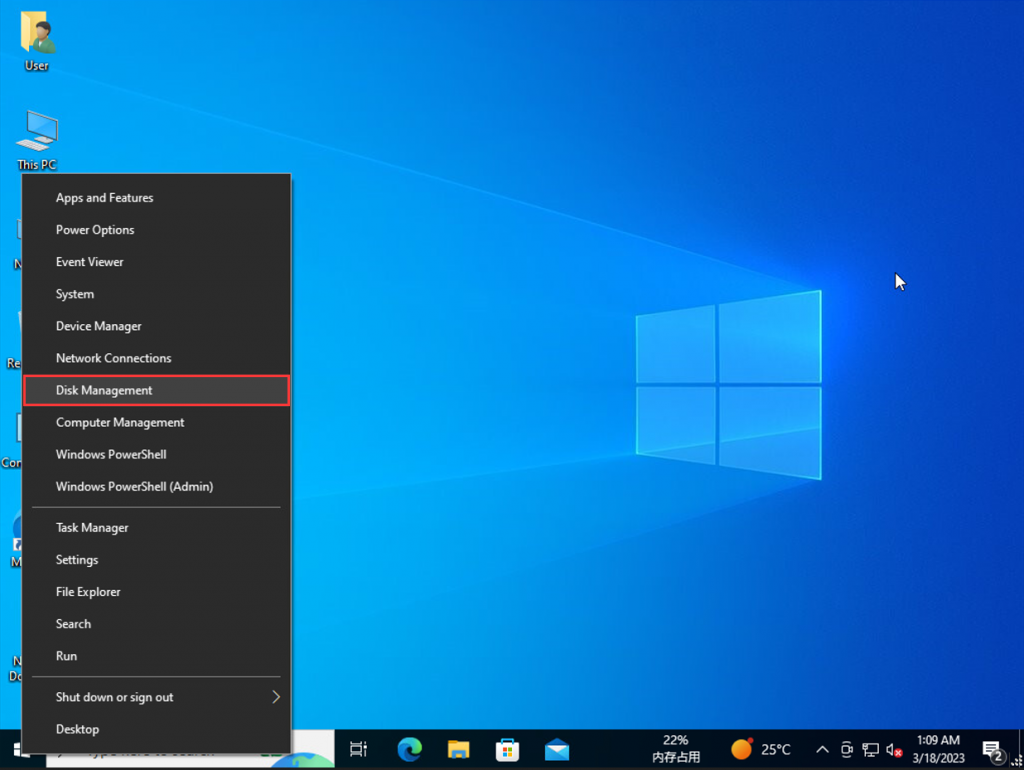
3-1. Enter the desktop of the operating system (Windows10 in the column), right-click the start menu in the lower left corner of the desktop, and choose Disk Management.
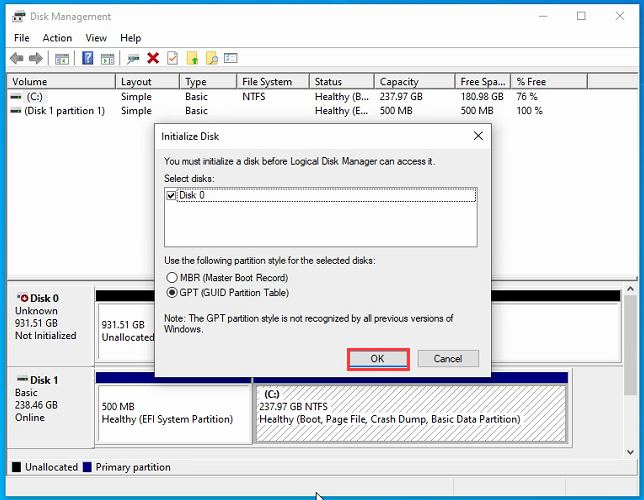
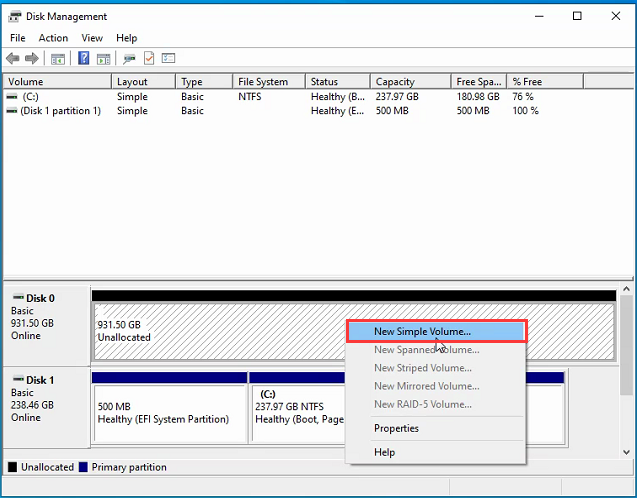
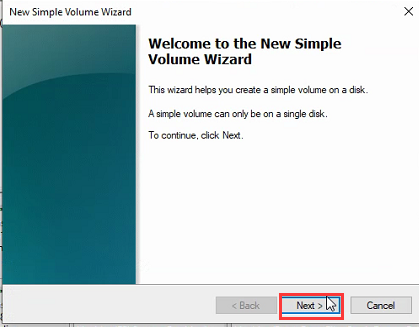
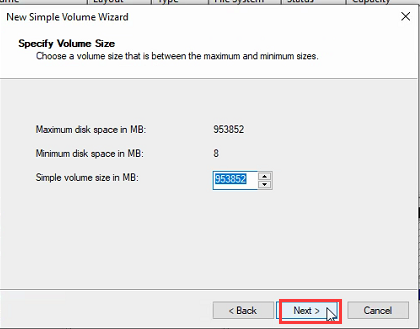
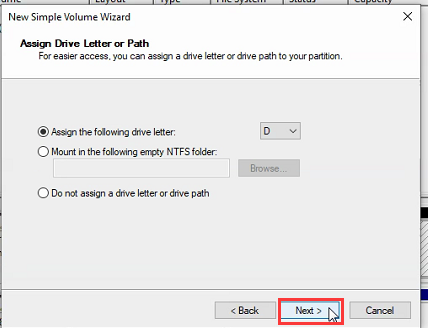
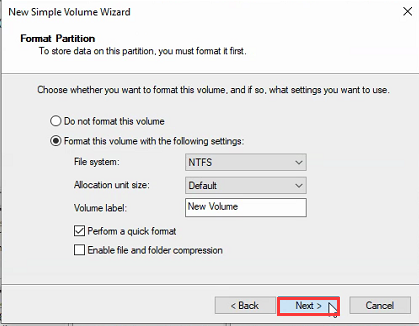
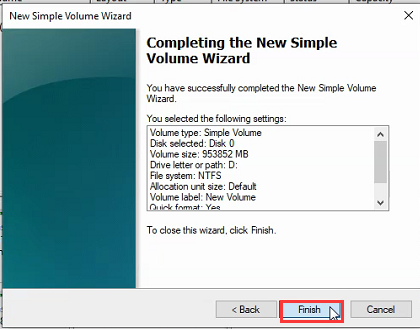
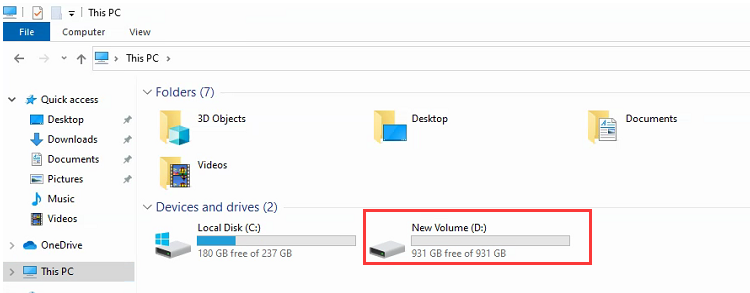
- 3-2. The Disk Management dialog box is displayed, prompting you to click OK during disk initialization. Right-click the initialized disk and choose New Simple volume... >Next>Next>Next>Next> Next>Finish, after the partition is complete, you can recognize the new hard disk in This PC.
How to install Windows 11 on a computer that does not support Windows 11?
How to achieve 4G internet access for models with built-in SIM card slots on the motherboard?
